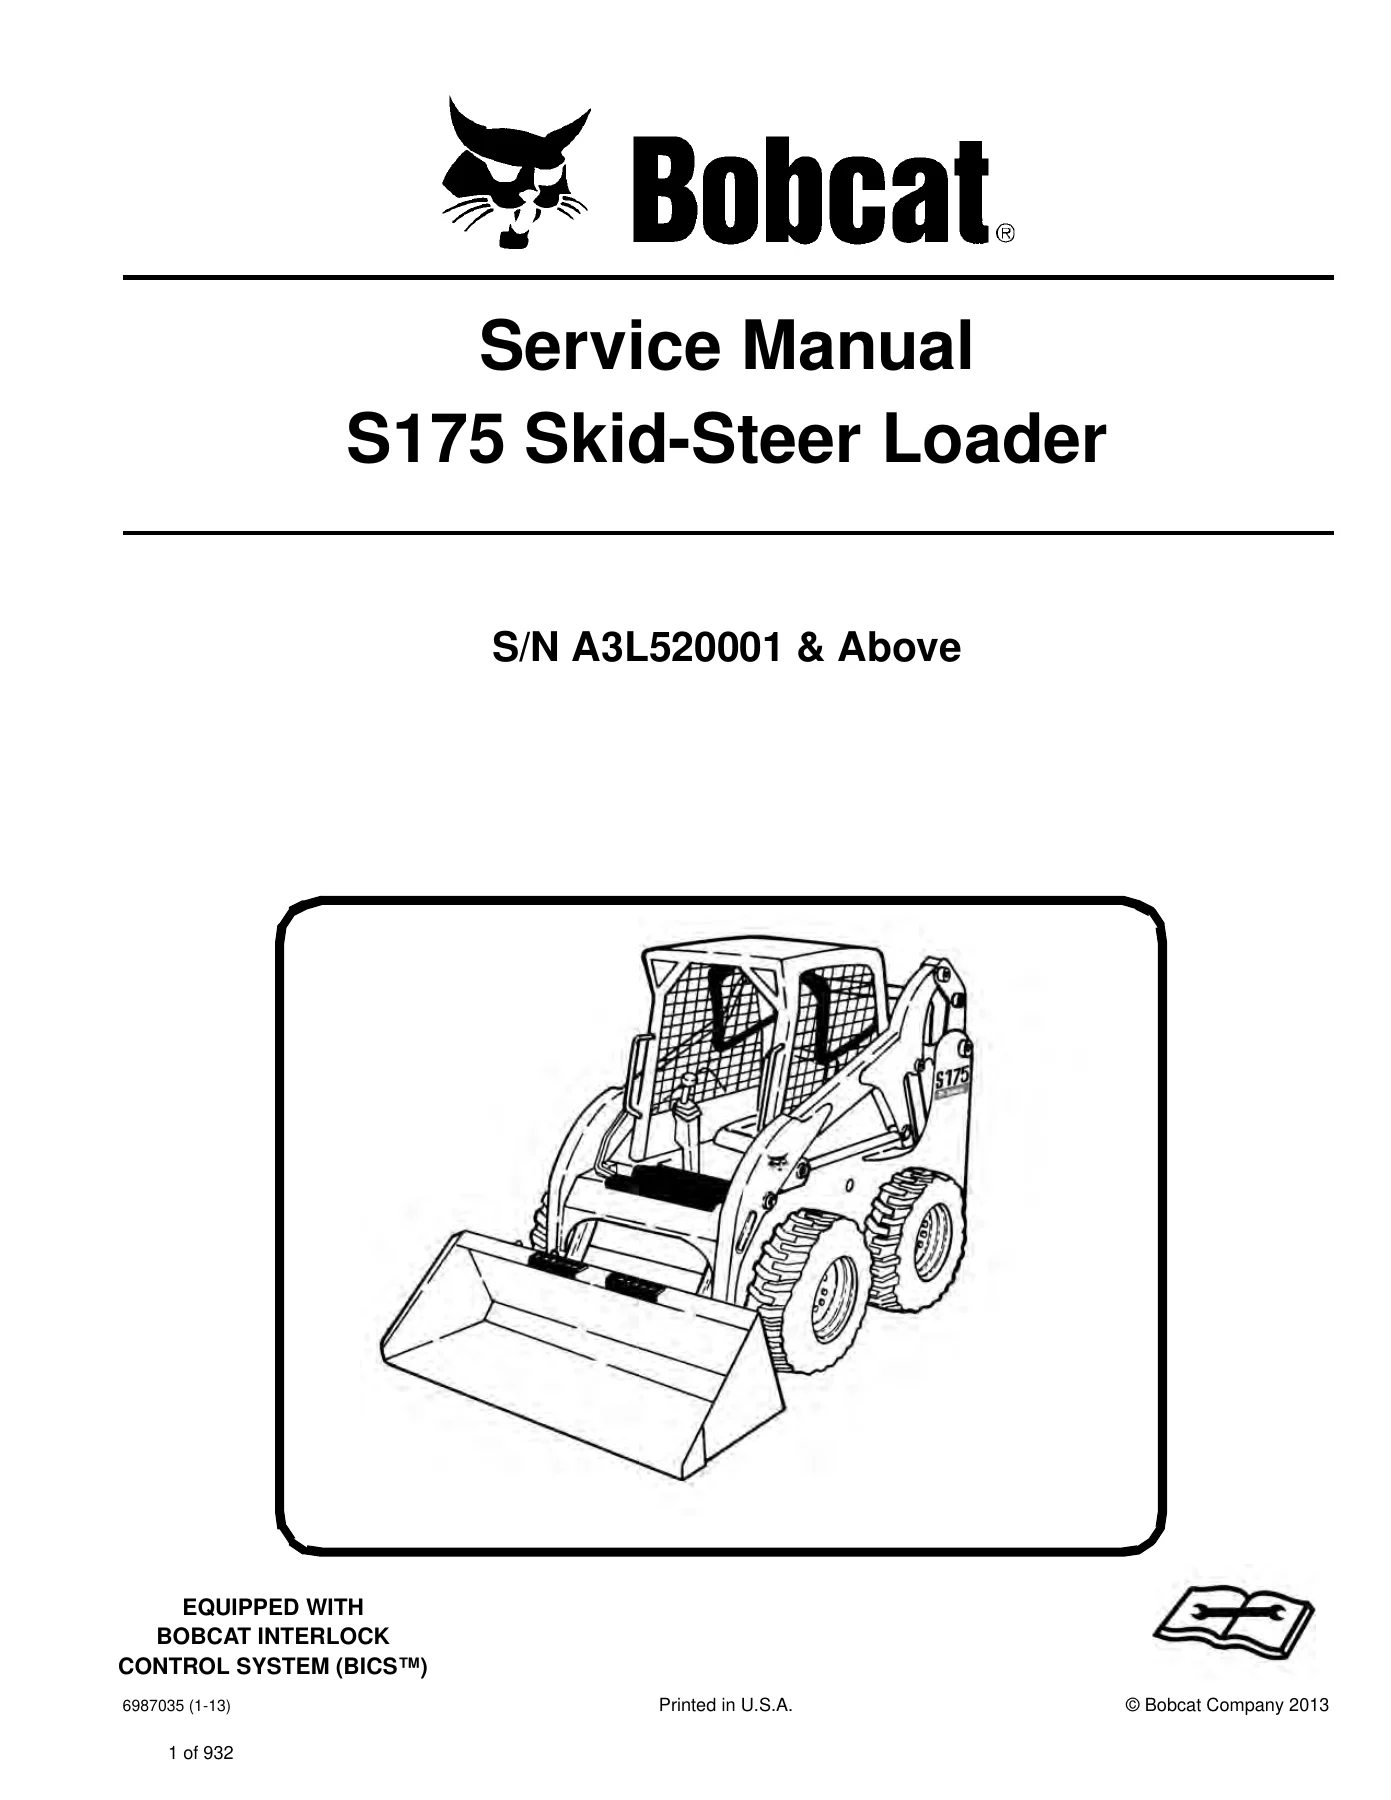
2013 Bobcat S175 Skid-Steer Loader Service Manual 6987035 – S/N A3L520001 & Above
The 2013 Bobcat S175 Skid-Steer Loader Service Manual 6987035 – S/N A3L520001 & Above is a detailed service and repair reference for the Bobcat S175 Skid-Steer Loader in the serial-number range shown on the manual cover. It is written for loader mechanics and provides servicing, adjustment, testing, removal, installation, disassembly, assembly and troubleshooting information across the machine’s major systems. The manual also includes system schematics, service-data tables, torque information, diagnostic service codes and machine specifications for the S175 configuration covered.
File Details
- Manual type: Service Manual
- Brand / model: Bobcat S175 Skid-Steer Loader
- Serial coverage: S/N A3L520001 & Above
- Document number: 6987035 (1-13)
- Date: 2013
- Language: English
- Page count: 932 pages
- File format: PDF
Workshop Repair and Diagnostic Scope
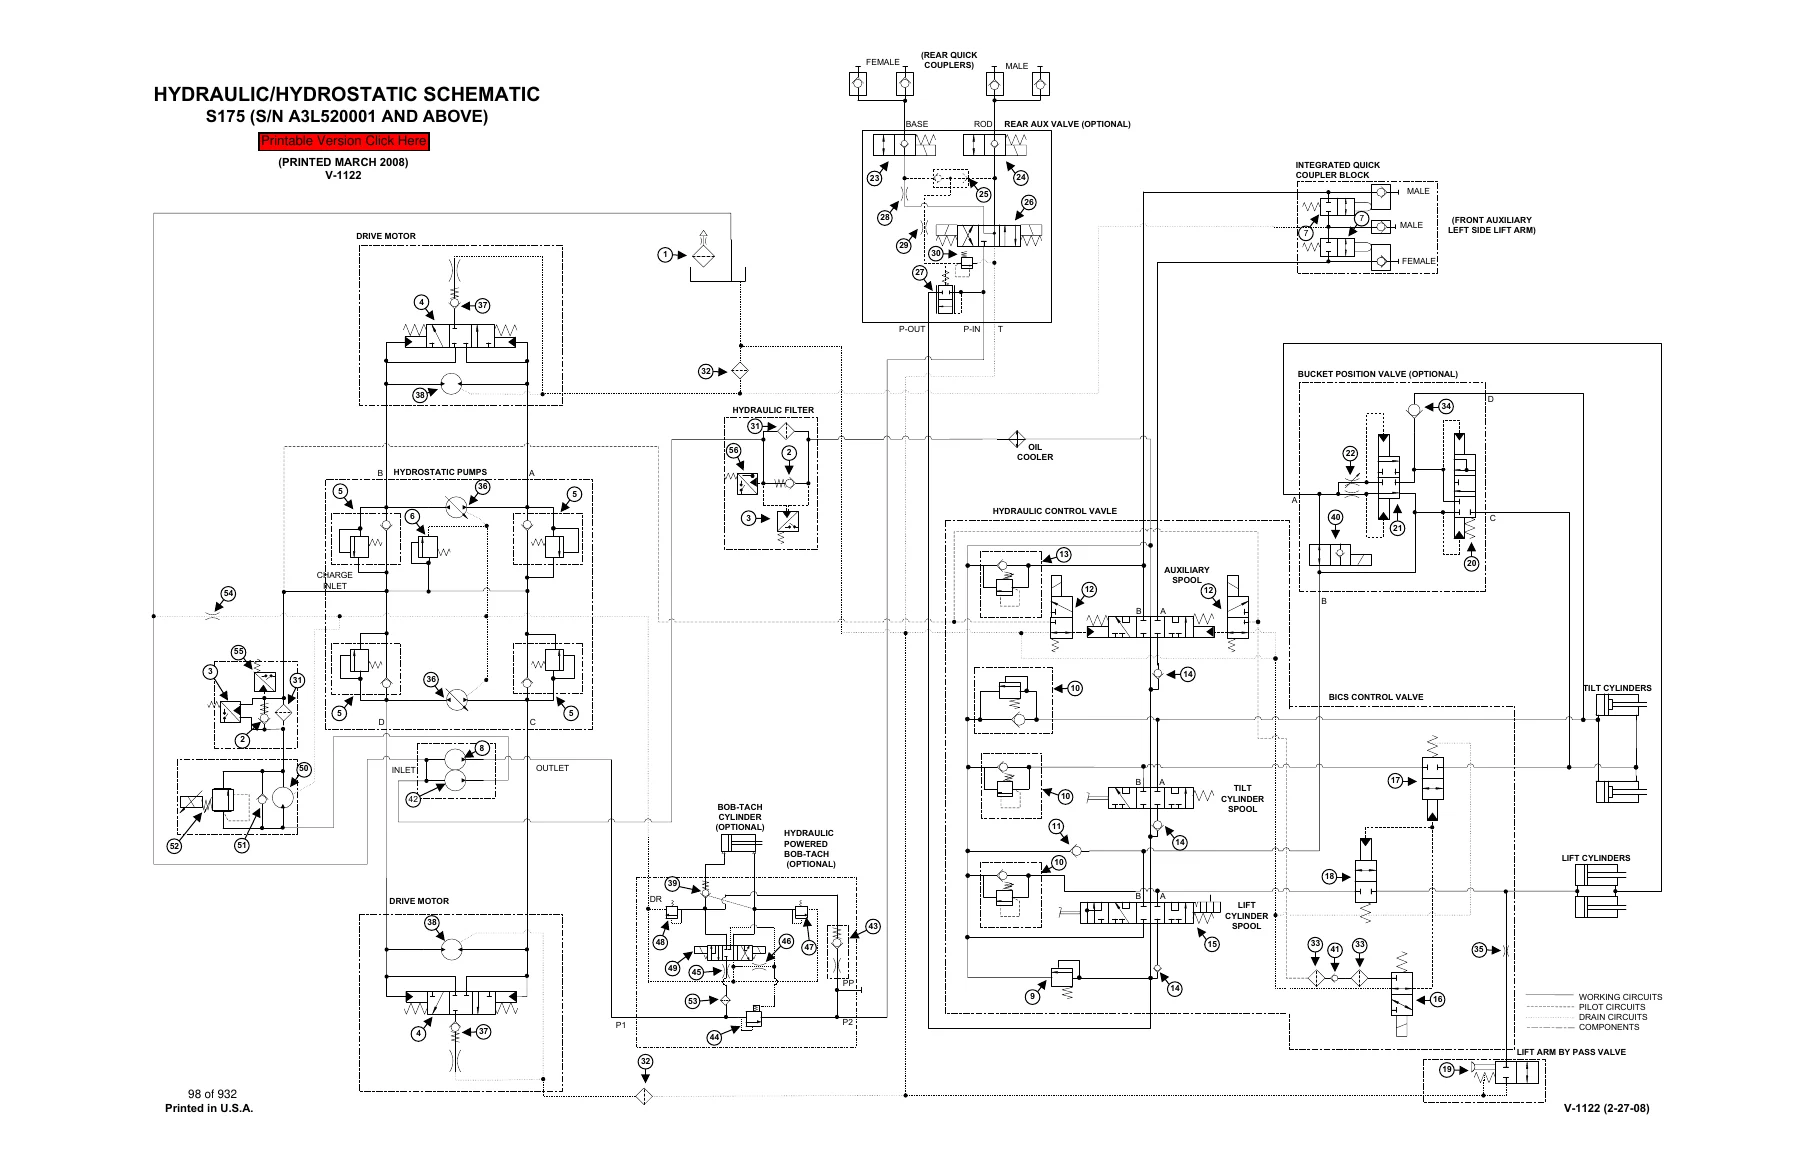
This Bobcat S175 service manual goes well beyond routine maintenance. The hydraulic section covers the lift, tilt and Bob-Tach cylinders, main relief valve, standard and ACS/SJC control valves, hydraulic pump variants, filters, reservoir, oil cooler, auxiliary circuits and high-flow components. Hydraulic and hydrostatic schematic sets are provided for standard machines and configurations with 2-speed, high-flow and SJC options. Troubleshooting charts help trace symptoms such as slow or uneven hydraulic action, lift-arm drift and pressure-related faults before component repair is undertaken.
The hydrostatic and drive material follows the power path through hydrostatic pumps and drive motors, charge pressure, drive belt, two-speed valve, brakes, chaincase, axles and related drive components. The manual includes removal and installation procedures, component inspection, parts identification, disassembly and assembly steps, pressure checks and adjustment information where applicable. This makes the 2013 Bobcat S175 Skid-Steer Loader Service Manual 6987035 – S/N A3L520001 & Above useful for both fault isolation and major mechanical work.
Electrical coverage includes harness and connector identification, fuse and relay locations, solenoid tests, battery, alternator and starter service, instrument panels, Bobcat controllers, speed sensors, diagnostic service codes and the Bobcat Interlock Control System (BICS™). Separate material addresses ACS and SJC control systems, electrical/hydraulic controls, Service PC connections, calibration routines, steering drift compensation, control-panel setup, password functions, the maintenance clock and back-up alarm troubleshooting. These sections provide a structured path from a displayed service code or control-system symptom to testing and repair.
Engine service is centered on the Kubota V2403-M-DI family used in this loader; the specification section identifies the engine as Kubota V2403-M-DI-E3B Interim Tier IV. Coverage includes engine specifications and torque values, troubleshooting, engine removal and installation, compression checking, cooling and lubrication systems, fuel injection equipment, cylinder head work, valve servicing, crankshaft and pistons, camshaft and timing gears, and flywheel and housing service. The specification pages also give performance figures, capacities, electrical data, hydraulic data, dimensions, general bolt torques, hydraulic connection tightening information and hydraulic/hydrostatic fluid requirements.
Chapters Covered
- Safety and Maintenance
- Lifting and blocking the loader; lift arm support device; operator cab procedures
- Transporting, towing and remote start / service tool procedures
- Service schedule, air cleaner, engine cooling, fuel and engine lubrication
- Hydraulic / hydrostatic fluid and filter maintenance; chaincase service
- Bob-Tach inspection, loader lubrication, tire maintenance and spark arrester service
- Pivot pins, storage / return to service, emergency exit and seat belt inspection
- Hydraulic System
- Hydraulic system information, symbols and troubleshooting
- Lift, tilt and Bob-Tach cylinders: testing, removal, parts identification and overhaul
- Main relief valve and hydraulic control valves for Standard, ACS and SJC configurations
- Hydraulic pumps: Standard, High Flow, SJC and SJC High Flow
- Hydraulic / hydrostatic filters, reservoir and oil cooler
- Bucket position valve, rear auxiliary diverter, Power Bob-Tach block and front auxiliary coupler block
- High flow valve and hydraulic / hydrostatic schematic sets for available option combinations
- Hydrostatic System
- Hydrostatic system information and troubleshooting
- Hydrostatic drive motors, including two-speed configuration
- Charge pressure checks and hydrostatic pump service
- SJC hydrostatic pump, drive belt, two-speed valve and case drain filter
- Drive System
- Single-speed and two-speed brake service
- Drive components, axle-related service and chaincase procedures
- Mainframe
- Seat bar, operator cab, standard seat and suspension seat
- Hand-lever and Power Bob-Tach components; lift arms
- Rear grille, rear door / tailgate and fuel tank
- Control pedals and linkages, ACS controls, control panels and SJC controls
- Control handles / levers, access panels, windows and cab door
- Electrical System and Analysis
- Electrical symbols, harness connectors, troubleshooting, fuse / relay identification and solenoid testing
- Battery, alternator, starter, instrument panels and lights
- Gateway / auxiliary, ACS and SJC Bobcat controllers; SJC speed sensors
- Diagnostic service codes and Bobcat Interlock Control System (BICS™)
- Seat bar sensor, traction lock, ACS and SJC control-system troubleshooting
- Electrical / hydraulic controls, Service PC connection and calibration
- Steering drift compensation, control panel setup, password setup, maintenance clock and back-up alarm
Complete PDF Bookmark Tree
Complete Bookmarks
The complete bookmarks in the “2013 Bobcat S175 Skid-Steer Loader Service Manual 6987035 – S/N A3L520001 & Above” are as follows:
MAINTENANCE SAFETYp. 3
CONTENTSp. 5
+FOREWORDp. 7
FOREWORDp. 9
SAFETY INSTRUCTIONSp. 11
+FIRE PREVENTIONp. 13
Maintenancep. 13
Operationp. 13
Electricalp. 13
Hydraulic Systemp. 13
Fuelingp. 13
Startingp. 13
Spark Arrester Exhaust Systemp. 13
Welding And Grindingp. 14
Fire Extinguishersp. 14
+SERIAL NUMBER LOCATIONSp. 15
Loader Serial Numberp. 15
Engine Serial Numberp. 15
DELIVERY REPORTp. 16
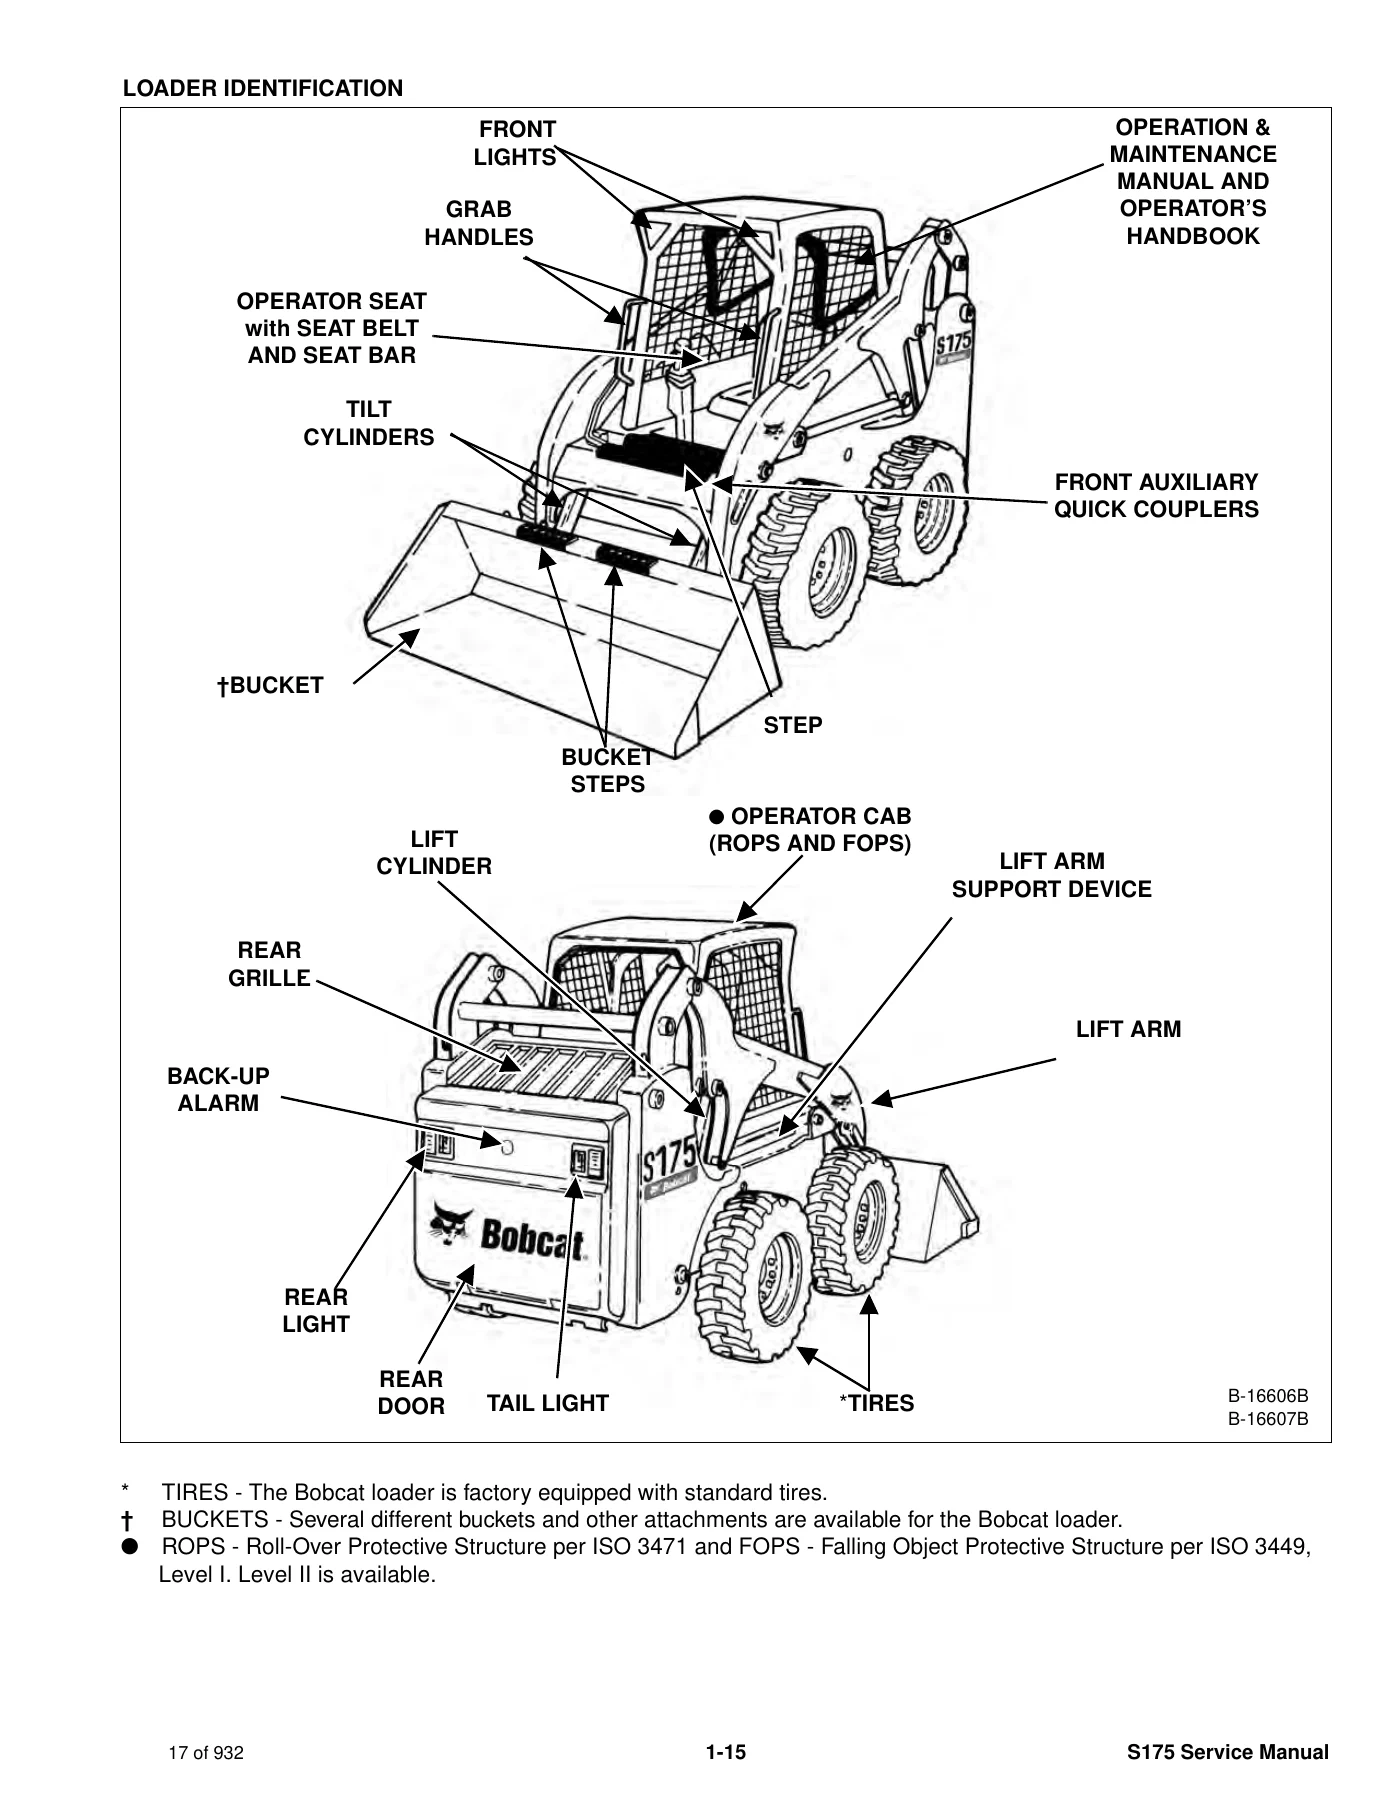
LOADER IDENTIFICATIONp. 17
+SAFETY AND MAINTENANCEp. 19
+LIFTING AND BLOCKING THE LOADERp. 23
+LIFT ARM SUPPORT DEVICEp. 25
Installingp. 25
Removingp. 26
+OPERATOR CABp. 27
Descriptionp. 27
Raisingp. 27
Loweringp. 28
Cab Door Sensorp. 29
Special Applications Kitp. 30
Special Applications Kit Inspection And Maintenancep. 30
+TRANSPORTING THE LOADER ON A TRAILERp. 31
Loading And Unloadingp. 31
Fasteningp. 31
+TOWING THE LOADERp. 33
+REMOTE START TOOL KIT- MEL1563p. 35
Remote Start Tool – MEL1563p. 35
Service Tool Harness Communicator – MEL1566p. 37
Remote Start Procedurep. 38
+REMOTE START TOOL (SERVICE TOOL) KIT – 7217666p. 41
Descriptionp. 41
Remote Start Tool (Service Tool) – 7022042p. 42
Loader Service Tool Harness – 6689747p. 43
Computer Service Tool Harness – 6689746p. 44
Remote Start Procedurep. 45
+SERVICE SCHEDULEp. 49
+AIR CLEANER SERVICEp. 51
Replacing Filter Elementsp. 51
+ENGINE COOLING SYSTEMp. 53
Cleaningp. 53
Removing And Replacing Coolantp. 54
Checking Levelp. 54
+FUEL SYSTEMp. 55
Fuel Specificationsp. 55
Biodiesel Blend Fuelp. 55
Filling The Fuel Tankp. 56
Fuel Filterp. 57
Removing Air From The Fuel Systemp. 57
+ENGINE LUBRICATION SYSTEMp. 59
Checking And Adding Engine Oilp. 59
Engine Oil Chartp. 59
Removing And Replacing Oil And Filterp. 60
+HYDRAULIC / HYDROSTATIC SYSTEMp. 61
Checking And Adding Fluidp. 61
Hydraulic / Hydrostatic Fluid Chartp. 61
Removing And Replacing Hydraulic Fluidp. 62
Removing And Replacing Hydraulic / Hydrostatic Filterp. 62
Removing And Replacing Hydraulic Case Drain Filters (Single Speed Loaders)p. 63
Removing And Replacing Hydraulic Case Drain Filters (Two-Speed Loaders)p. 64
Removing And Replacing Hydraulic Charge Filterp. 66
Breather Capp. 67
+FINAL DRIVE TRANSMISSION (CHAINCASE)p. 69
Checking And Adding Oilp. 69
Removing And Replacing Oilp. 69
+BOB-TACH (HAND LEVER)p. 71
Inspection And Maintenancep. 71
+BOB-TACH (POWER)p. 73
Inspection And Maintenancep. 73
+LUBRICATING THE LOADERp. 75
Lubrication Locationsp. 75
+TIRE MAINTENANCEp. 77
Wheel Nutsp. 77
Rotatingp. 77
Mountingp. 77
+SPARK ARRESTER MUFFLERp. 79
+PIVOT PINSp. 81
Inspection And Maintenancep. 81
+LOADER STORAGE AND RETURN TO SERVICEp. 83
Storagep. 83
Return To Servicep. 83
+STOPPING THE ENGINE AND LEAVING THE LOADERp. 85
+EMERGENCY EXITp. 87
Rear Windowp. 87
Front Doorp. 87
+SEAT BELTp. 89
Inspection And Maintenancep. 89
+HYDRAULIC SYSTEMp. 91
HYDRAULIC / HYDROSTATIC SCHEMATICSp. 97
+HYDRAULIC SYSTEM INFORMATIONp. 113
Glossary Of Hydraulic / Hydrostatic Symbolsp. 113
Troubleshootingp. 117
+CYLINDER (LIFT)p. 119
Testingp. 119
Removal And Installationp. 120
Parts Identificationp. 123
Disassembly And Assemblyp. 124
+CYLINDER (TILT)p. 127
Testingp. 127
Removal And Installationp. 128
Rod End Pivot Pin Bushing And Seal Removal And Installationp. 129
Base End Pivot Pin Removal And Installationp. 130
Parts Identificationp. 131
Disassembly And Assemblyp. 132
+CYLINDER (BOB-TACH)p. 135
Testingp. 135
Removal And Installationp. 136
Parts Identificationp. 137
Disassembly And Assemblyp. 138
+MAIN RELIEF VALVEp. 141
Descriptionp. 141
Testingp. 141
Adjustingp. 143
Removal And Installationp. 144
+HYDRAULIC CONTROL VALVE (STANDARD)p. 145
Descriptionp. 145
Removal And Installationp. 146
Identification Chartp. 151
Mount Bracket Removal And Installationp. 152
Lift Load Check Valve Removal And Installationp. 152
Load Check Valve Removal And Installation (Tilt And Auxiliary)p. 153
Anti-Cavitation Valve Removal And Installation (Lift, Rod End)p. 154
Port Relief / Anti-Cavitation Valve Removal And Installation (Lift, Base End)p. 155
Port Relief / Anti-Cavitation Valve Removal And Installation (Tilt, Base End)p. 155
Port Relief / Anti-Cavitation Valve Removal And Installation (Tilt, Rod End)p. 156
Port Relief Valve Removal And Installationp. 156
Plug Removal And Installationp. 157
Rubber Boot Removal And Installationp. 158
End Cap / Spool Lock Block Removal And Installationp. 159
Lift Spool And Detent Removal And Installationp. 160
Tilt Spool Removal And Installationp. 170
Auxiliary Spool Removal And Installationp. 172
Auxiliary Solenoid Removal And Installation (S/N A3L534999 & Below)p. 174
Auxiliary Solenoid Removal And Installation (S/N A3L535001 & Above)p. 175
Solenoid Removal And Installationp. 176
Lock Valve Removal And Installationp. 177
Lift Arm Bypass Orifice Removal And Installationp. 179
Main Relief Valve Removal And Installationp. 179
Check Valve Removal And Installationp. 180
+HYDRAULIC CONTROL VALVE (ACS) OR (SJC)p. 181
Descriptionp. 181
Removal And Installationp. 182
Actuator Removal And Installation (Out of Loader)p. 186
Identification Chartp. 189
Mount Bracket Removal And Installationp. 190
Lift Load Check Valve Removal And Installationp. 190
Load Check Valve Removal And Installation (Tilt And Auxiliary)p. 191
Anti-Cavitation Valve Removal And Installation (Lift, Rod End)p. 192
Port Relief / Anti-Cavitation Valve Removal And Installation (Lift, Base End)p. 193
Port Relief / Anti-Cavitation Valve Removal And Installation (Tilt, Base End)p. 193
Port Relief / Anti-Cavitation Valve Removal And Installation (Tilt, Rod End)p. 194
Port Relief Valve Removal And Installationp. 194
Plug Removal And Installationp. 195
End Cap Block Removal And Installationp. 196
Lift Spool And Detent Removal And Installationp. 197
Tilt Spool Removal And Installationp. 202
Auxiliary Spool Removal And Installationp. 204
Auxiliary Solenoid Removal And Installation (S/N A3L534999 & Below)p. 206
Auxiliary Solenoid Removal And Installation (S/N A3L535001 & Above)p. 207
Solenoid Removal And Installationp. 208
Lock Valve Removal And Installationp. 209
Lift Arm Bypass Orifice Removal And Installationp. 211
Main Relief Valve Removal And Installationp. 211
Check Valve Removal And Installationp. 212
+LIFT ARM BYPASS CONTROL VALVEp. 213
Descriptionp. 213
Testingp. 213
Removal And Installationp. 213
Disassembly And Assemblyp. 214
+HYDRAULIC PUMP (STANDARD)p. 215
Descriptionp. 215
Pump Test At Quick Couplersp. 215
Direct Pump Test (Standard Section)p. 216
Direct Pump Test (Charge Section)p. 218
Removal And Installationp. 220
Hydraulic Pump Start Upp. 222
Parts Identificationp. 223
Disassembly And Assemblyp. 224
+HYDRAULIC PUMP (STANDARD) (HIGH FLOW)p. 233
Descriptionp. 233
Pump Test At Quick Couplersp. 233
Direct Pump Test (Standard Section)p. 234
Direct Pump Test (Charge Section)p. 236
Direct Pump Test (High Flow Section)p. 238
Removal And Installationp. 240
Hydraulic Pump Start Upp. 242
Parts Identificationp. 243
Disassembly And Assemblyp. 244
+HYDRAULIC PUMP (SJC)p. 257
Descriptionp. 257
Pump Test At Quick Couplersp. 257
Direct Pump Test (Standard Section)p. 258
Direct Pump Test (Charge Section)p. 260
Removal And Installationp. 262
Hydraulic Pump Start Upp. 264
Parts Identificationp. 265
Disassembly And Assemblyp. 266
+HYDRAULIC PUMP (SJC) (HIGH FLOW)p. 275
Descriptionp. 275
Pump Test At Quick Couplersp. 275
Direct Pump Test (Standard Section)p. 276
Direct Pump Test (Charge Section)p. 278
Direct Pump Test (High Flow Section)p. 280
Removal And Installationp. 282
Hydraulic Pump Start Upp. 284
Parts Identificationp. 285
Disassembly And Assemblyp. 286
+HYDRAULIC / HYDROSTATIC FILTERSp. 299
Descriptionp. 299
Housing Removal And Installationp. 299
Charge Filter Housing Removal And Installationp. 301
+HYDRAULIC FLUID RESERVOIRp. 303
Descriptionp. 303
Removal And Installationp. 303
Hydraulic Fluid Screenp. 306
+OIL COOLERp. 307
Descriptionp. 307
Removal And Installationp. 307
+BUCKET POSITION VALVEp. 309
Descriptionp. 309
Solenoid Removal And Installationp. 309
Solenoid Testingp. 310
Removal And Installationp. 311
Disassembly And Assemblyp. 312
+REAR AUXILIARY DIVERTER VALVEp. 315
Descriptionp. 315
Solenoid Testingp. 315
Removal And Installationp. 316
Disassembly And Assemblyp. 319
+BOB-TACH (POWER) BLOCKp. 325
Descriptionp. 325
Removal And Installationp. 325
Disassembly And Assemblyp. 327
+FRONT AUXILIARY HYDRAULIC COUPLER BLOCKp. 331
Descriptionp. 331
Removal And Installationp. 331
Disassembly And Assemblyp. 331
+HIGH FLOW VALVEp. 333
Descriptionp. 333
High Flow Relief Valve Testingp. 333
High Flow Relief Valve Adjustmentp. 334
Solenoid Testingp. 335
Removal And Installationp. 336
Disassembly And Assemblyp. 337
+HYDROSTATIC SYSTEMp. 341
+HYDROSTATIC SYSTEM INFORMATIONp. 343
Troubleshootingp. 343
Descriptionp. 344
+HYDROSTATIC DRIVE MOTORp. 345
Descriptionp. 345
Removal And Installationp. 345
Parts Identificationp. 348
Disassembly And Assemblyp. 349
+HYDROSTATIC DRIVE MOTOR (TWO-SPEED)p. 355
Descriptionp. 355
Removal And Installation (Left Side)p. 356
Removal And Installation (Right Side)p. 359
Parts Identificationp. 362
Disassemblyp. 363
Assemblyp. 373
+HYDROSTATIC MOTOR CARRIER (SINGLE AND TWO-SPEED WITH MANUAL CONTROLS)p. 385
Descriptionp. 385
Shaft Seal Removal And Installationp. 386
Removal And Installationp. 388
Parts Identificationp. 390
Disassembly And Assemblyp. 391
+HYDROSTATIC MOTOR CARRIER (SINGLE AND TWO-SPEED WITH SJC CONTROLS)p. 397
Descriptionp. 397
Shaft Seal Removal And Installationp. 398
Removal And Installationp. 400
Parts Identificationp. 402
Disassembly And Assemblyp. 403
+CHARGE PRESSUREp. 409
Descriptionp. 409
Testing (S/N A3L529999 & Below)p. 410
Sender Removal And Installation (S/N A3L529999 & Below)p. 411
Testing (S/N A3L530001 & Above)p. 412
Sender Removal And Installation (S/N A3L530001 & Above)p. 413
Adjustingp. 414
+HYDROSTATIC PUMPp. 417
Descriptionp. 417
Replenishing / High Pressure Relief Valve Removal And Installationp. 417
Removal And Installationp. 418
Hydrostatic Pump Start Upp. 419
Parts Identification (Left Half)p. 420
Parts Identification (Right Half)p. 421
Disassemblyp. 422
Assemblyp. 428
+HYDROSTATIC PUMP (SJC)p. 435
Descriptionp. 435
Hydraulic Controller Removal And Installationp. 436
Removal And Installationp. 438
Hydrostatic Pump Start Upp. 440
Parts Identificationp. 441
High Pressure Relief And Bypass Valvep. 442
Charge Relief Valvep. 443
Disassembly And Assemblyp. 444
Mechanical Neutral Adjustmentp. 460
Hydraulic Controller Neutral Adjustmentp. 463
+DRIVE BELTp. 467
Descriptionp. 467
Shield Removal And Installationp. 467
Adjustingp. 467
Belt Removal And Installationp. 469
Tensioner Pulley Removal And Installationp. 470
Tensioner Pulley Parts Identificationp. 471
Tensioner Pulley Disassemblyp. 472
Tensioner Pulley Assemblyp. 473
+TWO-SPEED VALVEp. 475
Descriptionp. 475
Valve Removal And Installationp. 476
Valve Disassembly And Assemblyp. 478
+CASE DRAIN FILTERp. 481
Descriptionp. 481
Disassembly And Assemblyp. 481
+DRIVE SYSTEMp. 483
+BRAKE (SINGLE SPEED)p. 485
Descriptionp. 485
Disc Removal And Installationp. 485
+BRAKE (TWO-SPEED)p. 487
Descriptionp. 487
Disc Removal And Installationp. 487
Disc Disassembly And Assemblyp. 488
+DRIVE COMPONENTSp. 489
Descriptionp. 489
Axle Seal Removal And Installationp. 490
Axle Sprocket And Bearings Removal And Installationp. 492
Chain Removal And Installationp. 497
+CHAINCASEp. 499
Descriptionp. 499
Front Cover Removal And Installationp. 499
Center Cover Removal And Installationp. 500
Rear Cover Removal And Installationp. 501
+MAINFRAMEp. 503
+SEAT BARp. 507
Descriptionp. 507
Removal And Installationp. 507
Disassembly And Assemblyp. 508
Compression Spring Disassembly And Assemblyp. 509
+OPERATOR CABp. 511
Gas Cylinder Removal And Installationp. 511
Gas Cylinder Bracket Disassembly And Assemblyp. 514
Removal And Installationp. 514
+OPERATOR SEATp. 517
Removal And Installationp. 517
Seat Belt Removal And Installationp. 517
+OPERATOR SEAT (SUSPENSION)p. 519
Removal And Installationp. 519
Slide Rail Removal And Installationp. 520
Seat Belt Removal And Installationp. 520
Lower Cushion Removal And Installationp. 520
Back Cushion Removal And Installationp. 522
Shock Removal And Installationp. 522
3-Point Seat Belt Removal And Installationp. 523
+BOB-TACH (HAND LEVER)p. 525
Descriptionp. 525
Removal And Installationp. 525
Lever And Wedge Disassembly And Assemblyp. 526
Pivot Pin Bushing And Seal Removal And Installationp. 528
+BOB-TACH (POWER)p. 529
Descriptionp. 529
Removal And Installationp. 529
Lever And Wedge Disassembly And Assemblyp. 531
Pivot Pin Bushing And Seal Removal And Installationp. 532
+LIFT ARMSp. 533
Stabilizer Bar Removal And Installationp. 533
Link Removal And Installationp. 534
Removal And Installationp. 535
+REAR GRILLEp. 539
Removal And Installationp. 539
+REAR DOOR (TAILGATE)p. 541
Removal And Installationp. 541
Striker Removal And Installationp. 542
Striker Disassembly And Assemblyp. 542
Striker (Adjusting)p. 543
Latch Removal And Installationp. 544
+FUEL TANKp. 545
Removal And Installationp. 545
Fuel Level Sender Removal And Installationp. 546
Fuel Fill Screen Removal And Installationp. 547
+CONTROL PEDALS AND LINKAGESp. 549
Descriptionp. 549
Pedal Removal And Installationp. 549
Linkage Removal And Installationp. 550
Pedal (Adjusting)p. 552
+CONTROL PEDALS (ACS)p. 553
Descriptionp. 553
Foot Sensor Removal And Installationp. 553
Foot Pedal Removal And Installationp. 554
Foot Pedal Linkage Disassembly And Assemblyp. 555
+CONTROL PANELp. 557
Descriptionp. 557
Removal And Installationp. 558
Shock Removal And Installationp. 561
Shaft Removal And Installationp. 561
Shaft Disassembly And Assemblyp. 562
Linkage Removal And Installationp. 563
Pintle Arm Disassembly And Assemblyp. 567
Linkage Neutral (Adjusting)p. 569
Linkage Travel (Adjusting)p. 573
+CONTROL PANEL (SJC)p. 577
Descriptionp. 577
Removal And Installationp. 577
+CONTROL HANDLE / LEVERp. 579
Descriptionp. 579
Lever Removal And Installationp. 579
Boot Removal And Installationp. 580
+CONTROL HANDLE / LEVER (ACS)p. 581
Descriptionp. 581
Handle Sensor Removal And Installationp. 581
Handle Removal And Installationp. 584
Handle Disassembly And Assemblyp. 585
Lever Removal And Installationp. 585
Boot Removal And Installationp. 587
+CONTROL HANDLE / LEVER (SJC)p. 589
Descriptionp. 589
Joystick Testingp. 589
Joystick Removal And Installationp. 590
Joystick Mount Removal And Installationp. 591
+ACCESS PANEL (INSIDE)p. 593
Removal And Installation (Left)p. 593
Removal And Installation (Right)p. 593
+ACCESS PANEL (INSIDE) (SJC)p. 595
Removal And Installation (Left)p. 595
Removal And Installation (Right)p. 596
+WINDOW (REAR)p. 599
Removalp. 599
Installation (Split Molding)p. 599
Installation (Continuous Molding)p. 601
+WINDOW (TOP)p. 603
Removal And Installationp. 603
+WINDOW (SIDE)p. 605
Removal And Installationp. 605
+WINDOW (CAB DOOR)p. 607
Removal (Standard Window)p. 607
Installation (Standard Window)p. 608
Removal And Installation (Special Applications Window)p. 610
+CAB DOORp. 611
Descriptionp. 611
Removal And Installationp. 611
Aligningp. 612
Adjustingp. 613
Checking Operationp. 613
+ELECTRICAL SYSTEM AND ANALYSISp. 615
ELECTRICAL SCHEMATICSp. 619
+ELECTRICAL SYSTEM INFORMATIONp. 625
Glossary Of Electrical Symbolsp. 625
Standard Cab Harness Connectorsp. 628
Deluxe Cab Harness Connectorsp. 629
Mainframe Harness Connectorsp. 630
Descriptionp. 631
Troubleshootingp. 632
Fuse And Relay Location / Identificationp. 633
Solenoid Testingp. 634
+BATTERYp. 635
Removal And Installationp. 635
Servicingp. 636
Using A Booster Battery (Jump Starting)p. 637
+ALTERNATORp. 639
Belt Adjustmentp. 639
Belt Replacementp. 639
Charging System Inspectionp. 640
Alternator Voltage Testingp. 641
Low Voltage Testingp. 641
High Voltage Testingp. 642
Removal And Installationp. 643
Parts Identificationp. 644
+STARTERp. 645
Testingp. 645
Removal And Installationp. 646
Parts Identificationp. 647
+INSTRUMENT PANELSp. 649
Left Panelp. 649
Standard Key Panelp. 651
Keyless Start Panelp. 651
Deluxe Instrumentation Panelp. 652
Side Panelp. 653
Front Panelp. 653
Front Panel Removal And Installationp. 654
Removal And Installation (Left And Right)p. 654
Key Switch Removal And Installationp. 657
Alarm Removal And Installationp. 658
+LIGHTSp. 659
Front Removal And Installationp. 659
Rear Removal And Installationp. 660
Cab Light Removal And Installationp. 660
+BOBCAT CONTROLLER (GATEWAY AND AUXILIARY)p. 661
Descriptionp. 661
Connector Identificationp. 662
Removal And Installationp. 668
+BOBCAT CONTROLLER (ACS)p. 669
Descriptionp. 669
Connector And Wire Identificationp. 670
Removal And Installationp. 671
+BOBCAT CONTROLLER (SJC) (DRIVE)p. 673
Descriptionp. 673
Connector Identificationp. 674
Removal And Installationp. 676
+SPEED SENSORS (SJC)p. 677
Descriptionp. 677
Testingp. 677
Removal And Installationp. 679
+DIAGNOSTIC SERVICE CODESp. 681
Viewing Service Codesp. 681
Service Codes Listp. 682
+BOBCAT INTERLOCK CONTROL SYSTEM (BICS™)p. 687
Descriptionp. 687
Inspecting The BICS™ (Engine STOPPED – Key ON)p. 688
Inspecting Deactivation Of The Auxiliary Hydraulics System (Engine STOPPED – Key ON)p. 688
Inspecting The Seat Bar Sensor (Engine RUNNING)p. 688
Inspecting The Traction Lock (Engine RUNNING)p. 688
Inspecting The Lift Arm Bypass Controlp. 688
Inspecting Deactivation Of Lift And Tilt Functions (ACS And SJC)p. 688
Troubleshootingp. 689
+SEAT BAR SENSORp. 691
Descriptionp. 691
Troubleshootingp. 691
Testingp. 692
Removal And Installationp. 693
Bobcat Interlock Control System (BICS™) Circuit Testp. 696
+TRACTION LOCKp. 699
Descriptionp. 699
Troubleshootingp. 699
Removal And Installationp. 700
Inspectingp. 704
+CONTROL SYSTEM (ACS)p. 705
Descriptionp. 705
Troubleshootingp. 706
Handle Sensor Connector Disassembly And Assemblyp. 707
Switch Handle Removalp. 708
Switch Handle Installationp. 710
Actuator Connector Disassembly And Assemblyp. 713
Handle Lock Solenoid Removal And Installationp. 714
Handle Lock Solenoid Disassembly And Assemblyp. 714
Foot Sensor Disassembly And Assemblyp. 715
Foot Lock Solenoid Removal And Installationp. 716
+ELECTRICAL / HYDRAULIC CONTROLSp. 717
Identification Chartp. 717
Descriptionp. 718
Identification Chart ACD Group 0p. 719
Identification Chart ACD Group 1p. 720
Identification Chart ACD Group 2p. 721
Identification Chart ACD Group 3p. 722
+ELECTRICAL / HYDRAULIC CONTROLS (ACS)p. 723
Identification Chartp. 723
Descriptionp. 724
Identification Chart ACD Group 0p. 725
Identification Chart ACD Group 1p. 726
Identification Chart ACD Group 2p. 727
Identification Chart ACD Group 3p. 728
+ELECTRICAL / HYDRAULIC CONTROLS (SJC)p. 729
Identification Chartp. 729
Descriptionp. 730
Identification Chart ACD Group 0p. 731
Identification Chart ACD Group 1p. 732
Identification Chart ACD Group 2p. 733
Identification Chart ACD Group 3p. 734
+SERVICE PC (LAPTOP COMPUTER)p. 735
Connecting Remote Start Toolp. 735
Connecting Remote Start Tool (Service Tool)p. 735
+CALIBRATIONp. 737
Descriptionp. 737
Actuator Testingp. 737
Lift And Tilt Calibration (SJC)p. 740
Hydrostatic Pump Calibration (SJC)p. 742
Lift And Tilt Calibration (ACS)p. 747
+STEERING DRIFT COMPENSATIONp. 749
Descriptionp. 749
Operationp. 749
+FLYWHEEL RPM SENSORp. 751
Descriptionp. 751
Adjustingp. 751
+CONTROL PANEL SETUPp. 753
Right Panel Setup (Deluxe Instrumentation Panel)p. 753
Attachment Control Information (Deluxe Instrumentation Panel)p. 754
+PASSWORD SETUP (DELUXE INSTRUMENTATION PANEL)p. 755
Password Descriptionp. 755
Changing The Owner Passwordp. 755
Changing The User Passwordsp. 756
Password Lockout Featurep. 756
+PASSWORD SETUP (KEYLESS START PANEL)p. 757
Password Descriptionp. 757
Changing The Owner Passwordp. 757
Password Lockout Featurep. 757
+MAINTENANCE CLOCKp. 759
Descriptionp. 759
Setupp. 760
Resetp. 763
+BACK-UP ALARM SYSTEMp. 765
Descriptionp. 765
Inspectingp. 765
Adjusting Switch Positionp. 766
Troubleshooting (Standard And ACS)p. 767
Troubleshooting (Joystick)p. 768
Alarm Removal And Installationp. 769
Switch Removal And Installationp. 769
+ENGINE SERVICEp. 771
+ENGINE INFORMATIONp. 773
Descriptionp. 773
Specificationsp. 774
Torque Valuesp. 778
Troubleshootingp. 779
Engine Removal And Installationp. 781
Engine Mount Replacementp. 787
Compression – Checkingp. 788
+ENGINE SPEED CONTROLp. 789
Removal And Installationp. 789
+ENGINE SPEED CONTROL (SJC)p. 791
Removal And Installationp. 791
Disassembly And Assemblyp. 793
+MUFFLERp. 795
Removal And Installationp. 795
+AIR CLEANERp. 797
Housing Removal And Installationp. 797
+ENGINE COOLING SYSTEMp. 799
Radiator Removal And Installationp. 799
Hydraulic Fan Description (S/N A3L529999 & Below)p. 801
Hydraulic Fan Disassembly And Assembly (S/N A3L529999 & Below)p. 801
Blower Housing Removal And Installation (S/N A3L529999 & Below)p. 802
Fan Removal And Installation (S/N A3L529999 & Below)p. 804
Hydraulic Fan Motor Removal And Installation (S/N A3L529999 & Below)p. 804
Hydraulic Fan Description (S/N A3L530001 & Above)p. 805
Hydraulic Fan Disassembly And Assembly (S/N A3L530001 & Above)p. 805
Blower Housing Removal And Installation (S/N A3L530001 & Above)p. 807
Fan Removal And Installation (S/N A3L530001 & Above)p. 809
Hydraulic Fan Motor Removal And Installation (S/N A3L530001 & Above)p. 809
Water Pump Removal And Installationp. 810
Water Pump Disassembly And Assemblyp. 810
Thermostat Housing Removal And Installationp. 811
Thermostat – Checkingp. 812
+LUBRICATION SYSTEMp. 813
Oil Pan Removal And Installationp. 813
Oil Pump Removal And Installationp. 813
Oil Pump Inspectionp. 814
Engine Oil Pressure – Testingp. 815
+FUEL SYSTEMp. 817
Fuel Shutoff Solenoid – Checkingp. 817
Fuel Shutoff Solenoid Removal And Installationp. 817
Fuel Injection Pump – Checkingp. 818
Fuel Injection Pump Removal And Installationp. 819
Governor Disassembly And Assemblyp. 823
Fuel Camshaft Removal And Installationp. 824
Fuel Injection Pump – Timingp. 824
Fuel Injector Removal And Installationp. 826
Fuel Injector Nozzle Pressure – Checkingp. 827
Nozzle Spray Conditionp. 828
Valve Seat Tightnessp. 828
+CYLINDER HEADp. 829
Glow Plugs – Testingp. 829
Glow Plugs Removal And Installationp. 829
Valve Clearance Adjustmentp. 830
Valve Timing – Checkingp. 831
Cylinder Head Removal And Installationp. 832
Cylinder Head Disassembly And Assemblyp. 835
Cylinder Head – Servicingp. 835
Cylinder Head Top Clearancep. 836
Valve Guide – Checkingp. 836
Valve Guide Removal And Installationp. 837
Reconditioning The Valve And Valve Seatp. 837
Valve Springp. 839
Valve Tappetsp. 840
Rocker Arm And Shaft – Checkingp. 840
Push Rod Alignment – Checkingp. 841
+CRANKSHAFT AND PISTONSp. 843
Piston And Connecting Rod Removal And Installationp. 843
Piston And Connecting Rod – Servicingp. 844
Cylinder Bore – Checkingp. 847
Connecting Rod Alignmentp. 847
Crankshaft Gear Removal And Installationp. 848
Crankshaft And Bearings Removal And Installationp. 848
Crankshaft And Bearings – Servicingp. 850
+CAMSHAFT AND TIMING GEARSp. 855
Timing Gearcase Cover Removal And Installationp. 855
Timing Gears Backlash – Checkingp. 857
Idler Gear And Camshaft Removal And Installationp. 858
Camshaft – Servicingp. 859
Idler Gear And Shaft – Servicingp. 860
+FLYWHEEL AND HOUSINGp. 861
Flywheel Removal And Installationp. 861
Ring Gear Removal And Installationp. 861
Housing Removal And Installationp. 862
+HEATERp. 865
+HEATER SYSTEMp. 867
+REGULAR MAINTENANCEp. 869
Filtersp. 869
Heater Coilp. 869
+TROUBLESHOOTINGp. 871
Blower Motor Does Not Operatep. 871
Blower Motor Operates Normally, But Air Flow Is Insufficientp. 871
Electrical Systemp. 872
Engine Coolant Bypassing The Heater Valvep. 876
Heater Valve Not Opening Or Closingp. 877
+HEATER UNITp. 879
Removal And Installationp. 879
+HEATER COILp. 881
Removal And Installationp. 881
+BLOWER FANp. 883
Removal And Installationp. 883
Disassembly And Assemblyp. 884
Connector Identificationp. 886
+HEATER VALVEp. 887
Removal And Installationp. 887
Disassembly And Assemblyp. 888
+SPECIFICATIONSp. 889
+(S175) LOADER SPECIFICATIONSp. 891
Machine Dimensionsp. 891
Performancep. 892
Enginep. 892
Drive Systemp. 892
Controlsp. 893
Hydraulic Systemp. 893
Electricalp. 894
Capacitiesp. 894
Tiresp. 894
+TORQUE SPECIFICATIONS FOR BOLTSp. 895
Torque For General SAE Boltsp. 895
Torque For General Metric Boltsp. 896
+HYDRAULIC CONNECTION SPECIFICATIONSp. 897
O-ring Face Seal Connectionp. 897
Straight Thread O-ring Fittingp. 898
Tubelines And Hosesp. 898
Flare Fittingp. 898
Port Seal Fittingp. 899
+HYDRAULIC / HYDROSTATIC FLUID SPECIFICATIONSp. 901
+CONVERSIONSp. 903
Decimal And Millimeter Equivalent Chartp. 903
U.S. To Metric Conversion Chartp. 903
ALPHABETICAL INDEXp. 905
+SERVICE MANUAL REVISIONp. 907
Revision No: S175 – 1p. 907
Revision No: S175 – 2p. 909
Revision No: S175 – 3p. 911
Revision No: S175 – 4p. 913
Revision No: S175 – 5p. 915
Revision No: S175 – 6p. 917
Revision No: S175 – 7p. 919
Revision No: S175 – 8p. 921
Revision No: S175 – 9p. 923
Revision No: S175 – 10p. 925
Revision No: S175 – 11p. 927
Revision No: S175 – 12p. 929
Revision No: S175 – 13p. 931
- Engine Service
- Engine information, specifications, torque values, troubleshooting, removal / installation and compression checks
- Engine speed control, muffler, air cleaner and cooling system
- Lubrication system and engine oil-pressure testing
- Fuel system, injection pump, governor, injector and nozzle service
- Cylinder head, glow plugs, valve clearance, valve timing and valve servicing
- Crankshaft, pistons, bearings, camshaft, timing gears, flywheel and housing
- Heater
- Heater system description and regular maintenance
- Troubleshooting, heater unit, heater coil, blower fan and heater valve
- Specifications
- S175 dimensions, performance, engine, drive, controls, hydraulic and electrical specifications
- Fluid capacities and tire information
- General SAE and metric bolt torque specifications
- Hydraulic connection specifications and hydraulic / hydrostatic fluid specifications
- Decimal, millimeter and U.S.-to-metric conversion charts
Taken as a whole, the chapters connect scheduled maintenance with deeper diagnosis and component-level repair. A mechanic can move from symptom checks and service codes to pressure tests, wiring or hydraulic schematics, component removal, teardown and reassembly, then verify settings against the manual’s torque, capacity and specification data. The manual also distinguishes option-dependent procedures such as Standard Controls, ACS, SJC, High Flow and 2-Speed configurations where the service method or component layout changes.
Machine Specifications and Service Data
The specification section identifies a four-cylinder, liquid-cooled Kubota V2403-M-DI-E3B Interim Tier IV diesel engine with 2,433 L (148.5 in3) displacement. It lists rated output, torque, bore and stroke, idle ranges, hydrostatic four-wheel drive details, travel speeds, operating capacity, operating weight and breakout forces. Hydraulic data includes standard and high-flow pump capacities, quick-coupler relief pressure, cylinder dimensions and hydraulic function times. Electrical information covers the 12-volt system, 90-amp alternator, battery and starter, while capacity tables cover the fuel tank, engine oil, cooling system, hydraulic / hydrostatic reservoir and system, and chaincase reservoir.
For repair work, the manual supplies many job-specific torque values alongside general SAE and metric bolt torque charts. Hydraulic connection tables cover O-ring face seal, flare and port-seal fittings, and the hydraulic / hydrostatic fluid section provides viscosity guidance for operating temperature ranges. This combination is especially valuable when a repair involves both mechanical disassembly and system setup, because the same manual can be used to confirm the correct tightening value, fluid requirement, pressure range or adjustment before the loader is returned to service.
Get the S175 Back to Work
The 2013 Bobcat S175 Skid-Steer Loader Service Manual 6987035 – S/N A3L520001 & Above supports routine servicing, hydraulic and hydrostatic diagnosis, electrical troubleshooting, BICS™ checks, engine repair, drive-system work, control calibration and major component overhaul on the covered S175 loader. Using the documented procedures, test information, schematics, torque values and specifications helps reduce guesswork and gives each repair a clear reference point. Your manual is delivered instantly as a PDF after payment, with no shipping to wait for; open it on a computer, tablet or phone, and print the pages you need for the workshop.



Reviews
There are no reviews yet.