Description
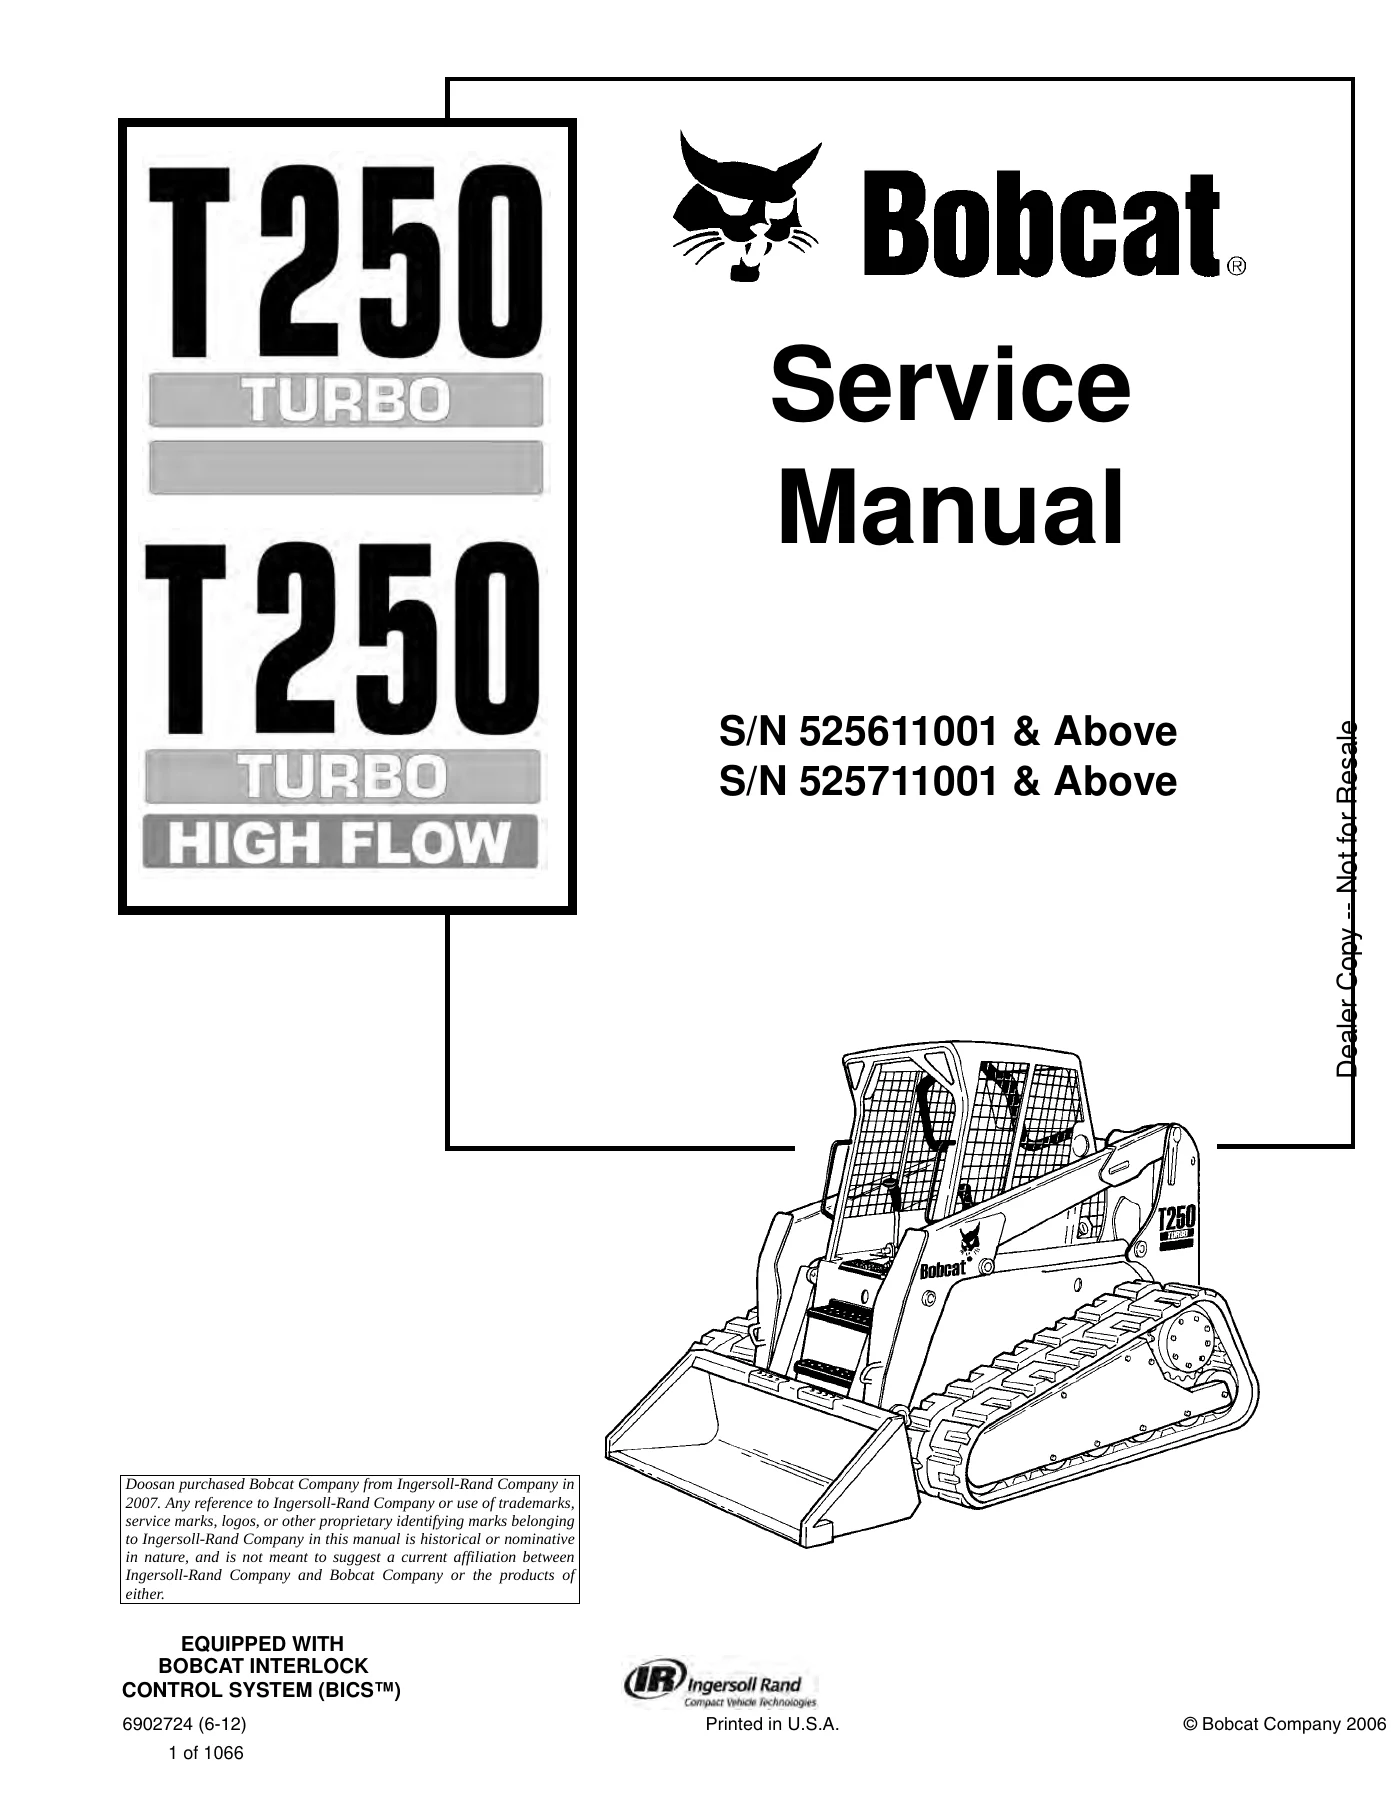
Bobcat T250 Service Manual 6902724 – The Complete Repair Reference
This is the full Bobcat T250 Compact Track Loader Service Manual, document number 6902724, dated 2012. It is the same comprehensive workshop reference used by professional technicians to service, diagnose, repair and maintain the T250 loader. Across approximately 1066 pages, the manual covers every major system on the machine, from the Kubota diesel engine and hydrostatic drive to the hydraulic control valve, electrical harness and operator cab. Whether you are replacing a lift cylinder, troubleshooting a BICS fault, adjusting track tension or rebuilding a hydrostatic motor, the procedures, torque values and specifications are all here in one searchable PDF.
The T250 is equipped with the Bobcat Interlock Control System (BICSTM), and this manual covers it in full detail, including the lift arm by-pass, seat bar sensor, traction lock and diagnostics service codes. Serial number ranges covered include S/N 525611001 & Above and S/N 525711001 & Above, with revision notes through 2012.
File Details
- Manual Type: Service Manual (Workshop Repair Manual)
- Brand: Bobcat
- Model: T250 Compact Track Loader
- Document Number: 6902724 (6-12)
- Publication Date: June 2012 (with historical revisions T250-1 through T250-5)
- Language: English
- Page Count: Approximately 1066 pages
- File Format: PDF
- Serial Number Coverage: S/N 525611001 & Above, S/N 525711001 & Above
- Equipped With: Bobcat Interlock Control System (BICSTM)
What This Bobcat T250 Service Manual Covers
The manual is organized into major system sections, each with removal, installation, disassembly, assembly, testing, adjustment and troubleshooting procedures. The main chapter groups are:
- Safety & Maintenance: Maintenance safety, fire prevention, service schedule, lifting and blocking, lift arm support device, operator cab raising and lowering, emergency exit, remote start, towing, transporting, lubricating the loader, service schedule chart.
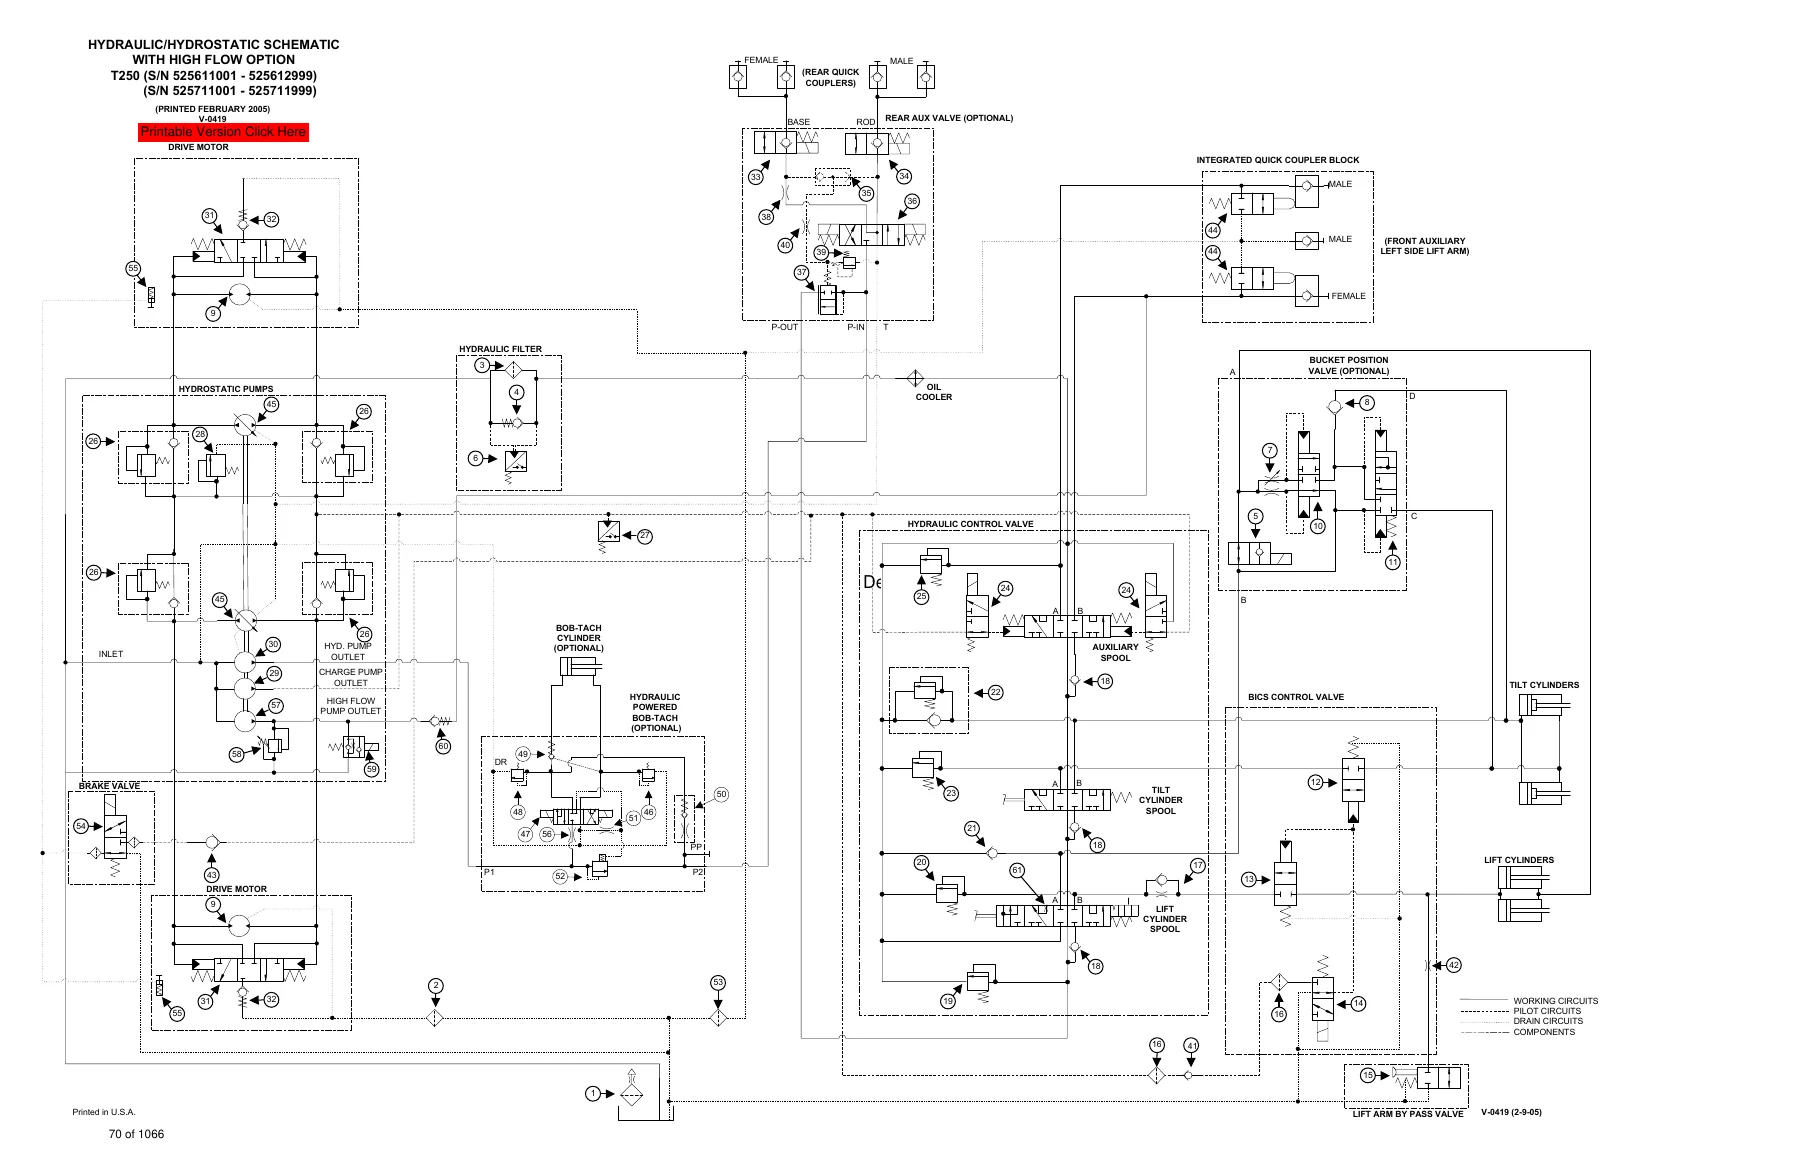
- Hydraulic/Hydrostatic System: Hydraulic control valve (foot control, ACS and SJC options), lift and tilt cylinders, power Bob-Tach, main relief valve, lift arm by-pass control valve, hydraulic pumps (standard, charge and high flow), hydrostatic motor, hydrostatic pump, hydraulic/hydrostatic filter, hydraulic fluid reservoir, bucket position valve, rear auxiliary diverter, front auxiliary coupler block, hydraulic schematics and connection specifications.
- Hydrostatic System: Charge pressure testing and setting, drive belt, hydrostatic motor (standard and SJC), hydrostatic pump (standard and SJC), pump controller, pump calibration, neutral adjustment, oil cooler.
- Drive System: Brake block, track components (idler, roller, tensioner, housing), track damage identification, track adjustment and checking.
- Main Frame: Bob-Tach and Power Bob-Tach, control handles (standard, ACS and SJC), control panels, control pedals, fuel tank, inside access panels, lift arms, operator cab, operator seat, rear door, rear grill, seat bar.
- Electrical System & Analysis: Advanced Control System (ACS), alternator, battery, BICSTM system, Bobcat controller, SJC controller, calibration procedures, diagnostics service codes, electrical system information, electrical/hydraulic controls reference, flywheel RPM sensor, instrument panels, lights, seat bar sensor, service PC, speed sensor, starter, traction lock, wiring schematics.
- Engine Service: Air cleaner, cooling fan, engine removal and installation, engine speed control, flywheel and housing, muffler, radiator, engine reconditioning (cylinder head, pistons, crankshaft, camshaft, valves, timing gears, turbocharger, injection pump, thermostat and more), engine troubleshooting.
- Heating, Ventilation & Air Conditioning (HVAC): A/C service, system flow, basic troubleshooting, blower fan, compressor, condenser, expansion valve, evaporator/heater unit, heater coil, heater valve, receiver/drier, pressure switch and relief valve, system charging and reclamation, temperature/pressure charts.
- Specifications: Loader specifications, engine specifications, torque specifications for bolts, hydraulic connection specifications, hydraulic fluid specifications, conversions.
Beyond the chapter list, this manual gives you the full technical picture: component identification with exploded views, hydraulic and electrical schematics, wiring diagrams, diagnostic service codes, torque values, service limits, clearances, adjustment procedures and step-by-step disassembly and assembly instructions. It is written for the working mechanic, so the language is direct and the procedures assume you have the machine in front of you.
Systems and Components Covered in Detail
Engine and Cooling
The T250 uses a Kubota V3300-DI-T turbo-charged diesel engine. This service manual provides complete engine reconditioning procedures, including cylinder head disassembly, valve lapping, piston and ring inspection, crankshaft alignment, camshaft height and side clearance checks, injection pump removal and timing, turbocharger service, thermostat testing and cooling system repair. Engine removal and installation is covered as an assembly with the hydrostatic pump, including the required lifting brackets and tools.
Hydraulic and Hydrostatic Drive
The hydraulic section is one of the largest in the manual. It covers the hydraulic control valve in both one-piece and two-piece castings, with variations for foot control, Advanced Control System (ACS) and Selectable Joystick Control (SJC). You will find procedures for lift and tilt spool removal, main relief valve adjustment, port relief valves, anti-cavitation valves, load check valves, BICSTM valve removal, solenoid testing and lift arm by-pass orifice service. The hydrostatic section includes pump and motor disassembly, charge pressure testing and setting, pump controller removal, pump calibration and neutral adjustment procedures for SJC machines.
Electrical System and Diagnostics
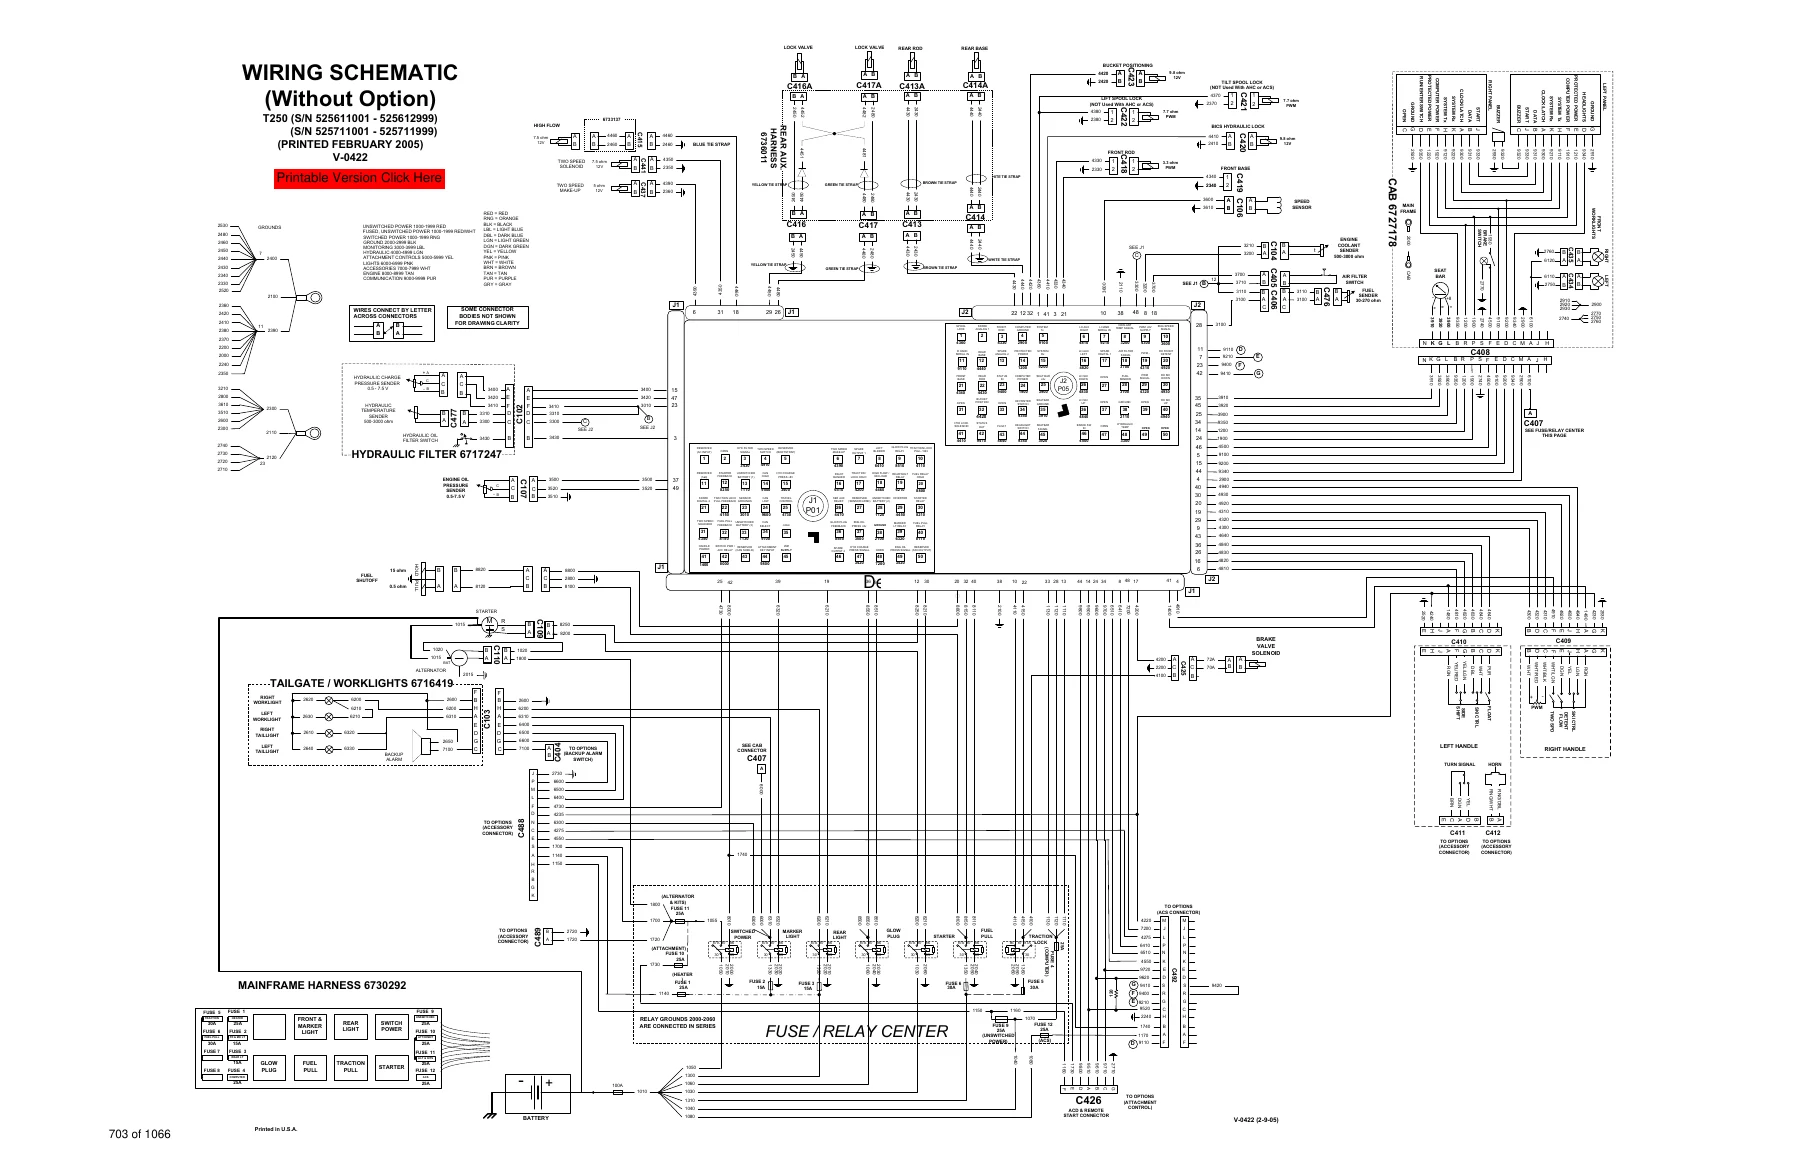
Electrical coverage includes the Bobcat controller, SJC controller, ACS controller, instrument panels (standard and deluxe), wiring schematics for machines with and without options, fuse and relay locations, diagnostics service codes, seat bar sensor testing, flywheel RPM sensor adjustment, speed sensor testing, alternator and starter service, battery maintenance and traction lock troubleshooting. The manual also includes calibration procedures for the ACS and SJC systems, which are essential after replacing handle sensors, foot pedal sensors, actuators or controllers.
Main Frame, Cab and Attachments
On the mechanical side, the manual covers the Bob-Tach and Power Bob-Tach, lift arms, operator cab (including gas cylinder service and emergency exit), operator seat, control handles and pedals, fuel tank, rear door and grill, and seat bar assembly. The front and rear auxiliary hydraulic circuits, bucket position valve and rear auxiliary diverter are also documented with removal, disassembly and assembly procedures.
Track and Undercarriage
Track maintenance is covered with track checking, track adjustment, removal and installation, front and rear idler service, track roller service and track damage identification. The manual explains the causes and prevention of common rubber track damage such as cutting of steel cords, abrasion of embedded metals, separation of embedded metals, corrosion, lug side cracks and edge cuts.
Who This Bobcat T250 Service Manual Is For
This PDF is for anyone who needs to service, repair or maintain a Bobcat T250 compact track loader. That includes professional diesel and heavy equipment mechanics, Bobcat dealership technicians, fleet maintenance shops, and owners who prefer to do their own repairs with the correct procedures and specifications. Because the manual covers multiple serial number ranges and control configurations (foot control, ACS and SJC), it is useful across a wide range of T250 machines.
The manual is also a valuable reference for understanding the BICSTM system, which controls the lift, tilt and traction functions. If your machine has an interlock fault, the diagnostics service codes and troubleshooting charts in this manual will help you trace the problem.
Why Correct Procedures and Specifications Matter on the T250
The T250 is a 9121 lb (4137 kg) class machine with a rated operating capacity of 2500 lb (1134 kg). Its hydrostatic drive system operates at high pressure, and the hydraulic system runs at system relief pressures up to 3300 PSI (227.5 bar) at the quick couplers. Torque values for critical fasteners, such as the hydrostatic motor mounting bolts (190 ft.-lb.), the drive sprocket bolts (190-215 ft.-lb.), and the track housing mounting bolts (330 ft.-lb.), are specified in the manual. Using the wrong torque or an incorrect adjustment can lead to component failure, hydraulic leaks or unsafe machine operation.
This manual gives you the exact specifications for engine oil pressure, hydraulic charge pressure, track tension, valve clearances, injection timing and electrical sensor voltages. It also provides the diagnostic service codes that the machine’s monitoring system uses to report faults, so you can move directly to the affected circuit or component instead of guessing.
Complete PDF Bookmark Tree
Complete Bookmarks
The complete bookmarks in the βBobcat T250 Compact Track Loader Service Manual 6902724 – PDF Repair Guideβ are as follows:
MAINTENANCE SAFETYp. 3
ALPHABETICAL INDEXp. 5
+CONTENTSp. 7
FOREWORDp. 8
+SAFETY INSTRUCTIONSp. 11
+SERIAL NUMBER LOCATIONp. 15
Loader Serial Numberp. 15
Engine Serial Numberp. 15
DELIVERY REPORTp. 16
BOBCAT LOADER IDENTIFICATIONp. 17
+SAFETY AND MAINTENANCEp. 19
+LIFTING AND BLOCKING THE LOADERp. 21
+LIFT ARM SUPPORT DEVICEp. 23
Engaging The Lift Arm Support Devicep. 23
Disengaging The Lift Arm Support Devicep. 24
+OPERATOR CABp. 25
Descriptionp. 25
Raising The Operator Cabp. 25
Lowering The Operator Cabp. 26
Emergency Exitp. 26
+TRANSPORTING THE BOBCAT LOADERp. 29
+TOWING THE LOADERp. 31
+REMOTE STARTp. 33
Procedure For Loader W/O Attachments Control Harnessp. 33
Procedure For Loader With Attachments Control Harnessp. 34
Procedurep. 35
+SERVICE SCHEDULEp. 37
+AIR CLEANER SERVICEp. 39
Replacing Filter Elementp. 39
+ENGINE COOLING SYSTEMp. 41
Cleaning Cooling Systemp. 41
Checking The Coolant Levelp. 43
Adding The Coolantp. 44
+FUEL SYSTEMp. 45
Fuel Specificationsp. 45
Filling The Fuel Tankp. 45
Fuel Filterp. 46
Removing Air From The Fuel Systemp. 46
+ENGINE LUBRICATION SYSTEMp. 47
Checking Engine Oilp. 47
Oil Chartp. 47
Replacing Oil And Filterp. 47
+HYDRAULIC/HYDROSTATIC SYSTEMp. 49
Checking And Adding Fluidp. 49
Hydraulic Fluid Chartp. 49
Hydraulic/Hydrostatic Filter Replacementp. 50
Replacing Hydraulic Fluid And Case Drain Filtersp. 51
+FAN GEARBOXp. 53
Checking And Adding Oilp. 53
+BOB-TACHp. 55
Inspection And Maintenancep. 55
+POWER BOB-TACHp. 57
Inspection And Maintenancep. 57
+LUBRICATING THE LOADERp. 59
+HYDRAULIC SYSTEMp. 61
HYDRAULIC/HYDROSTATIC SCHEMATICSp. 67
+HYDRAULIC SYSTEM INFORMATIONp. 83
Troubleshootingp. 87
Tightening Procedurep. 88
+CYLINDER (LIFT)p. 89
Checkingp. 89
Removal And Installationp. 89
Parts Identificationp. 91
Disassemblyp. 92
Assemblyp. 93
+CYLINDER (TILT)p. 97
Checkingp. 97
Removal And Installationp. 97
Base Pin Removal And Installationp. 99
Parts Identificationp. 100
Disassemblyp. 101
Assemblyp. 102
+CYLINDER (POWER BOB-TACH)p. 105
Checkingp. 105
Removal And Installationp. 106
Parts Identificationp. 107
Disassemblyp. 108
Assemblyp. 109
+MAIN RELIEF VALVEp. 113
Checking Main Reliefp. 113
Adjustmentp. 115
Removal And Installationp. 116
+HYDRAULIC CONTROL VALVE (2 PIECE CASTING) (FOOT CONTROL)p. 117
Identificationp. 117
Removal And Installationp. 117
BICSβ’ Valve, Removal And Installationp. 121
BICSβ’ Valve, Lift Arm By-Pass Orifice Removal And Installationp. 123
BICSβ’ Valve, Check Valve Removal And Installationp. 124
Backslide, Lock Valve Removal And Installationp. 125
BICSβ’ Valve, Solenoid Removal And Installationp. 126
BICSβ’ Valve, Solenoid Testingp. 127
Identification Chartp. 128
Load Check Valvep. 129
Main Relief Valvep. 130
Port Relief Valve, Tilt Spoolp. 130
Port Relief Valve, Lift Spoolp. 131
Anti-Cavitation Valve/Port Relief Valve, Tilt Spoolp. 131
Anti-Cavitation Valve, Lift Spoolp. 132
Rubber Bootp. 132
Lift And Tilt Lock Blockp. 133
Lift Spool And Detent Removalp. 134
Lift Spool And Detent Disassemblyp. 136
Lift Spool And Detent Assemblyp. 139
Lift Spool And Detent Installationp. 143
Tilt Spool Removal And Installationp. 144
Tilt Spool Disassembly And Assemblyp. 145
Auxiliary Spool Removal And Installationp. 146
Auxiliary Plug Removal And Installationp. 148
Auxiliary Electric Solenoid Disassemblyp. 149
Port-Auxiliary Section Removal And Installationp. 150
Cleaning And Inspectionp. 150
+HYDRAULIC CONTROL VALVE (2 PIECE CASTING) (ADVANCED CONTROL SYSTEM) (ACS)p. 151
Identificationp. 151
Actuator Removal And Installation (In Loader)p. 152
Actuator Removal And Installation (Out Of Loader)p. 154
Removal And Installationp. 156
BICSβ’ Valve, Removal And Installationp. 160
BICSβ’ Valve, Lift Arm By-Pass Orifice Disassembly And Assemblyp. 163
BICSβ’ Valve, Check Valve Disassembly And Assemblyp. 164
BICSβ’ Valve, Lock Valve Disassembly And Assemblyp. 165
BICSβ’ Valve, Solenoid Disassembly And Assemblyp. 166
BICSβ’ Valve, Solenoid Testingp. 167
Identification Chartp. 168
Lift Base End Restrictorp. 169
Load Check Valvep. 170
Main Relief Valvep. 171
Port Relief Valvep. 173
Anti-Cavitation Valve/Port Relief Valvep. 174
Anti-Cavitation Valvep. 175
Lift Spool Removalp. 176
Lift Spool Removal And Installationp. 177
Lift And Tilt Spool Disassembly And Assemblyp. 178
Auxiliary Spool Removal And Installationp. 179
Auxiliary Electric Solenoid Disassemblyp. 180
Port-Auxiliary Section Disassemblyp. 181
Cleaning And Inspectionp. 181
+HYDRAULIC CONTROL VALVE (2 PIECE CASTING) (selectable joystick control) (sjc)p. 183
Identificationp. 183
Actuator Removal And Installation (In Loader)p. 184
Actuator Removal And Installation (Out Of Loader)p. 186
Actuator Removal And Installation (Out Of Loader) (Contβd)p. 187
Removal And Installationp. 188
BICSβ’ Valve, Removal And Installationp. 192
BICSβ’ Valve, Lift Arm By-Pass Orifice Disassembly And Assemblyp. 195
BICSβ’ Valve, Check Valve Disassembly And Assemblyp. 196
BICSβ’ Valve, Lock Valve Disassembly And Assemblyp. 197
BICSβ’ Valve, Solenoid Disassembly And Assemblyp. 198
BICSβ’ Valve, Solenoid Testingp. 199
Identification Chartp. 200
Lift Base End Restrictorp. 201
Load Check Valvep. 202
Main Relief Valvep. 203
Port Relief Valvep. 205
Anti-Cavitation Valve/Port Relief Valvep. 206
Anti-Cavitation Valvep. 207
Lift Spool Removalp. 208
Lift Spool Removal And Installationp. 209
Lift And Tilt Spool Disassembly And Assemblyp. 210
Auxiliary Spool Removal And Installationp. 211
Auxiliary Electric Solenoid Disassemblyp. 212
Port-Auxiliary Section Disassemblyp. 213
Cleaning And Inspectionp. 213
+hYDRAULIC CONTROL VALVE (1 PIECE CASTING) (FOOT CONTROL)p. 215
Identificationp. 215
Removal And Installationp. 215
Identification Chartp. 219
BICSβ’ Valve, Lift Load Check Valve Removal And Installationp. 220
Load Check Valve Removal And Installation (Tilt & Auxiliary)p. 221
Anti-Cavitation Valve (Lift, Rod End)p. 221
Port Relief/Anti-Cavitation Valve (Lift, Base End)p. 222
Port Relief/Anti-Cavitation Valve (Tilt, Base End)p. 223
Port Relief/Anti-Cavitation Valve (Tilt, Rod End)p. 223
Port Relief Valvep. 224
Plug Removalp. 225
Rubber Boot Removal and Installationp. 226
End Cap/Spool Lock Block Removal and Installationp. 227
Lift Spool and Detent Removal and Installationp. 228
Auxiliary Spool Removal And Installationp. 240
Auxiliary Solenoid Disassembly and Assemblyp. 242
BICSβ’ Valve Solenoid Disassembly And Assemblyp. 243
BICSβ’ Valve, Lock Valve Removal And Installationp. 244
BICSβ’ Valve, Lift Arm By-Pass Orifice Disassembly And Assemblyp. 246
Main Relief Valvep. 247
BICSβ’ Valve, Check Valve Removal and Installationp. 248
+HYDRAULIC CONTROL VALVE (1 PIECE CASTING) (ADVANCED CONTROL SYSTEM) (ACS)p. 249
Identificationp. 249
Removal And Installationp. 250
Actuator Removal And Installation (In Loader)p. 254
Actuator Removal And Installation (Out of Loader)p. 256
Identification Chartp. 259
BICSβ’ Valve, Lift Load Check Valve Removal And Installationp. 260
Load Check Valve Removal And Installation (Tilt & Auxiliary)p. 261
Anti-Cavitation Valve (Lift, Rod End)p. 261
Port Relief/Anti-Cavitation Valve (Lift, Base End)p. 262
Port Relief/Anti-Cavitation Valve (Tilt, Base End)p. 263
Port Relief/Anti-Cavitation Valve (Tilt, Rod End)p. 263
Port Relief Valvep. 264
Plug Removalp. 265
End Cap Block Removal And Installationp. 266
Lift Spool Removal And Installationp. 267
Tilt Spool Removal And Installationp. 271
Auxiliary Spool Removal And Installationp. 273
Auxiliary Solenoid Disassembly And Assemblyp. 275
BICSβ’ Valve Solenoid Disassembly And Assemblyp. 276
BICSβ’ Valve, Lock Valve Removal And Installationp. 277
BICSβ’ Valve, Lift Arm By-Pass Orifice Disassembly And Assemblyp. 279
Main Relief Valvep. 279
BICSβ’ Valve, Check Valve Removal And Installationp. 280
+HYDRAULIC CONTROL VALVE (1 PIECE CASTING) (SELECTABLE JOYSTICK CONTROL) (SJC)p. 281
Identificationp. 281
Removal And Installationp. 282
Actuator Removal And Installation (In Loader)p. 286
Actuator Removal And Installation (Out of Loader)p. 288
Identification Chartp. 291
BICSβ’ Valve, Lift Load Check Valve Removal And Installationp. 292
Load Check Valve Removal And Installation (Tilt & Auxiliary)p. 293
Anti-Cavitation Valve (Lift, Rod End)p. 293
Port Relief/Anti-Cavitation Valve (Lift, Base End)p. 294
Port Relief/Anti-Cavitation Valve (Tilt, Base End)p. 295
Port Relief/Anti-Cavitation Valve (Tilt, Rod End)p. 295
Port Relief Valvep. 296
Plug Removalp. 297
End Cap Block Removal And Installationp. 298
Lift Spool Removal And Installationp. 299
Tilt Spool Removal And Installationp. 303
Auxiliary Spool Removal And Installationp. 305
Auxiliary Solenoid Disassembly And Assemblyp. 307
BICSβ’ Valve Solenoid Disassembly And Assemblyp. 308
BICSβ’ Valve, Lock Valve Removal And Installationp. 309
BICSβ’ Valve, Check Valve Removal And Installationp. 311
BICSβ’ Valve, Lift Arm By-Pass Orifice Disassembly And Assemblyp. 312
Main Relief Valvep. 312
+LIFT ARM BY-PASS CONTROL VALVEp. 313
Inspectingp. 313
Additional Inspection For Loaders W/Advanced Hand Controlsp. 313
Removal And Installationp. 313
Disassembly And Assemblyp. 314
+HYDRAULIC PUMPp. 315
Check The Output Of The Hydraulic Pumpp. 315
Removal And Installationp. 316
Identificationp. 318
Disassembly And Assemblyp. 319
+HYDRAULIC PUMP (CHARGE)p. 327
Check The Output Of The Hydraulic Pumpp. 327
Removal And Installationp. 330
Disassembly And Assemblyp. 330
+HYDRAULIC PUMP (HIGH FLOW)p. 331
Hydraulic Pump Test (30 GPM)p. 331
Hydraulic Pump Test (40 GPM)p. 332
Inline Hydraulic Pump Test (Standard)p. 333
Inline Hydraulic Pump Test (High Flow) (30 GPM And 40 GPM)p. 335
High Flow Relief Adjustment Procedure (30 GPM And 40 GPM)p. 337
High Flow Relief Valve Removal And Installation (30 GPM And 40 GPM)p. 339
Removal And Installation (30 GPM And 40 GPM)p. 340
Identification (30 GPM) (S/N 525613399 & Below)p. 342
Identification (40 GPM) (S/N 525613400 & Above)p. 343
Disassembly And Assembly (30 GPM And 40 GPM)p. 344
+HYDRAULIC PUMP (SLECTABLE JOYSTICK CONTROL) (SJC)p. 357
Check The Output Of The Hydraulic Pumpp. 357
Removal And Installationp. 358
Identificationp. 360
Disassembly And Assemblyp. 361
+HYDRAULIC PUMP (HIGH FLOW) (SELECTABLE JOYSTICK CONTROL) (SJC)p. 367
Hydraulic Pump Test (30 GPM)p. 367
Hydraulic Pump Test (40 GPM)p. 368
Inline Hydraulic Pump Test (Standard)p. 369
Inline Hydraulic Pump Test (High Flow) (30 GPM And 40 GPM)p. 371
High Flow Relief Adjustment Procedure (30 GPM And 40 GPM)p. 373
High Flow Relief Valve Removal And Installation (30 GPM And 40 GPM)p. 375
Removal And Installation (30 GPM And 40 GPM)p. 376
Identification (30 GPM) (S/N 525613399 & Below)p. 378
Identification (40 GPM) (S/N 525613400 & Above)p. 379
Disassembly And Assembly (30 GPM And 40 GPM)p. 380
+HYDRAULIC/HYDROSTATIC FILTERp. 389
Housing Removal And Installationp. 389
Mount Removal And Installationp. 390
+HYDRAULIC FLUID RESERVOIRp. 391
Fluid Removalp. 391
Removal And Installationp. 391
Hydraulic Fluid Screenp. 394
+BUCKET POSITION VALVEp. 395
Solenoid Removal And Installationp. 395
Solenoid Testingp. 395
Removal And Installationp. 396
Disassembly And Assemblyp. 396
+REAR AUXILIARY DIVERTERp. 399
Removal And Installationp. 399
Disassembly And Assemblyp. 401
Solenoid Testingp. 406
Inspectionp. 406
+POWER BOB-TACH BLOCKp. 407
Removal And Installationp. 407
Disassembly And Assemblyp. 408
+FRONT AUXILIARY HYDRAULIC COUPLER BLOCKp. 413
Removal and Installationp. 413
Disassembly And Assemblyp. 413
+HYDROSTATIC SYSTEMp. 415
+HYDROSTATIC SYSTEM INFORMATIONp. 417
Troubleshooting Chartp. 417
Replenishing Valve Functionp. 418
+HYDROSTATIC MOTORp. 419
Removal And Installationp. 419
Parts Identificationp. 422
Disassemblyp. 424
Inspectionp. 432
Assemblyp. 433
Fillingp. 441
+HYDROSTATIC MOTOR (SELECTABLE JOYSTICK CONTROL) (SJC)p. 443
Removal And Installationp. 443
Parts Identificationp. 446
Disassemblyp. 448
Inspectionp. 457
Assemblyp. 458
Fillingp. 467
+CHARGE PRESSUREp. 469
Testingp. 469
Removal And Installationp. 471
Setting Charge Pressurep. 472
+HYDROSTATIC PUMPp. 473
Removal And Installationp. 473
Replenishing/High Pressure Relief Valvep. 475
Parts Identification (Right Half)p. 476
Parts Identification (Left Half)p. 478
Hydraulic Pump Removal And Installationp. 480
Pump Separationp. 480
Disassemblyp. 481
Assemblyp. 487
+HYDROSTATIC PUMP (SELECTABLE JOYSTICK CONTROL) (SJC)p. 495
Pump Controller Removal And Installationp. 495
Hydrostatic Pump Calibrationp. 498
Removal And Installationp. 503
Parts Identification (Right Half)p. 505
Parts Identification (Left Half)p. 507
System Check Relief Valves (High Pressure Relief, Charge Check & By-Pass Valve)p. 509
Charge Relief Valvep. 510
Pump Separationp. 512
Shaft Seal And Shaft Replacementp. 513
Shaft Seal And Shaft Installationp. 515
Charge Pump Removalp. 517
Charge Pump Inspectionp. 519
Charge Pump Installationp. 520
Disassemblyp. 522
Inspectionp. 529
Assemblyp. 533
Pump Neutral Adjustmentp. 542
Pump Controller Neutral Adjustmentp. 545
+DRIVE BELTp. 549
Shield Removal And Installationp. 549
Adjustmentp. 549
Replacementp. 549
Tensioner Pulley Removal And Installationp. 550
Tensioner Pulley Tension Springp. 552
+OIL COOLER (SEAL TO CONNECT) (STC)p. 553
Hydraulic Oil Cooler Removal And Installationp. 553
+DRIVE SYSTEMp. 555
+BRAKEp. 557
Switch Operated Parking Brakep. 557
Block Removal And Installationp. 557
Block Disassembly And Assemblyp. 558
+DRIVE COMPONENTSp. 559
Track Checkingp. 559
Track Adjustmentp. 560
Track Removal And Installationp. 561
Track Idler (Front) End Play Specificationsp. 563
Track Idler (Front) Removal And Installationp. 563
Track Idler (Front) Parts Identification (Early Version)p. 566
Track Idler (Front) Identificationp. 567
Track Idler (Front) Disassembly (Early Version)p. 568
Track Idler (Front) Assembly (Early Version)p. 569
Track Idler (Rear) End Play Specificationsp. 572
Track Idler (Rear) Parts Identification (Early Version)p. 572
Track Idler (Rear) Removal And Installationp. 572
Track Idler (Rear) Identificationp. 573
Track Idler (Rear) Disassembly (Early Version)p. 574
Track Idler (Rear) Assembly (Early Version)p. 576
Track Roller Assembly End Play Specificationsp. 577
Track Roller Parts Identification (Early Version)p. 577
Track Roller Removal And Installationp. 577
Track Roller Identificationp. 578
Track Roller Disassembly (Early Version)p. 579
Track Roller Assembly (Early Version)p. 580
Track Housing Removal And Installationp. 582
Track Damage Identificationp. 583
+MAIN FRAMEp. 593
+SEAT BARp. 595
Removal And Installationp. 595
Assembling Componentsp. 596
Compression Spring Disassembly And Assemblyp. 597
+OPERATOR CABp. 599
Gas Cylinder Removal And Installation (Dual Gas Spring)p. 599
Gas Cylinder Removal And Installation (3rd Gas Spring)p. 601
Gas Cylinder Bracket Disassembly And Assemblyp. 603
Removal And Installationp. 603
+OPERATOR SEATp. 607
Removal And Installationp. 607
Slide Rail Removal And Installationp. 608
Seat Belt Removal And Installationp. 608
Cushion Removal And Installationp. 609
Back Removal And Installationp. 610
Shock Removal And Installationp. 610
3-Point Seat Belt Removal And Installationp. 611
+BOB-TACHp. 613
Removal And Installationp. 613
Bob-Tach Lever And Wedgep. 615
+POWER BOB-TACHp. 617
Removal And Installationp. 617
Power Bob-Tach Lever And Wedgep. 619
Pivot Pin Bushing And Seal Replacementp. 621
+LIFT ARMSp. 623
Removal And Installationp. 623
+REAR GRILLp. 627
Removal And Installationp. 627
+REAR DOORp. 629
Removal And Installationp. 629
Striker Removal And Installationp. 630
Striker Disassembly And Assemblyp. 630
Door Latch And Catch Adjustmentp. 630
Latch Removal And Installationp. 631
+FUEL TANKp. 633
Removal And Installationp. 633
Fuel Level Senderp. 635
+CONTROL PEDALSp. 637
Removal And Installationp. 637
Pedal Adjustmentp. 637
+CONTROL PEDALS (ACS)p. 639
Foot Sensor Removal And Installationp. 639
Foot Pedal Removal And Installationp. 640
Foot Pedal Linkage Disassembly And Assemblyp. 640
+CONTROL PANEL (NON-ADJUSTABLE PINTLES)p. 641
Removal And Installationp. 641
Shock Removal And Installationp. 643
Shaft Removal And Installationp. 643
Shaft Disassembly And Assemblyp. 643
Linkage Removal And Installationp. 645
Linkage Neutral Adjustmentp. 648
+CONTROL PANEL (ADJUSTABLE PINTLES)p. 655
Descriptionp. 655
Removal And Installationp. 656
Shock Removal And Installationp. 658
Shaft Removal And Installationp. 658
Shaft Disassembly And Assemblyp. 659
Linkage Removal And Installationp. 660
Pintle Arm Disassembly and Assemblyp. 665
Linkage Neutral Adjustmentp. 666
Linkage Travel Adjustmentp. 670
+CONTROL PANEL (SELECTABLE JOYSTICK CONTROL) (SJC)p. 675
Removal And Installationp. 675
+CONTROL HANDLEp. 679
Lever Removal And Installationp. 679
Steering Lever Bootp. 679
+CONTROL HANDLE (ADVANCED CONTROL SYSTEM) (ACS) SELECTABLE HAND/FOOT CONTROLp. 681
Components Identificationp. 681
Handle Sensor Removal And Installationp. 681
Control Handle Removal And Installationp. 684
Control Handle Disassembly And Assemblyp. 685
Control Lever Removal And Installationp. 686
Control Lever Bootp. 687
+CONTROL HANDLE (SELECTABLE JOYSTICK CONTROL) (SJC)p. 689
Joystick Testing (Right & Left)p. 689
Joystick Removal (Right & Left)p. 690
Joystick Boot Removal (Right & Left)p. 691
Lever Assembly Removal (Right & Left)p. 691
+INSIDE ACCESS PANELp. 693
Removal And Installation (Left)p. 693
Removal And Installation (Right)p. 693
+INSIDE ACCESS PANEL (SELECTABLE JOYSTICK CONTROL) (SJC)p. 695
Panel Removal (Right)p. 695
Panel Removal (Left)p. 698
+ELECTRICAL SYSTEM & ANALYSISp. 699
ELECTRICAL SCHEMATICSp. 703
+ELECTRICAL SYSTEM INFORMATIONp. 711
Troubleshootingp. 713
Descriptionp. 714
Fuse Locationp. 716
Relay Switch Locationp. 716
Solenoid Testp. 717
+BATTERYp. 719
Removal And Installationp. 719
Servicing The Electrical Systemp. 721
Using A Booster Battery (Jump Starting)p. 722
+ALTERNATORp. 723
Adjusting The Alternator Beltp. 723
Alternator Identificationp. 723
Charging System Checkp. 724
Alternator Voltage Testp. 725
Low Voltage Testp. 725
High Voltage Testp. 726
Removal And Installationp. 726
Rectifier Continuity (Diode) Testp. 727
Alternator Regulator Testp. 728
Disassemblyp. 729
Stator Continuity Testp. 729
Stator Ground Testp. 729
Rotor Continuity Testp. 730
Rotor Ground Testp. 730
Assemblyp. 730
+STARTERp. 731
Checkingp. 731
Removal And Installationp. 732
Parts Identificationp. 733
Disassembly And Assemblyp. 734
Inspection And Repairp. 737
No Load Testp. 740
+INSTRUMENT PANELp. 741
Left Panelp. 741
Right Panel (Standard) (With Key Switch)p. 742
Right Panel (Deluxe) (With Keyless Start)p. 743
Right Panel Setup Display Options (Deluxe)p. 745
Deluxe Panel Setupp. 746
Passwords (Deluxe)p. 746
Option And Field Accessory Panels (If Equipped)p. 748
Standard Panel Removal And Installation (Right Side)p. 749
Deluxe Panel Removal And Installation (Right Side)p. 750
Standard & Deluxe Panel Removal And Installation (Left Side)p. 751
Front Accessory Panel Removal And Installationp. 752
+LIGHTSp. 753
Front Removal And Installationp. 753
Rear Removal And Installationp. 753
+BOBCAT CONTROLLERp. 756
Identification Chartp. 756
Removal And Installationp. 758
+CONTROLLER (SELECTABLE JOYSTICK CONTROL) (SJC)p. 759
Removalp. 759
Identification Chartp. 762
+SPEED SENSOR (SELECTABLE JOYSTICK CONTROL) (SJC)p. 765
Testingp. 765
Removalp. 766
+DIAGNOSTICS SERVICE CODESp. 769
Displayp. 769
Number Codes Listp. 770
+BICSβ’ SYSTEMp. 775
Inspecting The BICSβ’ Controller (Engine STOPPED – Key ON)p. 775
Inspecting Deactivation Of The Auxiliary Hydraulics System (Engine STOPPED – Key ON)p. 775
Inspecting The Seat Bar Sensor (Engine RUNNING)p. 775
Inspecting The Traction Lock (Engine RUNNING)p. 775
Inspecting The Lift Arm By-Pass Controlp. 776
Additional Inspection For Loaders With Advanced Controls System (ACS) or Selectable Joystick Control (SJC)p. 776
Troubleshootingp. 777
Troubleshooting Guidep. 778
+SEAT BAR SENSORp. 779
Troubleshooting Chartp. 779
Testp. 780
Removal And Installationp. 781
BICSβ’ Circuit Testp. 782
+TRACTION LOCKp. 783
Troubleshooting Chartp. 783
Description Of The Control Systemp. 784
Inspecting The Control Systemp. 784
Parking Brake Solenoid Removal And Installationp. 785
+ADVANCED CONTROL SYSTEM (ACS)p. 787
Components Identificationp. 787
Troubleshooting Guidep. 789
Controller, Connector And Wire Identificationp. 790
ACS Controller Removal And Installationp. 791
Handle Sensor Connectorp. 792
Switch Handle Removalp. 793
Switch Handle Installationp. 795
Actuators Disassembly And Assemblyp. 798
Handle Lock Solenoid Removal And Installationp. 799
Handle Lock Solenoid Disassembly And Assemblyp. 800
Handle Lock Solenoid Connectorp. 800
Foot Sensor Disassembly And Assemblyp. 801
Foot Sensor Connectorp. 802
Foot Lock Solenoid Removal And Installationp. 803
Foot Lock Solenoid Connectorp. 804
+ELECTRICAL/HYDRAULIC CONTROLS REFERENCEp. 805
Controls Identification Chartp. 805
+ELECTRICAL/HYDRAULIC CONTROLS REFERENCE (selectable JOYstick control) (sjc)p. 807
Controls Identification Chartp. 807
+SERVICE PC (LAPTOP COMPUTER)p. 811
Connecting The Service PC To Remote Start Toolp. 811
+CALIBRATIONp. 813
Lift And Tilt Calibration Procedure (Selectable Joystick Control) (SJC)p. 813
Hydrostatic Pump Calibration (Selectable Joystick Control) (SJC)p. 815
Calibration Procedure (Advanced Control System) (ACS)p. 820
+FLYWHEEL RPM SENSORp. 823
+ENGINE SERVICEp. 825
+TROUBLESHOOTINGp. 829
+ENGINE SPEED CONTROLp. 831
Removal And Installationp. 831
Speed Control Cablep. 832
+ENGINE SPEED CONTROL (SELECTABLE JOYSTICK CONTROL) (SJC)p. 835
Removalp. 835
Disassemblyp. 837
Speed Control Cablep. 838
+MUFFLERp. 839
Removal And Installationp. 839
+AIR CLEANERp. 841
Housing Removal And Installationp. 841
+RADIATORp. 843
Removal And Installationp. 843
Mount Removal (Early Loaders)p. 845
Mount Removal (Later Loaders)p. 845
+COOLING FANp. 847
Drive Tension Pulley Removal And Installationp. 847
Gearbox/Blower Housing Removal And Installationp. 848
Blower Removal And Installationp. 849
Gearbox Parts Identificationp. 851
Gearbox Disassemblyp. 852
Gearbox Assemblyp. 857
Gearbox, Checking Backlashp. 862
+ENGINEp. 865
Removal And Installationp. 865
Mount Replacementp. 872
Removal And Installation Toolsp. 873
+FLYWHEEL AND HOUSINGp. 875
Flywheel Removal And Installationp. 875
Ring Gear Removal And Installationp. 875
Flywheel Housing Removal And Installationp. 875
+RECONDITIONING THE ENGINEp. 877
Engine Tools Identification Chartp. 877
Compression Pressurep. 882
Cylinder Head Clearancep. 882
Valve Cover, Injector Nozzle And Seal Removal And Installationp. 883
Checking Nozzle Injection Pressurep. 885
Nozzle Spraying Conditionp. 886
Valve Seat Tightnessp. 886
Rocker Arm And Push Rod Disassembly And Assemblyp. 887
Valve Clearancep. 887
Cylinder Head And Tappet Disassembly And Assemblyp. 888
Selecting Cylinder Head Gasket Disassembly And Assemblyp. 889
Valve Disassembly And Assemblyp. 891
Engine Timing (TDC)p. 891
Injection Pump Housing Removalp. 892
Injection Pump Governor Housing Removal And Installationp. 895
Injection Pump Governor Fork Lever Removal And Installationp. 897
Injection Pump Governor Lever Removal And Installationp. 897
Injection Pump Stop Lever Removal And Installationp. 898
Injection Pump Fuel Camshaft And Governor Weight Removal And Installationp. 898
Injection Pump Removal and Installationp. 900
Injection Pump Housing Installationp. 907
Injection Pump Timingp. 910
Fan Drive Pulley Disassembly And Assemblyp. 912
Water Pump Disassembly And Assemblyp. 913
Oil Cooler And Water Pipe Disassembly And Assemblyp. 913
Gearcase Cover Disassembly And Assemblyp. 914
Idle Gear And Camshaft Disassembly And Assemblyp. 915
Oil Pan And Oil Strainer Disassembly And Assemblyp. 915
Connecting Rod Cap Disassembly And Assemblyp. 916
Piston Disassembly And Assemblyp. 916
Piston Ring And Connecting Rod Disassembly And Assemblyp. 917
Flywheel And Crankshaft Disassembly And Assemblyp. 918
Bearing Case Cover Disassembly And Assemblyp. 919
Flywheel Housing Disassembly And Assemblyp. 920
Crankcase No. 2 Disassembly And Assemblyp. 920
Crankcase No. 1 And No. 2 Disassembly And Assemblyp. 921
Crankshaft Disassembly And Assemblyp. 921
Cylinder Head Surface Flatnessp. 922
Cylinder Head Flawp. 923
Valve Recessingp. 923
Valve Lappingp. 924
Clearance Between Valve Stem And Valve Guidep. 924
Replacing Valve Guidep. 925
Correcting Valve And Valve Seatp. 925
Free Length And Tilt Of Valve Springp. 926
Valve Spring Setting Loadp. 926
Oil Clearance Between Rocker Arm Shaft And Bearingp. 927
Oil Clearance Between Tappet And Tappet Guide Borep. 927
Timing Gear Backlashp. 928
Idler Gear Side Clearancep. 928
Camshaft Side Clearancep. 929
Camshaft Alignmentp. 929
Cam Heightp. 929
Oil Clearance Between Idler Gear Shaft And Idler Gearing Bushingp. 930
Replacing Idler Gear Bushingp. 931
Piston Pin Bore I.D.p. 932
Oil Clearance Between Piston Pin And Small End Bushingp. 932
Replacing Small End Bushingp. 933
Clearance Between Piston Ring And Groovep. 933
Piston Ring Gapp. 934
Connecting Rod Alignmentp. 934
Crankshaft Side Clearancep. 935
Crankshaft Alignmentp. 936
Oil Clearance Between Crankpin And Crankpin Bearingp. 936
Oil Clearance Between Crankshaft Journal And Crankshaft Bearingp. 938
Replacing Crankshaft Sleevep. 939
Cylinder Bore I.D.p. 939
Correcting Cylinder (Oversize +0.5 mm)p. 940
Engine Oil Pressurep. 940
Rotor Lobe Clearancep. 941
Clearance Between Outer Rotor And Pump Bodyp. 941
Clearance Between Rotor And Coverp. 941
Relief Valvep. 942
Thermostat Valve Opening Temperaturep. 942
Radiator Water Leakagep. 942
Radiator Cap Air Leakagep. 943
Thermostat Assemblyp. 943
Intake Air Heaterp. 944
Air Cleaner, Intake Pipe, Inlet Pipe And Mufflerp. 945
Oil Pipep. 945
Turbochargerp. 946
+HEATING, VENTILATION, AIR CONDITIONINGp. 947
+AIR CONDITIONING SYSTEM FLOWp. 950
Principalsp. 950
Chartp. 951
+COMPONENTSp. 953
+SAFETYp. 957
+REGULAR MAINTENANCEp. 959
Filter Elements Removal And Installationp. 959
Compressor Drive Belt Inspectionp. 960
Cleaning The Condenserp. 961
+BASIC TROUBLESHOOTINGp. 963
Poor A/C Performancep. 963
Cleaning The A/C Evaporator Coil & Heater Coilp. 964
Compressor Drive Belt Inspectionp. 964
Checking The Electrical Systemp. 965
Engine Coolant By-Passing The Heater Valvep. 973
Heater Valve Not Opening Or Closingp. 974
+GENERAL AIR CONDITIONING SERVICE GUIDELINESp. 975
Compressor Oilp. 975
Compressor Oil Checkp. 976
Component Replacement And Refrigeration Leaksp. 977
+SYSTEM TROUBLESHOOTING CHARTp. 979
Gauge Pressure Related Troubleshootingp. 980
Troubleshooting Treep. 982
+TEMPERATURE/PRESSUREp. 987
+AIR CONDITIONING SERVICEp. 989
+SYSTEM CHARGING AND RECLAMATIONp. 991
Reclamation Procedurep. 991
Charging Procedure With A Manifold Gauge Setp. 993
Charging Procedurep. 994
+COMPRESSORp. 997
Removal And Installationp. 997
Compressor Clutch Disassemblyp. 998
+CONDENSERp. 1003
Removal And Installationp. 1003
+RECEIVER/DRIERp. 1005
Removal And Installationp. 1005
+PRESSURE RELIEF VALVEp. 1007
Removal And Installationp. 1007
+PRESSURE SWITCHp. 1009
Removal And Installationp. 1009
+EVAPORATOR/HEATER UNITp. 1011
Removal And Installationp. 1011
Disassembly And Assemblyp. 1012
+THERMOSTATp. 1013
Removal And Installationp. 1013
+EXPANSION VALVEp. 1015
Removal And Installationp. 1015
+EVAPORATORp. 1017
Removal And Installationp. 1017
+HEATER COILp. 1019
Removal And Installation With A/Cp. 1019
Removal And Installation Without A/Cp. 1020
+BLOWER FANp. 1021
Removal And Installationp. 1021
Disassembly And Assemblyp. 1022
Wire Connector Removal and Installationp. 1024
+HEATER VALVEp. 1027
Removal and Installationp. 1027
Disassembly And Assemblyp. 1028
+SPECIFICATIONSp. 1031
+LOADER SPECIFICATIONS (T250)p. 1033
Machine Dimensionsp. 1033
Performancep. 1034
Controlsp. 1034
Enginep. 1034
Hydraulic Systemp. 1035
Electricalp. 1036
Drive Systemp. 1036
Capacitiesp. 1036
Tracksp. 1036
+ENGINE SPECIFICATIONSp. 1037
Generalp. 1037
Fuel Systemp. 1037
Valve And Valve Timingp. 1037
Valve Springp. 1038
Piston And Piston Ringp. 1038
Connecting Rodp. 1038
Cylinder Headp. 1039
Crankshaftp. 1039
Cylinder Borep. 1039
Oil Pumpp. 1039
Rocker Armp. 1040
Tappetp. 1040
Camshaftp. 1040
Thermostatp. 1040
Timing Gearp. 1041
Intake Air Heaterp. 1041
Turbocharger Compressor Shaftp. 1041
+TORQUE SPECIFICATIONS FOR BOLTSp. 1043
Torque For General SAE Boltsp. 1043
Torque For General Metric Boltsp. 1044
Torque For Kubota Metric Engine Boltsp. 1045
Tightening Torques For General Use Screws, Bolts And Nutsp. 1045
+HYDRAULIC CONNECTION SPECIFICATIONSp. 1047
O-ring Face Seal Connectionp. 1047
Straight Thread O-ring Fittingp. 1048
Tubelines And Hosesp. 1048
Flare Fittingp. 1048
O-ring Flare Fittingp. 1049
Port Seal Fittingp. 1051
+HYDRAULIC FLUID SPECIFICATIONSp. 1053
+CONVERSIONSp. 1055
Decimal And Millimeter Equivalentsp. 1055
+SMRp. 1057
T250-1p. 1057
T250-2p. 1059
T250-3p. 1061
T250-4p. 1063
T250-5p. 1065
Instant PDF Delivery – No Shipping, No Waiting
This Bobcat T250 service manual is delivered as a PDF file immediately after payment. There is no physical book to ship and no waiting for delivery. You can download it to your computer, tablet or smartphone, and print the pages you need for the shop. The PDF format lets you keep the entire manual on hand for quick reference, whether you are in the field or at the bench.
With 1066 pages of repair and maintenance information, this is one of the most complete service references you can get for the T250. It covers the engine, hydraulics, hydrostatic drive, electrical system, main frame, HVAC and full specifications, so you can diagnose, repair and maintain your machine with confidence.
Reviews
There are no reviews yet.