Description
File Details
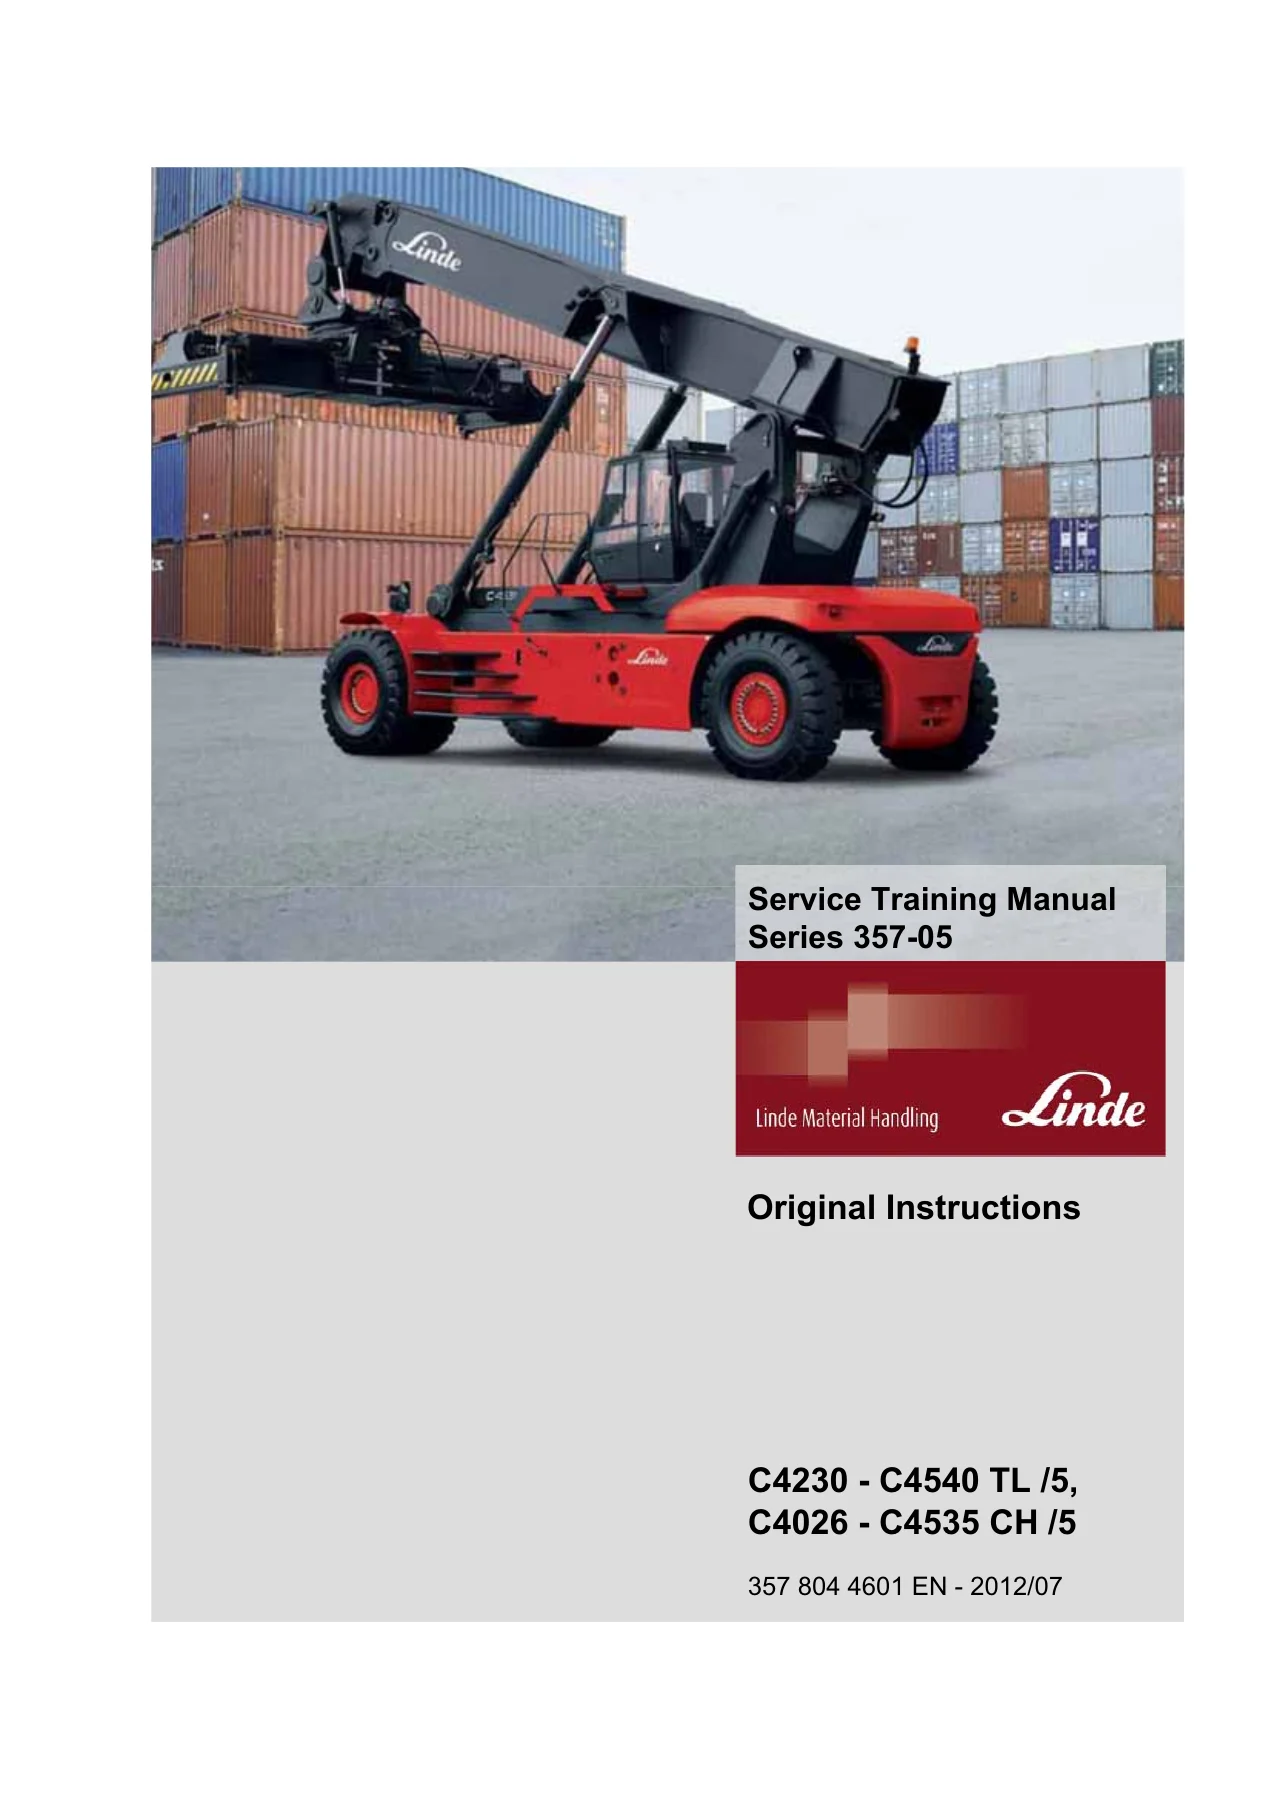
- Manual Type: Service Training Manual
- Brand: Linde
- Models Covered: C4230-C4540 TL/5, C4026-C4535 CH/5
- Document Number: 357 804 4601 EN
- Edition/Date: 2012/07
- Language: English
- File Format: PDF
Chapters Covered
This Linde Reach Stacker Service Training Manual is organised into ten major sections, each addressing a critical system or assembly of the C4230-C4540 TL/5 and C4026-C4535 CH/5 machines:
- Motor – Engine identification and technical data, ambient air pressure sensor, coolant level and temperature sensors, engine position sensor, oil pressure/temperature sensor, injectors, intake manifold sensors, water-in-fuel sensor, electrical specifications, sensor specifications, QSM11 fault code information
- Drivetrain – Dana TE27 and TE32 transmission, APC 200 controller operation and diagnostics, alarm and warning codes, transmission calibration, stall testing, pressure checks, control valve replacement, drive axle D101 and D102 series, wheel removal and fitting procedures, lubrication intervals, tightening torques
- Chassis – Cabin glass repair and replacement, undercarriage, truck body, chassis assembly
- Undercarriage – Steering system, steer axle type L102 removal and installation, stub axle repair, steering cylinder sealing, steering stops adjustment, hydraulic load sensing steering system, Danfoss steer hand pump OSPB 200 LS
- Controls – Parking brake WABCO-SAHR disc brake type 340 description, brake application, service brake layout and operation, brake pads removal and installation, caliper removal and hydraulic seals replacement, braking system circuit diagrams, brake charge valve adjustment, fault finding, Safim accumulator charging valve, wet multiple disc brake construction
- Electrics/Electronics – Cummins QSM Tier3 management system, IQAN control system calibrations, MDL display navigation, sensor adjustment, electrical schematic diagrams
- Hydraulics – 357-05 hydraulic system description, spreader operation, overload protection, load sensing systems, working hydraulics, HPR 105 variable piston pump, Linde directional valve block VT 4/3, hydraulic pressure settings, main pressure limit valve setting, pilot pressure system
- Load Lift System – Spreader removal and installation, boom inner replacement, boom inner removal and re-assembly, spreader model 817, spreader repairs, twistlock servicing, beam extension cylinders, sideshift cylinder, levelling cylinder, slewing gear adjustment
- Special Equipment and Accessories
- Circuit Diagrams
Across these chapters the manual delivers the complete service training content a technician needs to understand, diagnose and repair the major systems of these Linde reach stackers. From the Cummins QSM11 engine and its electronic control module through the Dana TE27/TE32 powershift transmission, the D101/D102 drive axles, the load sensing steering and working hydraulics, the WABCO-SAHR parking brake and the Elme spreader systems, every major assembly is covered with procedures, specifications, pressure settings and diagnostic routines.
What This Manual Enables You To Do
This service training manual gives you the detailed knowledge and step-by-step procedures to carry out complex repairs and diagnostics on the Linde C4230-C4540 TL/5 and C4026-C4535 CH/5 reach stackers. You can interpret APC 200 transmission fault codes, perform stall tests and pressure checks on the Dana TE27/TE32, calibrate clutch touch pressures, remove and refit injectors on the Cummins QSM11, replace drive axle hub components, service the WABCO-SAHR parking brake, adjust the Danfoss flow amplifier steering pressures, set the Linde HPR 105 pump delta pressures, troubleshoot the IQAN control system, and repair the Elme spreader twistlocks, extension cylinders and slewing gear.
Because this is the same material Linde uses to train its own service technicians, the procedures are written with a level of detail and clarity that generic repair guides cannot match. Torque values, pressure settings, clearance limits and adjustment sequences are given as precise figures. Wiring schematics and hydraulic circuit diagrams are included for systematic fault tracing. The fault code tables for the Cummins QSM11 and the APC 200 transmission give you the diagnostic direction to identify problems quickly and accurately.
Why This Manual Matters
Working on heavy lift equipment without the correct procedures and specifications risks damage to expensive components, unsafe operating conditions and costly downtime. The pressure settings for the load sensing hydraulic system, the clutch calibration values for the Dana transmission and the torque specifications for the drive axle all have narrow tolerances. Using the wrong figure or skipping a step in a sequence can lead to premature failure or a machine that does not perform as designed. This manual eliminates that risk by giving you the exact values and the correct method every time.
Complete PDF Bookmark Tree
Complete Bookmarks
The complete bookmarks in the βLinde C4230-C4540 TL-5 C4026-C4535 CH-5 Reach Stacker Service Training Manual 357 804 4601β are as follows:
+Engine identificationp. 11
+Technical Datap. 11
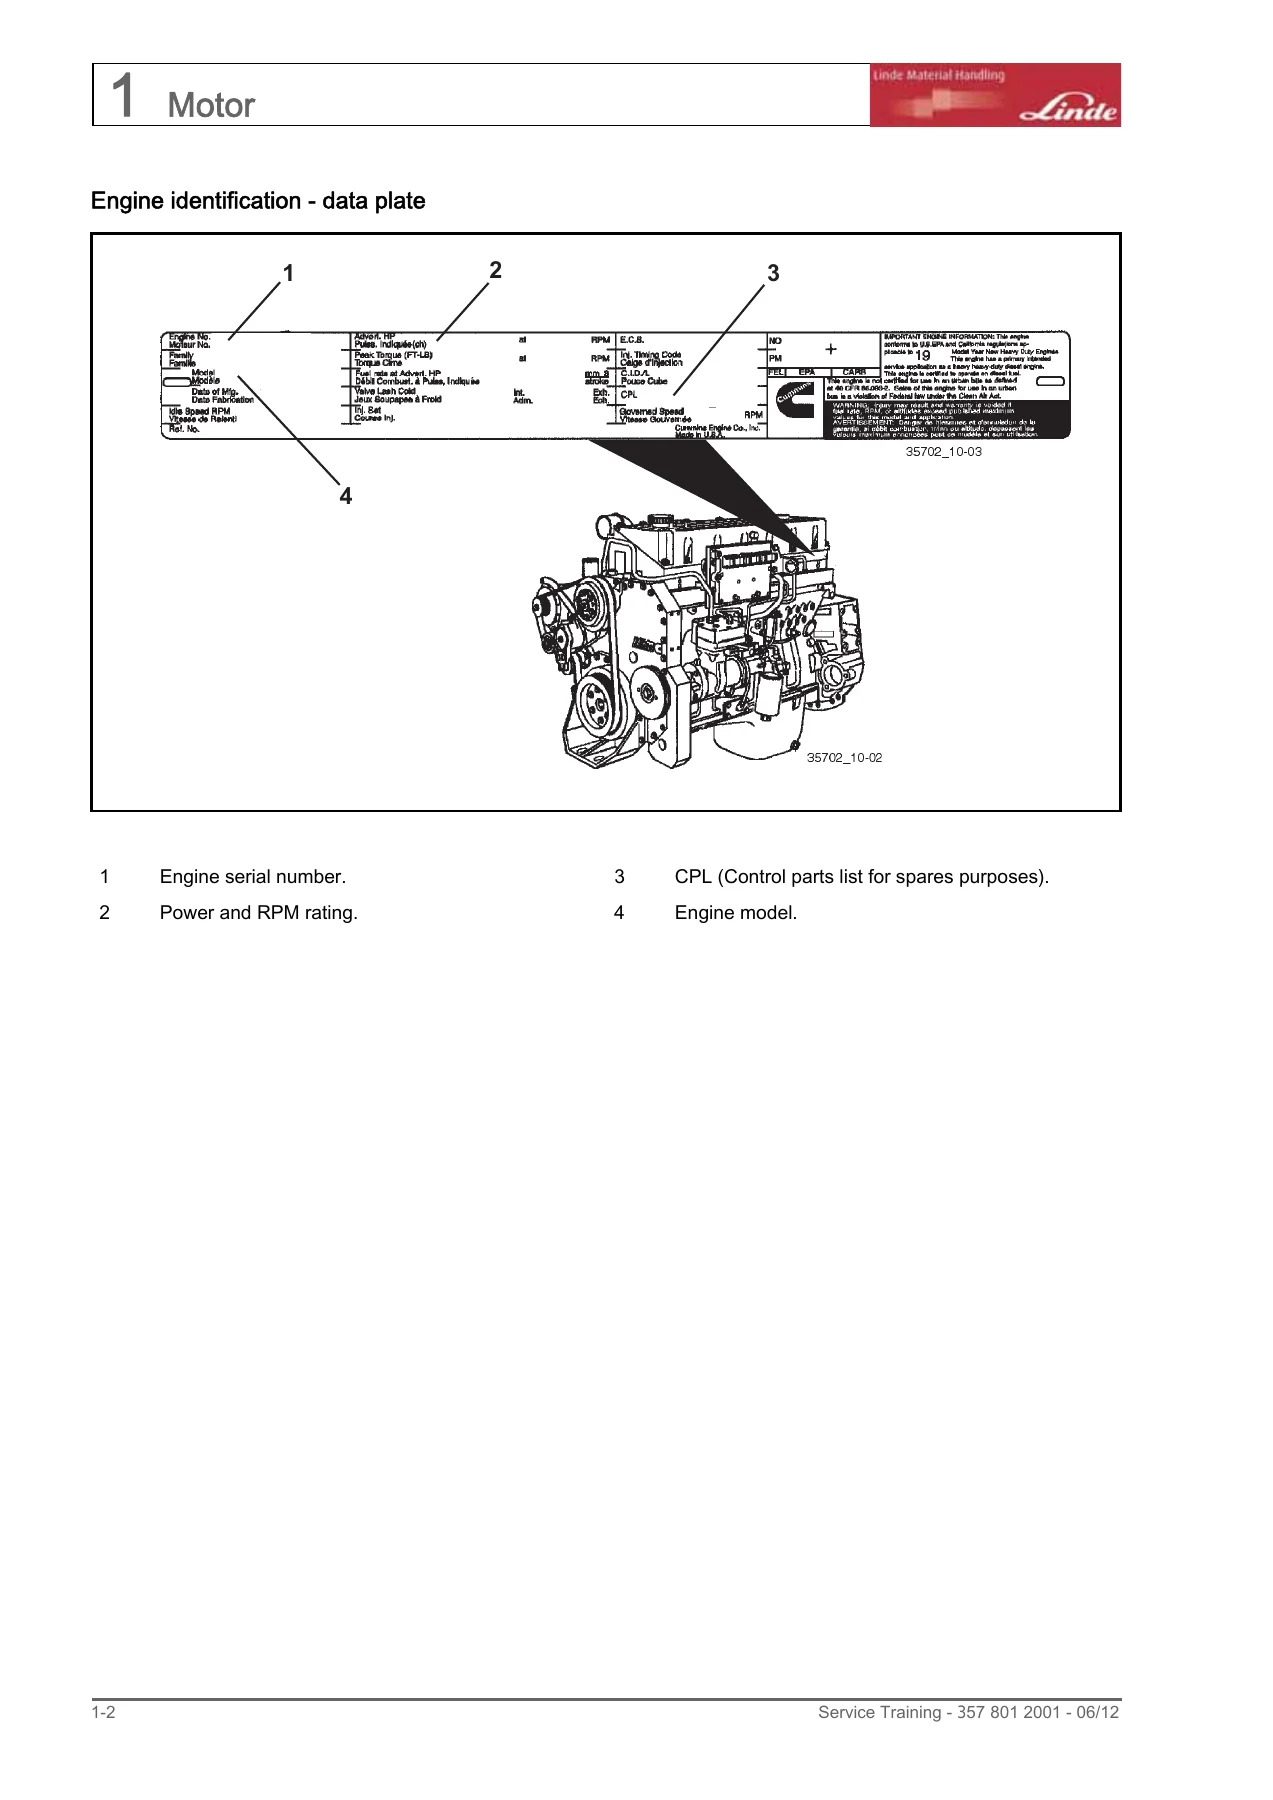
Engine identification – data platep. 12
Fuel system and Functionp. 13
Fuel system layoutp. 13
Fuel system componentryp. 14
Fuel filter and water trapp. 14
Fuel charge pump and solenoidp. 14
Fuel charge pump and solenoidp. 15
Testing the charge pump and solenoidp. 16
Flow testp. 16
Pressure testp. 16
Leakage testp. 16
Testing the fuel solenoidp. 17
Inspecting the charge pumpp. 17
Removing the charge pumpp. 17
Priming the charge pumpp. 18
Fuel injectorsp. 18
Fuel injector operationp. 19
Fuel injector removalp. 20
Adjusting the valves and injectorsp. 21
Engine cooling systemp. 22
Replacing the water filterp. 23
Removing and inspecting the thermostatp. 23
Removing the water pumpp. 24
Removal of the pulley beltp. 24
Oil filter replacementp. 24
Electrical systemp. 25
Engine sensor positions & diagnosticsp. 26
+Ambient air pressure sensorp. 26
+Check the ECM ambient air pressure sensor supply voltagep. 26
Conditionp. 26
Actionp. 26
OKp. 26
NOT OKp. 26
+If the sensor voltage supply is not correct to the voltage test in last step, measure voltage supply at the ECM connectorp. 27
Conditionp. 27
Actionp. 27
OKp. 27
NOT OKp. 27
+Check the ECM ambient air pressure sensor signal voltagep. 27
Conditionp. 27
Actionp. 27
OKp. 27
NOT OKp. 27
Coolant level switchp. 28
+Coolant temperature sensorp. 28
+Check the resistance of the coolant temperature sensorp. 29
Conditionp. 29
Actionp. 29
OKp. 29
NOT OKp. 29
+Inspect the sensor harness and the ECM connector pinsp. 30
Conditionp. 30
Actionp. 30
OKp. 30
NOT OKp. 30
+Check sensor harness for a short circuit from pin to pinp. 30
Conditionp. 30
Actionp. 30
OKp. 30
NOT OKp. 30
+Engine position sensorp. 31
+Check the resistance of the engine speed sensorp. 31
Conditionp. 31
Actionp. 31
OKp. 31
NOT OKp. 31
+Engine oil pressure / temperature sensorp. 32
+Check the resistance of the oil pressure / temperature sensorp. 32
Conditionp. 32
Actionp. 32
OKp. 32
NOT OKp. 32
+Inspect the sensor harness and the ECM connector pinsp. 33
Conditionp. 33
Actionp. 33
OKp. 33
NOT OKp. 33
+Check sensor harness for a short circuit from pin to pinp. 34
Conditionp. 34
Actionp. 34
OKp. 34
NOT OKp. 34
+Injectorsp. 35
+Check resistance of the injector solenoidsp. 35
Conditionp. 35
Actionp. 35
OKp. 35
NOT OKp. 35
+Inspect the actuator harness, pass-through connector, and ECM connector pinsp. 36
Conditionp. 36
Actionp. 36
OKp. 36
NOT OKp. 36
+Check external actuator harness for a short circuit from pin to pinp. 37
Conditionp. 37
Actionp. 37
OKp. 37
NOT OKp. 37
+Intake manifold temperature sensorp. 38
+Check the resistance of the intake manifold temperature sensorp. 38
Conditionp. 38
Actionp. 38
OKp. 38
NOT OKp. 38
+Inspect the intake manifold temperature sensor and the sensor harness connector pinsp. 39
Conditionp. 39
Actionp. 39
OKp. 39
NOT OKp. 39
+Check sensor harness for a short circuit from pin to pinp. 40
Conditionp. 40
Actionp. 40
OKp. 40
NOT OKp. 40
+Intake manifold pressure sensorp. 41
+Check the ECM intake manifold pressure sensor voltage supplyp. 41
Conditionp. 41
Actionp. 41
OKp. 41
NOT OKp. 41
+If the sensor voltage supply is not correct to the voltage test in last step, measure voltage supply at the ECM connectorp. 42
Conditionp. 42
Actionp. 42
OKp. 42
NOT OKp. 42
+Check the ECM intake manifold pressure sensor signal voltagep. 42
Conditionp. 42
Actionp. 42
OKp. 42
NOT OKp. 42
+Water-in-fuel (WIF) sensorp. 43
+Check the sensor voltage supplyp. 43
Conditionp. 43
Actionp. 43
OKp. 43
NOT OKp. 43
+If the sensor voltage supply is not correct to the voltage test in last step, measure voltage supply at the ECM connectorp. 44
Conditionp. 44
Actionp. 44
OKp. 44
NOT OKp. 44
+Check sensor harness for a short circuit from pin to pinp. 44
Conditionp. 44
Actionp. 44
OKp. 44
NOT OKp. 44
+Electrical specificationsp. 45
DATALINKp. 45
J1939 BACKBONE RESISTANCEp. 45
ALL CONTINUITY CHECKSp. 45
ALL SHORTS TO GROUNDp. 45
5 V POWER SUPPLY (Sensor Only) @ECM/Harnessp. 45
SOLENOIDSp. 45
ECM CONNECTORp. 45
INJECTORp. 45
SHORT CIRCUIT TO EXTERN AL VOLTAGEp. 45
+Sensor Specificationsp. 46
VEHICLE SPEED SENSORp. 47
ENGINE POSITION SENSORp. 47
+DANA TE27 & TE32 Transmissionp. 58
+The APC 200p. 59
The Transmission Information-Diagnostic is a part of the APC200 programming.p. 59
Accessing the APC200 information menu systemp. 60
The Dana Alarm and Warning Codesp. 64
How the system indicates an Alarm / Error Codep. 65
Problems during Calibrationp. 83
Failure codes during calibrationp. 83
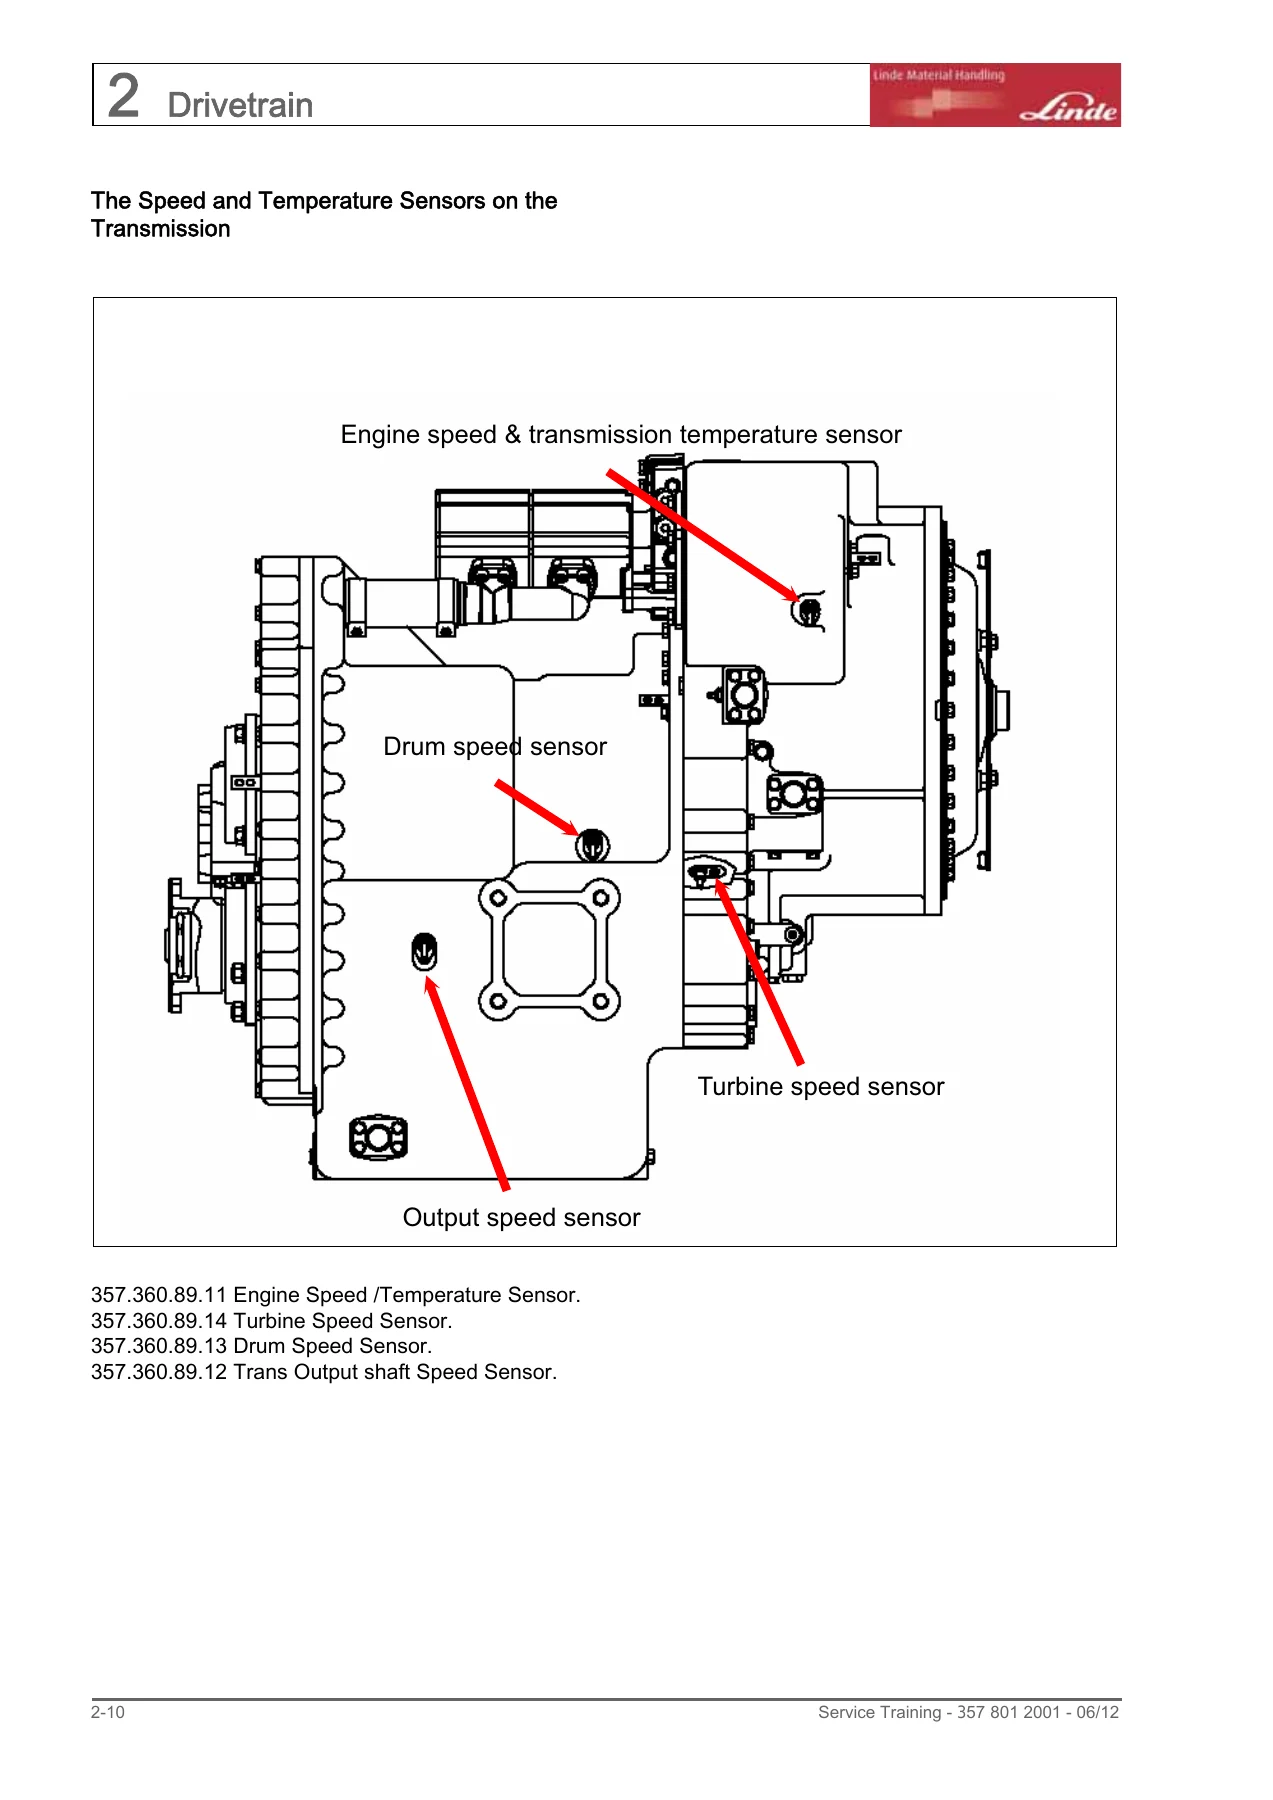
The Speed and Temperature Sensors on the Transmissionp. 84
+The Solenoid Valve arrangement on the Dana TE27 β TE 32p. 85
Dana 4502926 24 Volt Linde Part Number 357 360 63 00.p. 86
Dana 4503764 12 Volt Linde Part Number 357 360 63 01.p. 86
The Solenoid valve arrangementp. 87
The most common Dana Alarm Codesp. 88
+The most common Dana Alarm Codesp. 90
Before the change of a Solenoid valve, check the cables and connectors.p. 90
+The most common Dana Alarm Codesp. 91
Before the change of a Solenoid valve, check the cables and connectors.p. 91
+The most common Dana Alarm Codesp. 92
Before the change of a Solenoid valve, check the cables and connectors.p. 92
+The most common Dana Alarm Codesp. 93
Before the change of a Solenoid valve, check the cables and connectors.p. 93
+Self diagnostic functions APC200 controllerp. 94
Wiring connections:p. 98
Wiring connections:p. 102
STP= switched to plus; STG= switched to ground; VFS= variable force solenoid).p. 104
Transmission Calibrationp. 106
How to do the Auto Calibrationp. 107
How to use the calibration mode to heat up the transmissionp. 108
Pressure Checkpoints on the ECM Control valve for the TE27Transmissionp. 109
Procedure to replace TE 27 transmission control valve.p. 110
+Procedure to replace TE 27 transmission control valve.p. 111
How to Perform a Stall Test on a TE 27 Transmissionp. 112
+TIGHTENING TORQUESp. 116
TORQUE SPECIFICATIONS FOR LUBRICATED OR PLATED SCREW THREADSp. 116
ELASTIC STOP NUT TORQUEp. 117
TORQUE TABLES FOR O-RING PLUGSp. 117
TORQUE TABLE FOR PIPE PLUGSp. 117
PRESSURE & TEMPERATURE SPECIFICATIONSp. 117
ELECTRICAL SPECIFICATIONSp. 118
HYDRAULIC COOLER LINES SPECIFICATIONS.p. 118
EXTERNAL PLUMBINGp. 119
Cooler & filter lines specificationsp. 119
Neutral Selectedp. 120
Forward 1st speedp. 121
Transmission pressure checksp. 129
Mechanical and electrical checksp. 129
Hydraulic checksp. 129
Controller (APC200): Please refer to functional description.p. 129
TROUBLESHOOTING GUIDEp. 130
+Refer (o the following troubleshooting guide for the diagnosis of typical transmission troubles.p. 130
Low clutch pressurep. 130
Low charging pump output flowp. 130
Overheatingp. 130
Noisy converterp. 130
Lack of powerp. 130
CHECKPOINTSp. 131
Safety precautionsp. 138
Cleaning, inspection and legend symbolsp. 139
Technical specificationsp. 141
Maintenancep. 147
Installation detailsp. 154
Troubleshooting guidep. 185
Sectional views & parts identificationp. 195
Assembly instructionsp. 226
Special toolsp. 231
D 101 and 102 series drive axlep. 259
Important remarksp. 266
+Procedures for wheel removal – Drive axlep. 267
Removing an outer drive wheelp. 268
Removing an inner drive wheelp. 270
+Procedures for wheel removal – Steer axlep. 272
Removing a steer wheelp. 273
Rim wheel component inspectionp. 275
+Procedures for wheel fitting – Drive axlep. 276
Mounting an inner drive wheelp. 276
Mounting an outer drive wheelp. 278
+Procedures for wheel fitting – Steer axlep. 281
Mounting the steer axle wheelp. 281
Wheel fastener torque setting tablep. 283
Examples of restraining devicep. 284
Lubrication intervals and maintenance instructionsp. 286
General Instructions for correct assembly and disassemblyp. 292
Assembly drive assemblyp. 304
Assembly hub assemblyp. 311
Assembly planetary gear drivep. 328
Assembly service brakep. 334
+Assembly parking brakep. 341
+Hydraulic tank assemblyp. 343
Repairing the cabin glass panep. 345
Repairing the cabin window pane (glass-to- glass)p. 346
Repairing the cabin window pane with aluminium frame (sliding window)p. 347
Repairing the roof window without frame or channelsp. 348
Undercarriagep. 349
+Truck Bodyp. 349
+Steering systemp. 351
Steer axle type L 102p. 351
Removing and installing the steer axlep. 352
Repairing the steer axle – to 09/99p. 354
Renewing the wheel bearingsp. 354
Adjusting the wheel bearingsp. 355
+Stub axle – to 09/99p. 356
Removing the stub axle – to 09/99p. 357
Installing the stub axle – to 09/99p. 357
Renewing the wheel bearings – from 09/99p. 358
+Adjusting the wheel bearings – from 09/99p. 359
Stub axle – from 09/99p. 360
Removing the stub axle – from 09/99p. 361
+Installing the stub axle – from 09/99p. 361
Removing and installing the steering cylinderp. 362
Sealing the steering cylinderp. 363
Changing the steering cylinder sealsp. 363
+Changing the steering cylinder seals – vaggeryds cylindersp. 364
Adjusting the steering stopsp. 367
Checking the steering stopsp. 367
Adjusting the inner steering stopsp. 368
Checking the steering stopsp. 368
+Hydraulic load sensing steering systemp. 369
Steering hydraulics circuit diagramp. 370
Hydraulic Power Steeringp. 374
Flow amplifier valvep. 376
Flow amplifier valve, pressure settingp. 378
+Troubleshooting the osqa flow amplifierp. 382
Danfoss steer hand pump type OSPB 200 LSp. 383
Danfoss steer hand pump, operationp. 383
Danfoss steer hand pump, assembly timingp. 383
Danfoss steer hand pump, troubleshootingp. 384
+Parking brake – descriptionp. 387
Descriptionp. 388
Brake applicationp. 388
Service brake layout and operationp. 389
Parking brake WABCO-SAHR disc brake type 340 – anchor platep. 390
Parking brake WABCO-SAHR disc brake type 340 – brake caliper – mountp. 392
Parking brake WABCO-SAHR disc brake type 340 βp. 393
Typep. 394
Adjusting screwp. 394
Clearance Minp. 394
+Clearance Maxp. 394
FSG90p. 394
8 mm allen keyp. 394
0.5p. 394
1.5p. 394
FSG110p. 394
10 mm allen keyp. 394
0.5p. 394
1.5p. 394
+Emergency release of parking brakep. 394
Removal and replacement of brake padsp. 395
Caliper removal and replacement of hydraulic sealsp. 397
Parking brake WABCO-SAHR disc brake type 340-assemblep. 402
Parking brake WABCO-SAHR disc brake type 340 – disassemblep. 402
Parking brake WABCO-SAHR disc brake type 340-p. 403
Parking brake WABCO-SAHR disc brake type 340 – brake applicationp. 404
Parking brake WABCO-SAHR disc brake type 340 – installationp. 404
Parking brake WABCO-SAHR disc brake type 340 – alternative installationp. 404
Parking brake WABCO-SAHR disc brake type 340 – release (Emergency cases)p. 405
Parking brake WABCO-SAHR disc brake type 340 – Assemblep. 406
Parking brake WABCO-SAHR disc brake type 340 – brake pads – removalp. 412
Parking brake WABCO-SAHR disc brake type 340 – brake pads – installationp. 413
+Braking systemp. 414
Braking system circuit diagramp. 414
Description of operationp. 414
+Brake pressure systemp. 416
Braking system circuit diagram keyp. 417
Description of operation of the hydraulic braking systemp. 417
Braking system circuit diagramp. 418
Brake system cooling and flushingp. 419
Pressure measurementsp. 420
Measuring the system pressurep. 420
To measure the system and handbrake pressurep. 420
Measuring the service brake pressurep. 420
+Equipment required for pressure testingp. 421
Adjustment of the brake charge valvep. 423
Adjusting the recharge pressurep. 423
+Adjusting the maximum pressurep. 423
Adjustment of the service brakep. 424
Adjustment of the brake pressurep. 424
Adjustment of the pedal anglep. 424
Fault findingp. 425
Safim accumulator charging valve ref. 111448/A3 spare parts listp. 426
+Safim accumulator charging valve ref. 111448/A3 instructions for disassemblingp. 427
Control operations pos. 1p. 427
Control operations pos. 2p. 427
+Safim accumulator charging valve ref. 111448/A3 trouble shootingp. 428
Parking brake valvep. 428
Accumulator charging valvep. 430
Safim accumulator charging valve ref. 111448/A3 service programp. 431
+Safim accumulator charging valve ref. 111448/A3 _adjustmentp. 432
Regulation of twin-screw accumulator charging valve Series 11000p. 432
Checking accumulator efficiencyp. 432
Adjusting pressure switchesp. 433
Safim accumulator charging valve ref. 111448/A3 installationp. 434
+Safim accumulator charging valve ref. 111448/A3 descriptionsp. 435
Connectionp. 435
Installation requirementsp. 435
Identification platep. 435
Accumulator charging valve with solenoid valvep. 437
+Construction of the wet multiple disc brakep. 438
Checking the lining wearp. 439
Installation of the piston cupsp. 440
Fitting o-ring and back-up ringp. 440
Installation of the omegat seal setp. 440
Installation of the piston into the brake anchor platep. 441
Checking the air gapp. 442
Leakage test specification for the hydraulic braking systemp. 443
Checking the hydraulic braking system for tightnessp. 443
Checking the cooling oil compartment for tightnessp. 443
Final assemblyp. 444
Aligning the brake platesp. 444
Parking brakep. 445
Mechanical floating caliper disc brakep. 446
Parking brake assemblyp. 447
Replacement of the brake padp. 448
General informationp. 448
Sequence of operations when changing brake padsp. 448
Installation and adjustmentp. 448
Alternative procedurep. 448
Emergency releasep. 448
Instructions for assembly of the disc brakep. 449
Brake discp. 452
+IQAN Control System Calibrationsp. 454
The Safety computer system on the 357/05 Reachstackerp. 454
How to change the Language, Time and Datep. 457
+Driver Adjustmentsp. 459
Service Display First Level Accessp. 460
Service Display Second Level Accessp. 462
How to adjust a Sensor, e.g. The Boom Length Sensor 1&2p. 463
Using the measure function on the MDL Displayp. 465
How to request a password from the Public Access key:p. 467
+357-05 Hydraulic system descriptionp. 489
357-05 Hydraulic system, operationp. 490
Operation of the pilot systemp. 490
Operation of the oil cooling systemp. 490
Operation of the load sensing systemp. 491
Operation of lift / lowerp. 491
Operation of the spreader function and motorised cab valvep. 491
+357-05 Spreader, operationp. 493
Operation of sideshiftp. 493
Operation of twist locksp. 493
Operation of beam extend and retractp. 493
Operation of optional lock cylindersp. 493
Operation of the damping cylindersp. 493
Operation of the beam rotate motorp. 493
+Key to spreader hydraulic system diagramp. 494
Overload protection and Spreader safetyp. 496
Spreader safetyp. 496
+Overload Protectionp. 497
Glossary of Termsp. 498
The advantage of Load Sensing systemsp. 499
Working hydraulicp. 501
Working hydraulicp. 503
+Function description HPR 105p. 504
Variable piston pump HPR 105p. 505
Linde Directional Valve block VT 4/3p. 506
Function of the Systemp. 507
+Regeneration valves for Lift, Extensionp. 513
Hydraulic pressure settings of 357-05 Reach Stackerp. 514
Test points & oil pressure adjusters on main valve block VT 4/3p. 514
Test points & oil pressure adjusters on HPR 105 (hydraulic piston regulator) pump and DANFOSS flow control valve (steering valve)p. 515
Delta Ap pressure setting of LEFT HAND side hydraulic pumpp. 516
Delta Ap pressure setting of RIGHT HAND side hydraulic pumpp. 517
+VD3 pressure setting on RIGHT HAND side pumpp. 518
Main pressure limit valve setting on Linde valve VT 4/3p. 519
Pilot pressure systemp. 520
Pilot pressure system operationp. 521
Pilot pressure system settingp. 522
Pilot reduction valve settings on lift and extension cylinderp. 523
+Spreaderp. 526
Spreader – removalp. 526
+Support equipmentp. 527
Tool refp. 527
Descriptionp. 527
Part numberp. 527
Quantityp. 527
3p. 527
25 tonne cranep. 527
–p. 527
1p. 527
3ap. 527
16 tonne Forkliftp. 527
1p. 527
4p. 527
'D' shackles x 10 tonne SWLp. 527
–p. 527
8p. 527
5p. 527
Lifting chains x 10 tonne SWL X 6 metres longp. 527
–p. 527
4p. 527
6p. 527
Male capp. 527
Part of (0019524001)p. 527
2p. 527
7p. 527
Male capp. 527
0009524045p. 527
2p. 527
8p. 527
Plugp. 527
0019527000 (part of 0019524001)p. 527
4p. 527
9p. 527
Nutp. 527
Part of (0019524001)p. 527
4p. 527
10p. 527
Plugp. 527
0009527014p. 527
2p. 527
11p. 527
Nutp. 527
0009520120p. 527
2p. 527
+Boom innerp. 535
Boom inner replacement – preparationp. 535
+Support equipmentp. 535
Tool refp. 535
Descriptionp. 535
Part numberp. 535
Quantityp. 535
1p. 535
Forklift 6 tonne capacity at 600 mm load centrep. 535
–p. 535
+1p. 535
+Support equipmentp. 544
Tool refp. 544
Descriptionp. 544
Part numberp. 544
Quantityp. 544
Forklift with at least 6p. 544
tonne capacity at 600p. 544
mm load centre and a lift height of at least 4 metres.p. 544
3p. 544
1p. 544
Forklift with 15 tonnep. 544
capacity at 600 mm load centre and a lift height of at least 4 metres.p. 544
4p. 544
–p. 544
1p. 544
5p. 544
Chain 6 tonne capacityp. 544
–p. 544
+2p. 544
Boom inner re-assemblyp. 551
Table 1p. 552
Xp. 552
Yp. 552
+kgp. 552
42 tonnep. 552
3980p. 552
290p. 552
4454p. 552
45 tonnep. 552
4069p. 552
299p. 552
4797p. 552
+Sliding bearingsp. 556
Operation and constructionp. 558
Technical data and schematic diagramsp. 560
Operating and performance datap. 560
Spreader removalp. 561
Spreader assemblyp. 562
Spreader repairsp. 563
Sliding bearingsp. 563
Repairing the twistlocksp. 564
Twistlock removalp. 565
Twistlock inspectionp. 566
Beam extension cylindersp. 567
Sideshift cylinderp. 569
Levelling cylinderp. 570
SLEWING GEARp. 572
+Spreaderp. 574
USER INSTRUCTIONp. 576
SERVICE MANUALp. 578
DIAGRAMSp. 599
Instant PDF Delivery
Your purchase gives you immediate access to the complete Linde C4230-C4540 TL-5 C4026-C4535 CH-5 service training manual as a PDF download. There is no shipping, no waiting for a physical book and no restriction on where you use it. The file works on any laptop, tablet or smartphone, and you can print the pages you need for the workshop. Whether you are a professional technician, a fleet maintenance manager or an operator who wants to understand your machine in depth, this manual puts the full service training content at your fingertips.
Reviews
There are no reviews yet.