Description
Manitou MT 1440 and MT 1840 Telehandler Service Manual
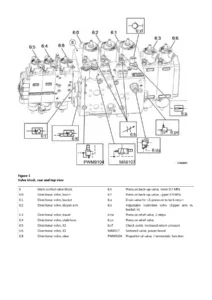
This is the complete Manitou service manual for the MT 1440 and MT 1840 telehandler range. Document number 647793EN-USM134(A-03/2021), it covers all eight Stage V variants of these two lift trucks across European Union, North American and Australian specifications. The Manitou MT 1440 MT 1840 Telehandler Service Manual 2021 – 75D 100D ST5 PDF Repair Guide is a full workshop reference running 678 pages, dealing with every major system on the machine from the engine and hydrostatic transmission through to the triplex and quadruplex boom assemblies, the hydraulic circuit and the complete electrical architecture.
File Details
- Manual type: Service Manual / Workshop Repair Manual
- Brand: Manitou
- Model range: MT 1440 and MT 1840 telehandlers
- Document number: 647793EN-USM134(A-03/2021)
- Edition / date: A-03/2021
- Language: English
- Region: European Union, North America and Australia
- Page count: 678 pages
- File format: PDF
Chapters Covered
The manual is organised by numbered group, each one self-contained with its own specifications, diagrams and removal procedures.
- 00. General and Safety Characteristics β foreword, abbreviations, warranty-period work, maintenance position, symbol explanations, maintenance rules, supplier documentation, weights and forces, lubricants and fuels, dimensions, name plate locations, standard tightening torques, metric/imperial conversion
- 10. Engine β fan control and reversal (HA versions), intake system and EGR, lubrication system, cooling system, fuel system, 75D and 100D component locations, control and adjustment, exhaust assembly tightening torques, DEF pump cleaning, removal and refit, troubleshooting, fault table, specific tooling
- 20. Transmission β mechanical transmission kinematic chain, hydrostatic transmission (HA versions), diagrams and schematics, component locations, tightening torques, pressure connector adjustment, hydrostatic pump boost pressure, mechanical zero, regulation start, HP relief valves, motor adjustment, removal, troubleshooting
- 30. Axle β supplier documentation, bleeding the axle locking cylinder, adjusting the axle stops when installing wider tires
- 40. Brake β master cylinder specifications, service brake specifications, parking brake specifications, mechanical and hydrostatic transmission schematics, service brake component location, control and adjustment, service brake pedal stop, bleeding the service brake circuit, parking brake adjustment, putting the truck in freewheel, removal
- 50. Lift Structure β triplex boom MT 14, quadruplex boom MT 18, boom kinematics, component locations, boom pads and lubrication zones, chain wear checking, chain tension presets, control and adjustment of chain tensions, hose tension adjustment, triplex and quadruplex boom removal and refit, specific tooling
- 70. Hydraulics β list of hydraulic sheets, FP HP feed block, accumulators, 9-component distributors, 4-component electro-proportional distributor PVG100/32, 3-component deflector distributor, brake master cylinder, cooling engines, hydraulic pumps, steering, safety valves, discharge valves, compensating isolation valve, flow rate control valve, dynamic selection valve, ventilation cut-off, hydraulic diagrams for all eight variants, component locations, control and adjustment, pressure connector adjustment, removal, specific tooling
- 80. Electricity β fuses and relays (cab, engine hood 75D, engine hood 100D), ECU inputs/outputs, technical sheets for electrical components, CAN and LIN operating diagrams, coding examples, cable marking, position by diagram, full electrical diagrams for MT 100D, MT A 100D and MT HA 100D, component locations, control and adjustment, removal and refit, troubleshooting with DTC codes for main and auxiliary ECU, engine error codes, air conditioning error codes, specific tooling
- 85. Operator Station β air conditioning operation description, safety measures for handling R134a, schematic diagrams, HVAC component locations, automatic air conditioning location, condenser component, control and adjustment, evaporator temperature sensor check, tightening torques, removal and refit of dashboard trim, cab casings, air conditioning unit, cab, condenser, motor and electric window, troubleshooting
- 90. Chassis β counterweight tightening torque, removal of engine hood, 75D engine housing, 100D engine housing
- 110. Additional Equipment
- 120. Diagnostic Tools and Software β diagnostics case kit, USB Link 2 box, component diagnostics box
Across all of these groups the manual supplies the technician with the values, procedures and illustrations needed to actually work on the machine rather than just read around it. Tightening torques are given in N.m with imperial equivalents alongside, pressure connector values are tabulated with minimum and maximum thresholds, and adjustment procedures are broken down step by step. The hydraulic schematics cover the circuit in colour-coded detail β suction, boost, high pressure, low pressure, pilot, cooling, return and drainage lines are distinguished β and the electrical diagrams show connector pins, wire numbers, splice points and connector names so a fault can be traced from an ECU pin all the way to the component. The troubleshooting sections publish the DTC fault codes for the main SPU 40-26 ECU, the auxiliary SPU 25-15 / SPU 40-26 ECU and the engine ECU, so a diagnostic tool reading can be interpreted directly against the manual.
Covered Models
- MT 1440 EASY 75D ST5 S1
- MT 1440 100D ST5 S1
- MT 1440 A 100D ST5 S1
- MT 1440 HA 100D ST5 S1
- MT 1840 EASY 75D ST5 S1
- MT 1840 100D ST5 S1
- MT 1840 A 100D ST5 S1
- MT 1840 HA 100D ST5 S1
Engines and Drivelines Covered
The manual deals with both the 75D (55.4 kW / 75 hp) and 100D (74.4 kW / 101 hp) four-cylinder Stage V engines, 3621 cmΒ³, direct injection, turbocharged, managed electronically and using DOC, DPF and β on the 100D β SCR with DEF. Engine ECU pinouts for both versions are provided in the Electricity chapter. The transmission chapter separates the mechanical transmission used on non-HA versions (with the PSR gearbox and torque converter) from the hydrostatic transmission used on HA versions (A4VG 71-180 series 32 pump and A6VM series 71 motor), each with its own pressure connector layout, adjustment procedures and tightening torques. Axle type 212 is documented in the supplier documentation listing.
What This Manual Enables
With this service manual a technician can carry out the full range of workshop operations on an MT 1440 or MT 1840. Engine work includes removal of the exhaust line, radiator, hydraulic engine-fan assembly, starter, belt casing, attachment belt, air conditioning belt, alternator, fuel filter, air conditioning compressor and expansion tank, along with DEF pump cleaning and the exhaust assembly tightening torques. The transmission chapter covers mechanical and hydrostatic gearbox removal and the adjustment of the hydrostatic pump and motor. Brake work covers bleeding the service and parking brake circuits, adjusting the parking brake and putting the truck into freewheel for towing. The lift structure chapter supports the removal and refit of the triplex 14 m and quadruplex 18 m booms, telescope removal, chain wear checking and chain tension presets. The hydraulic chapter covers removal of the hydraulic oil tank and the main hydraulic distributors. Electrical work is supported by full connector pinouts, fuse and relay listings and DTC fault tables. The operator station chapter covers the HVAC system, cab removal and window lift motor replacement.
Correct procedures and correct specifications are what separate a repair that lasts from one that comes back. This manual gives the tightening torque for the counterweight at 950 N.m Β± 95 N.m, the boom foot pad clearance ranges, the master cylinder and service brake pressures, the hydrostatic pump HP relief valve setting of 508 bar, and dozens of other values that are specific to this machine and cannot be guessed. Where a component has a removal sequence β the boom telescope extraction, the DEF pump flush, the strain gage bonding and calibration β the manual walks through it in order, with the tooling and the intermediate measurements called out.
Complete PDF Bookmark Tree
Complete Bookmarks
The complete bookmarks in the βManitou MT 1440 MT 1840 Telehandler Service Manual 2021 – 75D 100D ST5 PDF Repair Guideβ are as follows:
Legal disclaimerp. 3
Forewordp. 13
List of Abbreviationsp. 13
Intervention during the warranty periodp. 15
Servicing positionp. 15
Explanation of symbolsp. 15
Servicing Rulesp. 16
Supplier documentation list ST5p. 19
+Characteristics and specificationsp. 19
Mass & stress ST5p. 19
Lubricants & fuel ST5p. 20
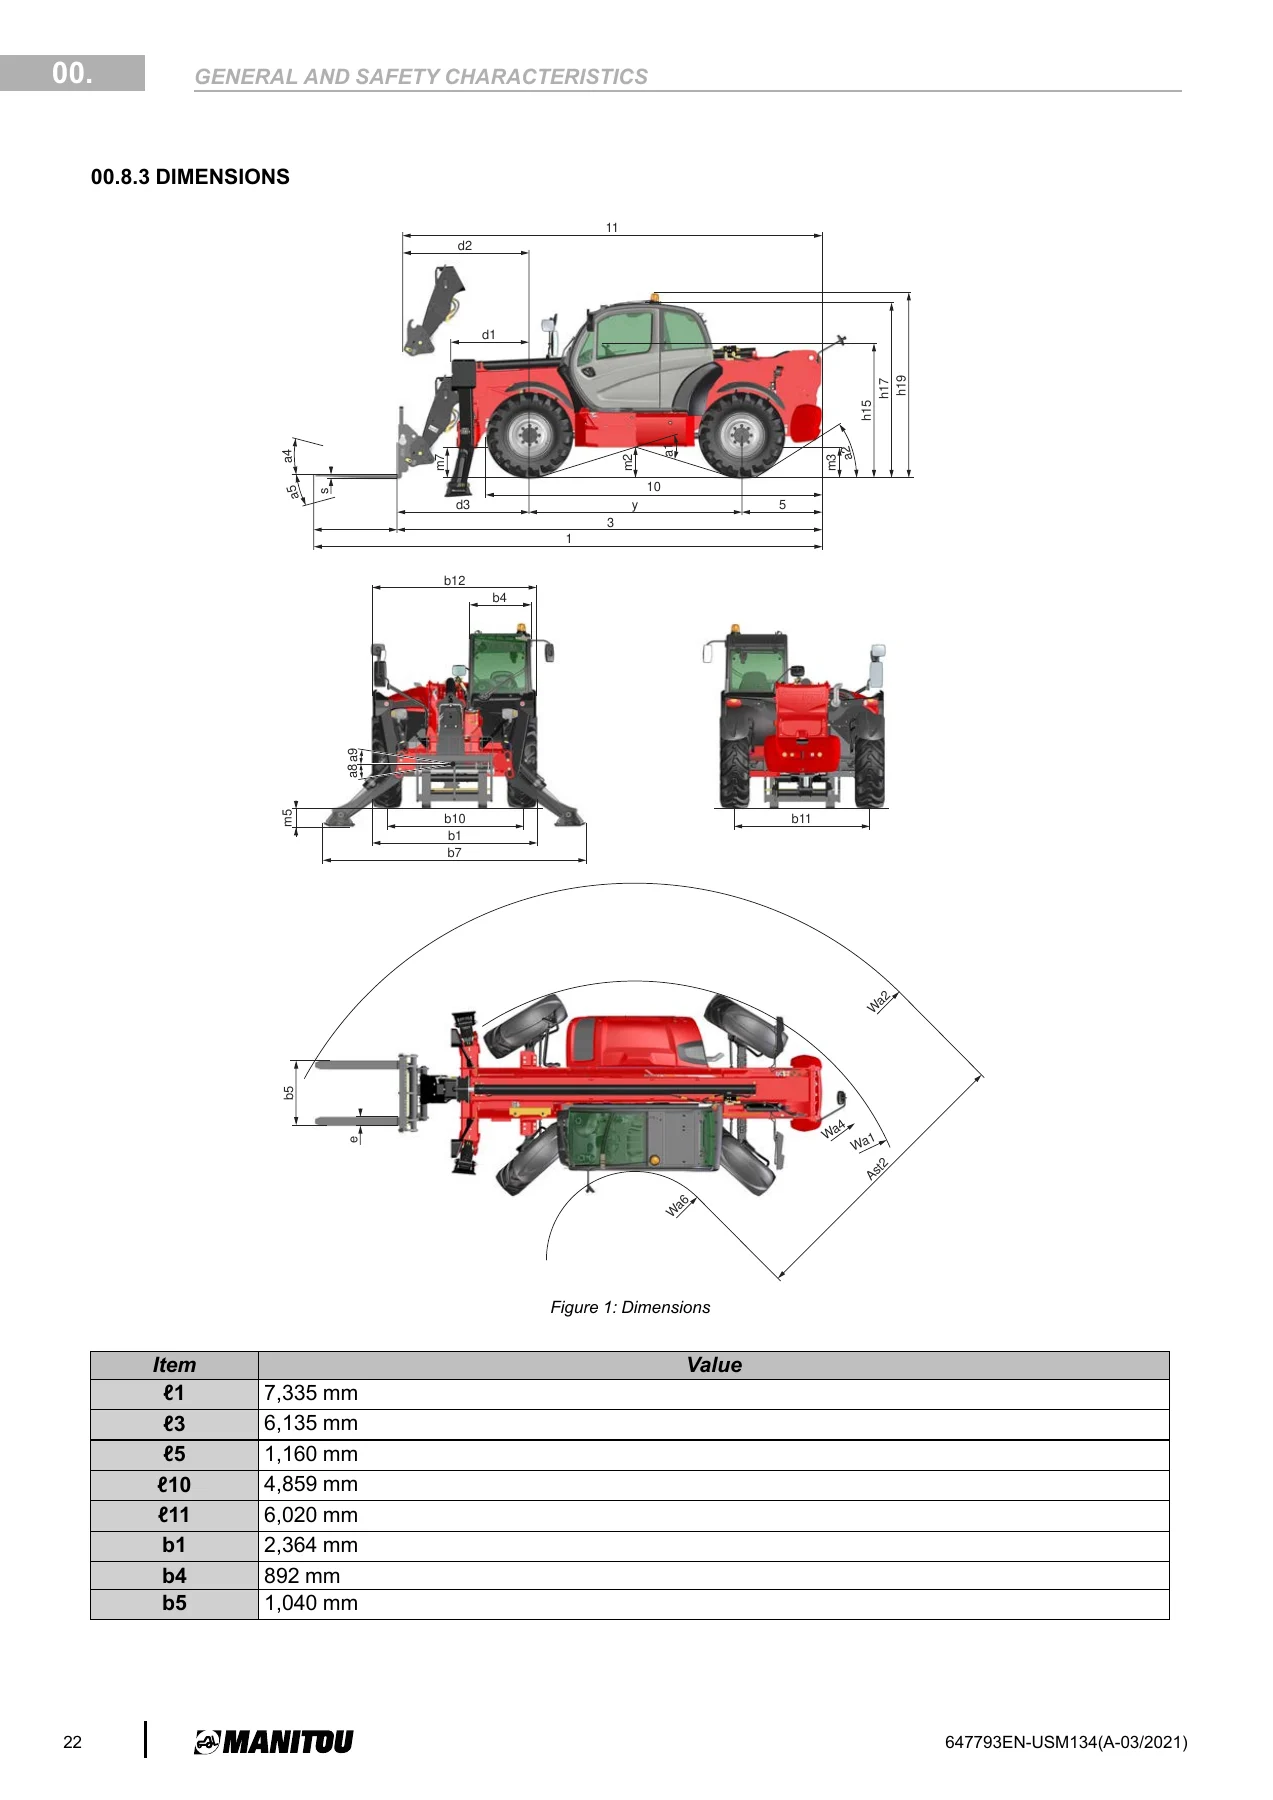
+Dimensions ST5p. 22
+Locationp. 24
+Location of name & identification plates ST5p. 24
Location of name and identification platesp. 24
+Control and adjustmentp. 25
Standard tightening torquesp. 25
Metric – imperial unit conversionp. 26
+Characteristics and specificationsp. 28
Supplier documentation ST5p. 28
+Fan control and reversal (HA versions)p. 28
+Ventilation regulationp. 28
View of fan reversal stickerp. 28
+Conditions of fan control related componentsp. 28
Control diagramp. 28
Variation of fan speed with oil temperaturep. 29
+75D versionsp. 30
Presentation of engine new features 75D ST5p. 30
Engine Specifications (3.6L 75 hp)p. 30
+100D versionsp. 30
Presentation of engine new features 100D ST5p. 30
Engine Specifications (3.6L 100 hp)p. 30
Diesel exhaust fluid (DEF)p. 31
+Diagrams and schematicsp. 31
+Intake and EGR circuitp. 31
Intake system and EGRp. 32
Keyp. 32
+Lubrication circuitp. 32
Lubrication systemp. 33
Keyp. 33
+Cooling systemp. 33
Cooling systemp. 34
Keyp. 34
+Fuel circuitp. 34
+Locationp. 36
+75D versionsp. 36
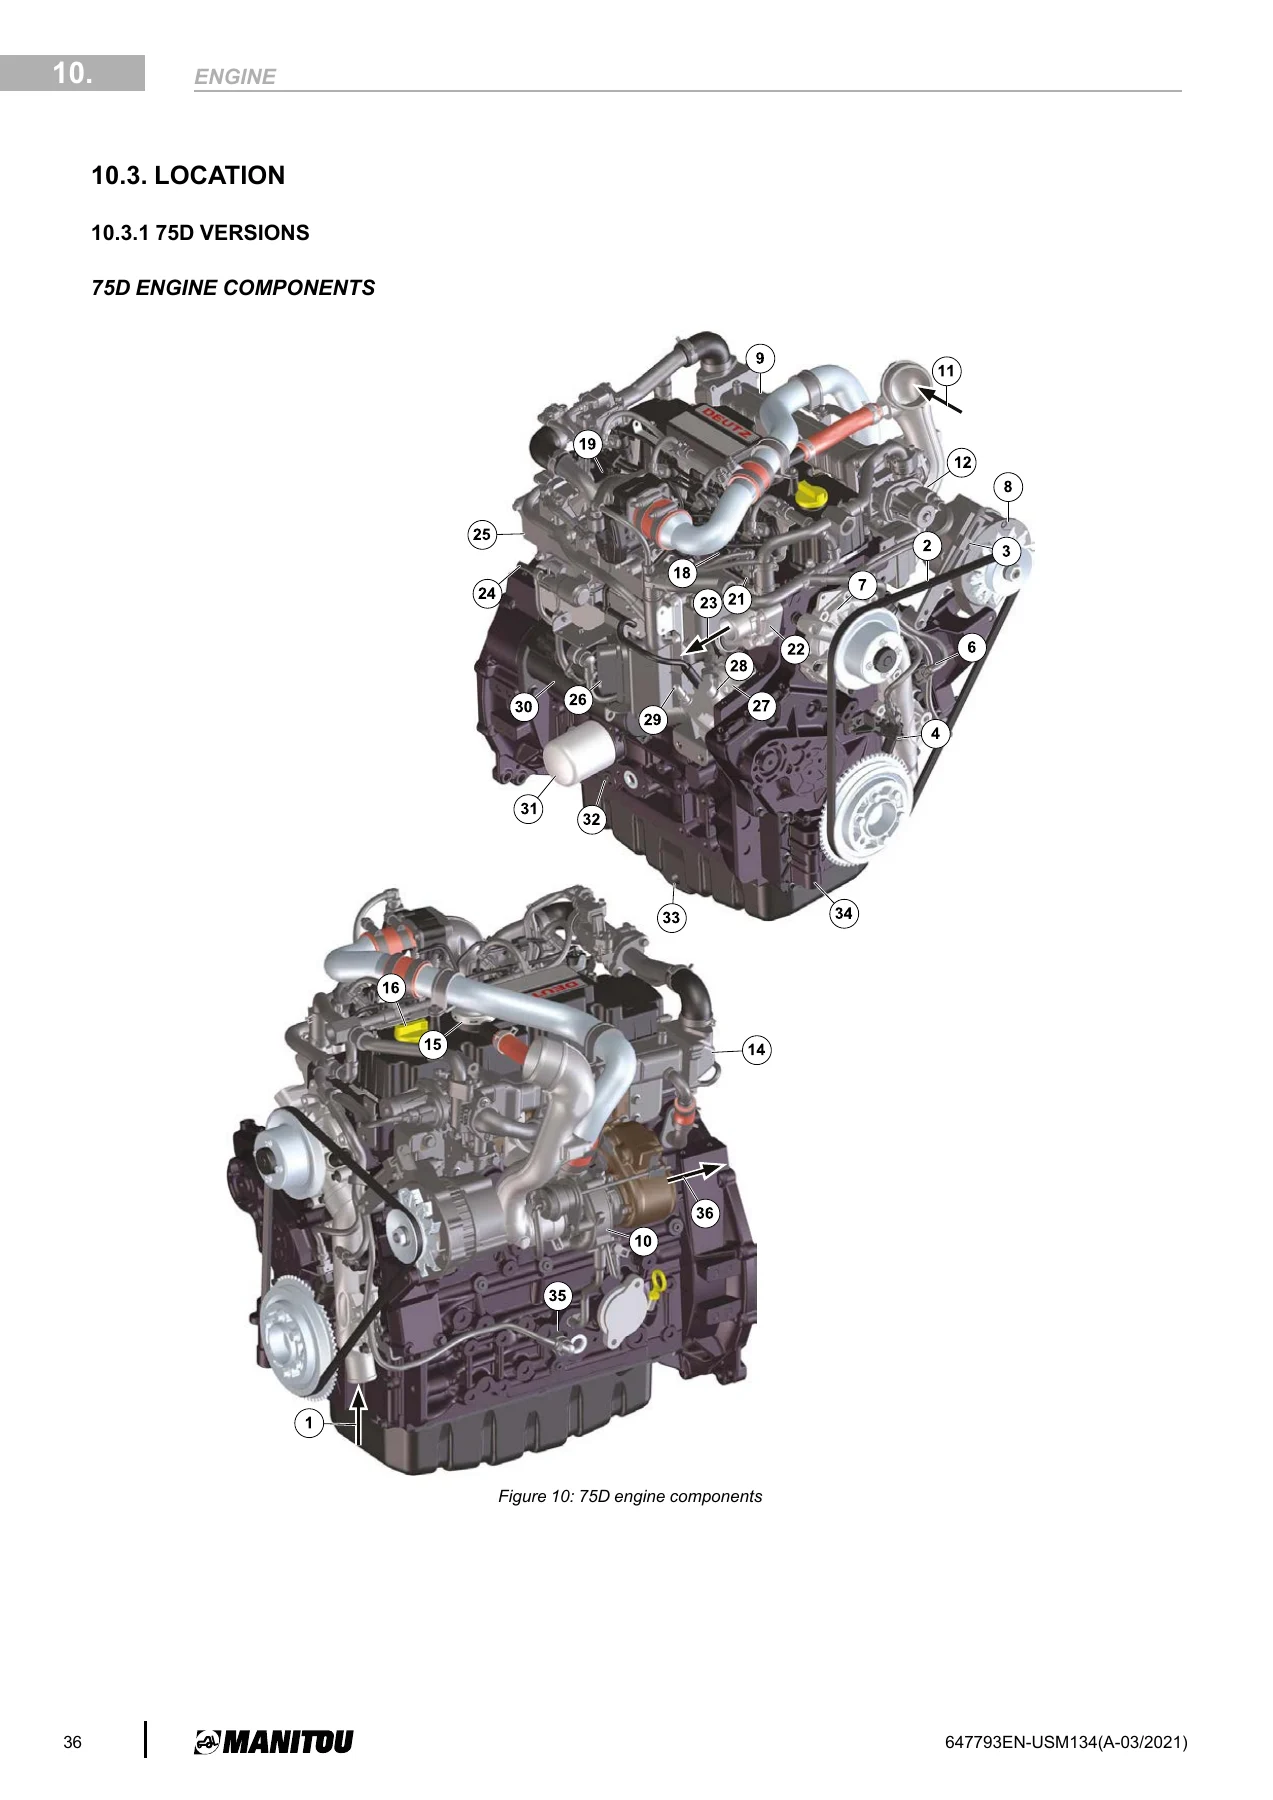
+Location of engine components Deutz 3.6L 75D ST5p. 36
75D engine componentsp. 36
Keyp. 37
+Water cooling system 75Dp. 38
75D water cooling systemp. 38
Keyp. 38
+100D versionsp. 39
+Location of engine components Deutz 3.6L 100D ST5p. 39
100D engine componentsp. 39
Keyp. 39
+Location of cooling circuit components 100Dp. 40
Location of cooling system components (100D non-HA versions)p. 40
Location of cooling system components (100D HA versions)p. 40
+All versionsp. 41
Fuel injection circuitp. 41
+Location of fuel circuit components ST5p. 42
Location of fuel system componentsp. 42
+Control and adjustmentp. 42
+75D versionsp. 42
+Tightening torques for exhaust 75Dp. 42
Exhaust assembly tightening torquesp. 42
+100D versionsp. 43
+Tightening torques for exhaust 100Dp. 43
Exhaust assembly tightening torquesp. 43
+Prepare DEF pump cleaningp. 43
Removing the rear cab casingp. 44
Disconnecting the hoses connected to the DEF pumpp. 44
+DEF pump cleaning procedurep. 44
Hoses connected between the pump and the tankp. 44
Circuit primingp. 45
Inducement levelsp. 45
+All versionsp. 45
Fan drive Check pointp. 45
Regeneration conditions and constraintsp. 46
+Tightening torques engine suspension ST5 MECAp. 47
Engine suspension tightening torques (mechanical transmission)p. 47
+Tightening torques engine suspension ST5 Hp. 48
Engine suspension tightening torques (hydrostatic transmission)p. 48
+Tightening torques for fuel circuit ST5p. 48
Fuel circuit tightening torquesp. 48
+Tightening torques for heating circuit on engine 75/100p. 49
Tightening torques of heating circuit elements on the engine blockp. 49
+Tightening torques for engine oil tank plug ST5p. 49
Engine oil bath plug-valve tightening torquep. 49
Belt tension Deutz 3.6L ST5p. 49
+Removalp. 50
+75D versionsp. 50
+Remove the exhaust line 75Dp. 50
Disconnecting the exhaust linep. 50
Unscrew the exhaust mountp. 50
Remove the 2 clamps from the DPFp. 50
+Remove the radiator 75Dp. 50
Removing the radiator hosesp. 51
Removing the radiator support bracket fastenersp. 51
Undoing the lower radiator tie rodp. 51
Sling the radiatorp. 51
Removing the cooling engine-fan assembly 75Dp. 51
+Removing the engine 75Dp. 52
Disconnecting the engine connectorsp. 53
Unclipping the wiring harnessp. 53
Disconnecting the engine ground X122p. 53
Removing the glow plug power supply X257p. 53
Disconnecting the alternator X179 and the groundp. 54
Disconnecting the 2 heating hosesp. 54
Disconnecting the cooler hosesp. 54
Removing the 13 gearbox exterior fastening screwsp. 54
Removing the 4 screws from the converterp. 54
Engine slinging ringp. 55
Sling the enginep. 55
Removing the 3 exhaust side support screwsp. 55
Removing the 3 radiator side support screwsp. 55
+100D versionsp. 56
+Remove exhaust pipe 100Dp. 56
Removing the cover from the engine housingp. 56
Disconnecting the SCR connectorsp. 56
Removing the angle piecep. 56
Remove the mufflerp. 56
+Remove DOC-DPF assembly 100Dp. 56
Removing the insulationp. 56
Removing the angle piecep. 57
Disconnecting the DEFp. 57
Unscrewing the DOC-DPF bracketp. 57
Removing the DOC-DPF assemblyp. 57
+Remove the exhaust line 100Dp. 57
Disconnecting the DEFp. 57
Disconnecting the SCR connectorsp. 58
Unscrewing the exhaust mount padp. 58
Undoing the DOC-DPF clamp.p. 58
Undoing the 6 screws from the exhaust line bracketp. 58
Removing the coolant tankp. 58
Slinging from the exhaust line bracket ringsp. 58
Removing the exhaust line bracket assemblyp. 59
+Remove the radiator 100Dp. 59
Removing the radiator hosesp. 59
Disconnecting the supercharged air cooling hosesp. 59
Removing the radiator support bracket fastenersp. 59
Undoing the lower radiator tie rodp. 59
Sling the radiatorp. 60
+Remove the hydraulic engine-fan assembly 100Dp. 60
Disconnecting the supercharged air cooling hosep. 60
+Remove the engine 100D MECHp. 61
Disconnecting the engine connectorsp. 61
Unclipping the wiring harnessp. 61
Disconnecting the engine ground X122p. 61
Removing the glow plug power supply X257p. 61
Disconnecting the alternator X179 and the groundp. 62
Disconnecting the 2 heating hosesp. 62
Disconnecting the cooler hosesp. 62
Removing the 13 gearbox exterior fastening screwsp. 62
Removing the 4 screws from the converterp. 62
Sling the enginep. 63
Removing the 3 exhaust side support screwsp. 63
Removing the 3 radiator side support screwsp. 63
+Removing the engine HAp. 63
Disconnecting the engine connectorsp. 64
Unclipping the wiring harnessp. 64
Disconnecting the engine ground X122p. 64
Removing the glow plug power supply X257p. 64
Disconnecting the alternator X179 and the groundp. 65
Disconnecting the 2 heating hosesp. 65
Disconnecting the cooler hosesp. 65
Engine slinging ringp. 65
Sling the enginep. 65
Removing the 3 exhaust side support screwsp. 66
Removing the 3 radiator side support screwsp. 66
+All versionsp. 66
+Remove the starter 75/100Dp. 66
Removing the diesel filter and disconnecting the connector.p. 66
Disconnecting the battery +p. 66
Removing the starterp. 67
+Remove the belt guard 75/100Dp. 67
Removing the belt casingp. 67
+Remove the accessory belt 75/100Dp. 67
Removing the attachment beltp. 67
+Remove the air conditioning belt 75/100Dp. 67
Removing the air conditioning beltp. 67
+Remove the alternator 75/100Dp. 68
Remove the alternatorp. 68
+Remove the diesel filter 75/100Dp. 68
Removing the fuel filterp. 68
+Remove air conditioning compressor 75/100Dp. 68
Remove the 2 access panelsp. 68
+Remove the expansion tank 75/100Dp. 70
Undoing the tank support screwsp. 70
Removing the hosesp. 70
Removing the fuel tank ST5p. 70
+Refitp. 72
+Refit the exhaust line 100Dp. 72
Refitting the exhaust linep. 72
Performing checks after engine refitting ST5p. 72
+Troubleshootingp. 72
Link to DTC for engine ECU ST5p. 72
Startup tests ST5p. 72
Permission condition for engine startp. 73
Lack of engine power ST5p. 73
Engine troubleshooting procedurep. 73
+Specific toolingp. 76
+Cleaning DEF kitp. 76
+Electronic belt tensiometerp. 76
Electronic belt tensiometerp. 76
+Characteristics and specificationsp. 77
Supplier documentation ST5p. 77
+Diagrams and schematicsp. 77
+Mechanical transmissionp. 77
+Transmission drive chain MECHp. 77
Kinematic chain of transmission assembly (100 hp)p. 77
Keyp. 77
Gearboxp. 77
Front and rear axlesp. 78
35 km/h option front and rear axlesp. 78
+Transmission synoptic MECHp. 79
Operation overview β mechanical transmissionp. 79
+Transmission operation schematic MECHp. 80
Neutral schematic diagramp. 80
Forward gear schematic diagramp. 80
Reverse gear schematic diagramp. 81
+Hydrostatic transmission (HA versions)p. 81
+Transmission drive chain Hp. 81
(Hydrostatic) transmission assembly kinematic chainp. 81
Keyp. 82
Standard transfer boxp. 82
Optional transfer boxp. 82
Front and rear axlesp. 82
+Transmission synoptic Hp. 83
Operation overview β hydrostatic transmissionp. 83
Color keyp. 83
+Transmission operation schematic HAp. 85
Schematic diagram for hydrostatic transmission in forward gearp. 85
Color keyp. 86
Hydrostatic transmission β flow of fluids in forward gear (front right view)p. 87
Hydrostatic transmission β flow of fluids in forward gear (rear left view)p. 88
Color keyp. 89
Hydrostatic transmission reverse gear schematic diagramp. 90
Color keyp. 91
Hydrostatic transmission β flow of fluids in reverse gear (front right view)p. 92
Hydrostatic transmission β flow of fluids in reverse gear (rear left view)p. 93
Color keyp. 94
+Locationp. 95
+Mechanical transmissionp. 95
+Location of transmission components MECAp. 95
Location of components β mechanical transmission assemblyp. 95
Location of components β mechanical transmission cooling circuitp. 96
+Location of ports on PSR09 gearboxp. 97
Location of gearbox portsp. 97
+Hydrostatic transmission (HA versions)p. 98
+Location of transmission components HAp. 98
Location of components β hydrostatic transmission assemblyp. 98
Location of components β hydrostatic transmission cooling circuitp. 99
+Location of adjustment points on transmission HAp. 100
Hydrostatic pump adjustment pointsp. 100
Hydrostatic motor adjustment pointsp. 100
+Control and adjustmentp. 101
+Mechanical transmissionp. 101
+Tightening torques for transmission 75Dp. 101
Tightening torques for transmission assembly β 75 hp versions (without tilt)p. 101
+Tightening torques for transmission 100D/100Pp. 102
Tightening torques for transmission assembly β 100 hp (with tilt)p. 102
+Tightening torques for gearbox coupling MECHp. 102
Gearbox/engine coupling tightening torquesp. 102
+Adjustment values for pressure ports MECHp. 103
Location of pressure connectors β mechanical transmissionp. 103
+Locking the 4th gear PSR09 gearboxp. 104
Gearbox plugp. 104
Gearbox screwp. 104
+Hydrostatic transmission (HA versions)p. 104
+Tightening torques for transmission HAp. 104
Transmission assembly tightening torquesp. 104
+Tightening torques for engine hydrostatic coupling HAp. 105
Hydrostatic motor/pump coupling tightening torquesp. 105
+Adjustment values for pressure ports HAp. 105
Location of pressure connectors β hydrostatic pumpp. 105
Location of pressure connectors β hydrostatic motorp. 105
Location of pressure connectors β hydrostatic transmission assemblyp. 106
Adjustment of pressure connectors β hydrostatic transmission assemblyp. 106
Performing checks before startup or after repair HAp. 106
Adjusting boost pressure on the hydrostatic pump HAp. 107
Adjusting mechanical zero on hydrostatic pump HAp. 107
Adjusting regulation start on hydrostatic pump HAp. 108
Adjusting HP limiters on hydrostatic pump HAp. 109
Adjusting regulation on hydrostatic motor HAp. 109
Hydrostatic transmission adjustment sheet HAp. 113
+Removalp. 115
+Mechanical transmissionp. 115
+Removing the gearbox ST5 non-HAp. 115
Cover platep. 115
Draining the gearboxp. 115
Gearbox universal jointp. 116
Hose supportp. 116
Gearbox coupling coverp. 116
Alternator casingp. 116
Engine/gearbox couplingp. 117
Hose supportp. 117
Hose supportp. 117
Hose supportp. 117
Connectors on gearboxp. 118
Gearbox control leverp. 118
Gearbox outlet hosep. 118
Parking brake hosep. 118
Gearbox inlet hosep. 119
Pallet truck under the engine-gearbox assemblyp. 119
Gearbox mountingp. 119
Gearbox attachment boltsp. 119
Gearbox fastening screwsp. 120
Mount and gearbox fastening screwsp. 120
Gearbox fastening screwsp. 120
Pallet truck under the engine-gearbox assemblyp. 121
Engine/gearbox assemblyp. 121
Gearbox fastening screwsp. 121
Gearbox onlyp. 121
+Hydrostatic transmission (HA versions)p. 122
+Removing the hydrostatic pump HAp. 122
Cab external trim and cover platep. 123
Removing the hydrostatic motor HAp. 125
Removing the transfer box HAp. 126
+Troubleshootingp. 127
General conditions of authorization to move the truckp. 127
DTC for transmissionp. 127
+Specific toolingp. 128
+Basic manometer kitp. 128
Basic manometer box β overviewp. 128
+Digital manometer kitp. 128
Digital manometer boxp. 128
+Machined socket (50 mm diameter)p. 128
Machined 50 mm socketp. 129
+Characteristics and specificationsp. 130
Supplier documentation ST5p. 130
+Control and adjustmentp. 130
Bleeding the axle blocking cylinderp. 130
Adjusting axle stops when changing tiresp. 130
+Characteristics and specificationsp. 133
Master Cylinder specificationsp. 133
Service brake specificationsp. 133
Parking brake specificationsp. 133
+Diagrams and schematicsp. 135
+Mechanical transmissionp. 135
+Service brake diagramp. 135
Service brake schematic diagramp. 135
+Parking brake diagramp. 136
Parking brake schematic diagramp. 136
+Hydrostatic transmission (HA versions)p. 137
+Service brake diagram HAp. 137
Service brake schematic diagramp. 137
+Parking brake diagram HAp. 138
Parking brake schematic diagramp. 138
+Locationp. 139
+Location of service brake componentsp. 139
Location of service brake componentsp. 139
+Control and adjustmentp. 140
+Mechanical transmissionp. 140
+Tightening torques for brake circuit MECAp. 140
Braking circuit tightening torquesp. 140
+Adjusting the service brake ST5p. 140
Adjustment of the service brake pedal stopp. 140
+Pressure ports on brake circuit ST5p. 141
Location of braking circuit pressure connectorsp. 141
Bleeding the service brake circuit ST5p. 141
Adjusting the parking brakep. 142
Bleeding the parking brake circuitp. 143
Freewheeling MECHp. 144
+Hydrostatic transmission (HA versions)p. 145
+Adjusting brake pedal & TH7 valve HAp. 145
Brake pedal and TH7 valve adjustmentp. 146
Freewheel Operation by removing the cardan shaftsp. 146
+Removalp. 146
General safety measures before brake removal operationsp. 146
Removing the parking brakep. 147
Removing the master cylinderp. 147
Removing the brake assistance system ST5p. 148
+Specific toolingp. 148
+Hydraulic brake bleed kit 554019p. 148
Hydraulic brake bleed kitp. 149
+Parking brake bleeding harness 265865p. 149
Parking brake bleeder harnessp. 149
+Characteristics and specificationsp. 150
+Boom description 14 mp. 150
Triplex boom slinging pointp. 150
+Boom description 18 mp. 150
Quadruplex boom slinging pointp. 150
+Diagrams and schematicsp. 150
+Schematic diagram for 14 m boomp. 151
Triplex 14 m boom kinematicsp. 151
+Schematic diagram for 18 m boomp. 153
Quadruplex 18 m boom kinematicsp. 153
+Locationp. 155
+Location of components for 14 m boomp. 157
Location of 14 m triplex boom componentsp. 157
+Location of components for 18 m boomp. 159
Location of 18 m quadruplex boom componentsp. 159
+Control and adjustmentp. 161
+Triplex boomp. 161
+Pads and greasing areas on 9m triplex boomp. 161
Triplex boom pads and lubrication zonesp. 161
+Boom pads 14 mp. 162
Boom padsp. 162
Boom pads with straight edgesp. 162
Boom pads with beveled edgesp. 163
+Tightening torques triplex boom 14 mp. 165
Boom tightening torquep. 165
+Quadruplex boomp. 167
Preparation and safety instructions 18 mp. 167
+Main information about preset boom 18 mp. 167
+Check the wear of the boom chains 18 mp. 168
T2 extend chain elongationp. 168
T3 extend chain elongationp. 168
Wear of T2 extend chain platesp. 168
Wear of T3 extend chain platesp. 168
Wear of T2 extend chain extended pinsp. 168
Wear of T3 extend chain extended pinsp. 169
Alignment of chain flatsp. 169
Chain elongationp. 169
Plate wearp. 169
Wear of inner chain extended pinsp. 169
Alignment of chain flatsp. 169
+Pre-setting of chain tension during winding up 18 mp. 170
Chains and tensioners in the boomp. 170
"T2 retract chain" presetsp. 170
"T3 retract chains" presettingp. 170
"T2 extend chains" presettingp. 170
"T3 extend chains" presettingp. 171
+Checking and setting of chain tension 18 mp. 171
Chain slackp. 172
Clearance between T1 and T2p. 172
Diagram of clearance adjustmentp. 173
+Adjusting hoses tension 18 mp. 173
Hose tension adjustment screwp. 174
Adjustment operating diagramp. 174
Boom head pipework connectionp. 174
+Removalp. 174
+Triplex boomp. 174
+Removing the boom circuit 14 mp. 174
Attachment and tilting line mounting flangep. 174
Mounting flangep. 175
Boom horizontal, telescope retracted and forks carriage verticalp. 175
Rear boom casingp. 175
Boom head front casingp. 175
Mounting flangep. 176
Boom head hosesp. 176
Boom head hoses pluggedp. 176
Tilting cylinder pinp. 176
Tilting the carriagep. 177
Telescopic boom cylinder attachmentp. 177
Cylinder hoses pluggedp. 177
Hose supportp. 177
Bracket placed on the valvep. 178
Slide fastening screws and telescope cylinderp. 178
Telescope cylinder fastening screwsp. 178
Slinging of the telescope cylinderp. 178
Striking the telescope cylinder screwp. 179
Telescope cylinder attachment removalp. 179
Extension of the hydraulic assemblyp. 179
Hydraulic assembly extendedp. 179
+Removing the telescope T1 and T2 14 mp. 180
Front cover platesp. 180
Front pads and cagesp. 180
Rear cover platep. 180
Rear slide padsp. 180
Strap on telescope T2p. 180
Strap on telescope T2p. 181
Telescopic boom cylinder nutp. 181
+Removing the complete boom 14 mp. 181
Boom foot coverp. 181
Telescopic boom cylinder power supplyp. 181
Attachment and tilting lines power supplyp. 182
Angle sensor connecting rodp. 182
Telescope retraction sensor harness retaining clampp. 182
Telescope retraction sensorp. 182
Compensating cylinder pinp. 183
Boom slinging ringp. 183
Chocking the lifting cylinder footp. 183
Removal of the lifting cylinder pinp. 183
Boom foot pivot pin stop washerp. 184
Boom foot pivot pin adjusting washerp. 184
Boom foot pivot pinp. 184
+Quadruplex boomp. 184
+Information about removing chain boom 18 mp. 184
Identification of telescope chainsp. 185
+Removing the boom circuit 18 mp. 186
Hose kitp. 186
Front cover platep. 186
Hydraulic pipe supportp. 186
Boom head electrical connectorp. 187
Hydraulic hose extractionp. 187
Inserting the hoses into the boom headp. 187
Rear boom casingp. 188
Hose guidep. 188
Hose guide greasing nipplep. 188
Hose tension systemp. 188
Hose tension systemp. 189
Pulley supportp. 189
Spring supportp. 190
Hydraulic hose extractionp. 190
Disconnection of hoses and wiring harnessp. 190
Hydraulic hose attachmentp. 191
Hydraulic kit extractionp. 191
Installing the kit on trestlesp. 191
+Removing the telescope T2 and T3 18 mp. 191
Telescope T2 + T3 assemblyp. 192
Chain tensionerp. 192
Chain tensionerp. 193
Chain pulley axle pinp. 193
Cylinder pinp. 193
Boom cylinderp. 194
Boom cylinderp. 194
Telescopic boom cylinder pinp. 194
Boom cylinderp. 194
Retract chain tensionerp. 195
Retract chain platep. 195
Retract chain tensionerp. 195
Telescope slide padsp. 195
Telescope brush sealsp. 196
Chain and tensioner separationp. 196
Chain tensionp. 196
Telescope slide pad removalp. 196
Telescope slide pad removalp. 197
Lifting the telescopep. 197
Removing the telescope chainsp. 197
Chocking the boomp. 197
Removing the telescopep. 198
+Removing the telescope T3 18 mp. 198
Telescope T3 assemblyp. 198
Telescope slide padsp. 198
Retraction chain platep. 199
Telescope brush sealsp. 199
Chain pulley axle pinp. 199
Telescope slide pad removalp. 199
Lifting the telescopep. 200
+Refitp. 200
+Triplex boomp. 200
+Installing the telescope T1 14 mp. 200
Lower padsp. 200
Cages and lower padsp. 200
Telescopic boom retraction, cages and upper/side slide padsp. 201
Cover platesp. 201
Inside right upper and side slide padsp. 201
LH side padsp. 202
+Installing the telescope T2 14 mp. 202
Lower padsp. 202
Cages and lower padsp. 202
T2 telescopic boom retractionp. 202
Cages and upper/side slide padsp. 203
Cover platesp. 203
Upper padsp. 203
Side padsp. 203
Hose guide scraper plate clearancep. 204
Cover platesp. 204
Telescopic boom cylinder nutp. 204
+Installing the boom circuit 14 mp. 204
Slide padsp. 205
Telescoping circuit on trestlesp. 205
Retraction of telescoping circuit into the telescopep. 205
Cylinder and slide attachment screwsp. 205
Telescopic boom cylinder retaining screwp. 206
Boom head hosesp. 206
Mounting flangep. 206
Tilting cylinder pinp. 206
Boom head front casingp. 207
Attachment and tilting line mounting flangep. 207
Mounting flangep. 207
Rear boom casingp. 207
+Quadruplex boomp. 208
Information about installing chain boom 18 mp. 208
+Installing the telescope T3 18 mp. 208
Telescope T3 assemblyp. 208
Slide pad mounting pinp. 209
Chocking of T3 inside T2p. 209
Insertion of shim in the telescopep. 210
Insertion of upper slide pad shimp. 210
Slide pad assembly recommendationp. 210
Chain plate positioningp. 210
Thread lock on chain plate fastening screwsp. 211
Positioning of slide pads on the telescopep. 211
+Installing the telescope T2 and T3 18 mp. 211
Telescope T2 + T3 assemblyp. 211
Place the chains on the telescopep. 212
Positioning of the strap on the telescopep. 212
Lifting of T2+T3 assemblyp. 212
Inserting slide pads between T1 and T2p. 212
Slide pad mounting pinp. 213
Slide pad assembly recommendationp. 213
Chocking of the assembly inside T1p. 213
Chocking of the assembly inside T1p. 214
Insertion of upper slide pad shimp. 214
T3 retract chain attachmentp. 214
Insertion of slide pads and shims between T1 and T2p. 214
Slide pad mounting pinp. 215
Slide pad assembly recommendationp. 215
Thread lock on chain plate fastening screwsp. 215
Chain plate positioningp. 215
Chain pulley assemblyp. 216
Pulley pin insertionp. 216
T2 extend chain tensioner attachmentp. 217
T2 retract chain tension presettingp. 217
Installing the telescopic boom cylinderp. 217
Telescopic boom cylinder attachmentp. 217
Positioning of T3 extend chain tensionersp. 218
+Installing the boom circuit 18 mp. 218
Hose kitp. 218
Placing of the hose support toolp. 219
Telescope slide pad lubrication pointsp. 219
Inserting the hydraulic kitp. 219
Spring support attachmentp. 220
Left pulley support attachmentp. 220
Pre-assembly of the two pulleys with the axle pinp. 220
Positioning of pulleys + axle pin assemblyp. 220
Right pulley support attachmentp. 221
Hose guide attachmentp. 221
+Specific toolingp. 221
+Pipe end piecesp. 221
+Channel leverp. 221
+Hose routing support toolp. 222
Hose routing supportp. 222
+Hose tension adjustment gagep. 223
Hose tension adjustment gagep. 223
+Chain checking gagep. 223
Hose tension adjustment gagep. 223
+Characteristics and specificationsp. 224
List of hydraulic components ST5p. 225
+FP HP hydraulic supply unit 52527900p. 227
3D representation of the FP HP feed block + remote accumulatorp. 227
Location of FP HP feed block componentsp. 227
Hydraulic diagram of FP HP feed blockp. 228
+FP HP hydraulic supply unit 52624601p. 230
3D representation of the FP HP feed block with remote accumulatorp. 231
3D representation of the FP HP feed block with connected accumulatorp. 231
Location of FP HP feed block componentsp. 232
Hydraulic diagram of FP HP feed blockp. 232
+SD 8/7 control valve 52620010p. 234
3D representation of SD 8/7 distributorp. 234
EE element in neutralp. 235
EE2 element in neutralp. 235
EE element activatedp. 236
EE2 element activatedp. 236
+SD 8/8 control valve 52607669p. 239
3D representation of SD 8/8 distributorp. 240
3D location of distributor componentsp. 240
Schematic location of distributor componentsp. 240
EE element in neutralp. 241
EE2 element in neutralp. 241
EE element activatedp. 241
EE2 element activatedp. 241
+PVG100/32 electro-proportional control valve 295292p. 245
3D representation of the distributor PVG100/32p. 245
Location of PVG100/32 elementsp. 246
Location of inlet element componentsp. 248
Location of telescope element componentsp. 250
Location of attachment element componentsp. 251
Location of control head componentsp. 252
Location of control head pinsp. 253
Electrical operation of the control head for a voltage of 0.5 Vbat+p. 253
Electrical operation of the control head for a voltage of 0.25 Vbat+p. 254
Electrical operation of the control head for a voltage of 0.75 Vbat+p. 254
Location of control head componentsp. 255
Location of control head pinsp. 255
Electrical operation of the control head for a voltage of 0.5 Vbat+p. 256
Electrical operation of the control head for a voltage of 0.25 Vbat+p. 256
Electrical operation of the control head for a voltage of 0.75 Vbat+p. 257
+ED2ED1 3-element deviation control valve 266306p. 257
3D representation of the deflector distributorp. 257
+Boosted master cylinder 52627389p. 258
3D representation of power-assisted brake master cylinderp. 258
Location of assisted braking master cylinder componentsp. 258
Hydraulic diagram of the power-assisted brake master cylinderp. 258
+PLM20.19 Cooling motor 259708p. 260
3D representation of the cooling enginep. 260
Location of cooling engine componentsp. 260
Hydraulic diagram of the cooling enginep. 260
+PLM20.16 Cooling motor 52696195p. 260
3D representation of the cooling enginep. 261
Exploded view of cooling engine componentsp. 261
Hydraulic diagram of the cooling enginep. 261
+KP30.43 hydraulic pump 52537440p. 261
3D representation of the hydraulic pumpp. 261
Hydraulic diagram of the hydraulic pumpp. 262
Location of priority flow divider on hydraulic pumpp. 262
Cross-sectional view of the priority flow dividerp. 262
Hydraulic diagram of the priority flow divider (DDP)p. 263
+EP-45 Emergency pump 260692p. 264
3D representation of the backup pumpp. 264
Hydraulic diagram of the backup pumpp. 264
+LAGU 250/125 140B direction pump 311437p. 265
3D representation of the steering pump and connector correspondencep. 265
Hydraulic diagram of the steering pumpp. 265
Location of internal steering pump elementsp. 266
+3-Position steering selectorp. 267
3D view of 3-position steering selectorp. 267
Hydraulic diagram of the 3-position steering selectorp. 267
+AVBSODE-30 dual safety valve 52525895p. 267
3D representation of the CSPDp. 268
Hydraulic diagram of the CSPDp. 268
+VBSODE-38 dual safety valve 266267p. 268
3D representation of the double safety valvep. 268
+VBSODE-42 dual safety valve 287170p. 268
3D representation of the double safety valvep. 269
Cross-sectional view of the double safety valvep. 269
+VBSODE-33 dual safety valve 199263p. 269
3D representation of the double safety valvep. 269
Cross-sectional view of the double safety valvep. 270
+AVBSOSE-33 single safety valve 229571p. 270
3D representation of the single safety valvep. 270
Cross-sectional view of the single safety valvep. 270
+AVBSOSE-33 single safety valve 290552p. 272
3D representation of the single safety valvep. 272
Cross-sectional view and location of componentsp. 272
+VMS relief valve 273281p. 273
3D representation of the VMS discharge valvep. 273
+Combination relief valve 296882p. 274
3D representation of the discharge block valvep. 274
Location of discharge valve elementsp. 274
Hydraulic diagram of the discharge block valvep. 275
+AVBSOSE-30 compensation isolation valve 265366p. 275
3D representation of the compensating isolation valvep. 275
Hydraulic diagram of the compensating isolation valvep. 275
+Description of isolation compensation valvep. 276
Hydraulic schematic diagram of the VIC (maximum crowd movement)p. 276
Circuit colorsp. 276
Key to componentsp. 276
+Flow regulation valve 288003p. 277
3D representation of the flow rate control valvep. 277
Hydraulic diagram of the flow rate control valvep. 277
Hydraulic diagram (max. flow rate)p. 278
Hydraulic diagram (flow rate X%)p. 278
+Dynamic select valve 52528004p. 278
3D representation of the dynamic selection valvep. 278
Hydraulic diagram of the dynamic selection valvep. 278
+VEIC ventilation cut-off electrovalve 52545565p. 279
3D representation of the ventilation cut-off electrovalvep. 279
Hydraulic diagram of the ventilation cut-off electrovalvep. 279
+Diagrams and schematicsp. 279
+Hydraulic schematic – 14m for MT 75/100D/Pp. 281
Key to diagram abbreviationsp. 281
Key to itemsp. 282
Key to valuesp. 282
Hydraulic diagram 1 β MT 1440p. 284
Hydraulic diagram 2 β MT 1440p. 285
+Hydraulic schematic – 18m for MT 75/100D/Pp. 287
Key to diagram abbreviationsp. 287
Key to itemsp. 288
Key to valuesp. 288
Hydraulic diagram 1 β MT 1840p. 290
Hydraulic diagram 2 β MT 1840p. 291
+Hydraulic schematic – 14m for MT(-X) A 100D/Pp. 293
Key to diagram abbreviationsp. 293
Key to itemsp. 294
Key to valuesp. 294
Hydraulic diagram 1 β MT(-X) A 1440p. 297
Hydraulic diagram 2 β MT(-X) A 1440p. 298
+Hydraulic schematic – 18m for MT(-X) A 100D/Pp. 299
Key to diagram abbreviationsp. 299
Key to itemsp. 300
Key to valuesp. 300
Hydraulic diagram 1 β MT(-X) A 1840p. 303
Hydraulic diagram 2 β MT(-X) A 1840p. 304
+Hydraulic schematic – 14m for MT HA 100Dp. 305
Key to diagram abbreviationsp. 305
Key to itemsp. 306
Key to valuesp. 307
Hydraulic diagram 1 β MT HA 1440p. 309
Hydraulic diagram 2 β MT HA 1440p. 310
Hydraulic diagram 3 β MT HA 1440p. 311
+Hydraulic schematic – 18m for MT HA 100Dp. 313
Key to diagram abbreviationsp. 313
Key to itemsp. 314
Key to valuesp. 315
Hydraulic diagram 1 β MT HA 1840p. 317
Hydraulic diagram 2 β MT HA 1840p. 318
Hydraulic diagram 3 β MT HA 1840p. 319
+Locationp. 321
+Location of hydraulic components MT 1440 75D ST5p. 321
Location of hydraulic components β MT 1440 EASY 75D ST5p. 321
+Location of hydraulic components MT 1440 100D ST5p. 323
Location of hydraulic components β MT 1440 100D ST5p. 323
+Location of hydraulic components MT 1440 A 100D ST5p. 325
Location of hydraulic components β MT 1440 A 100D ST5p. 325
+Location of hydraulic components MT 1440 HA 100D ST5p. 326
Location of hydraulic components β MT 1440 HA 100D ST5p. 327
+Location of hydraulic components MT 1840 75D ST5p. 329
Location of hydraulic components β MT 1840 EASY 75D ST5p. 329
+Location of hydraulic components MT 1840 100D ST5p. 331
Location of hydraulic components β MT 1840 100D ST5p. 331
+Location of hydraulic components MT 1840 A 100D ST5p. 333
Location of hydraulic components β MT 1840 A 100D ST5p. 333
+Location of hydraulic components MT 1840 HA 100D ST5p. 334
Location of hydraulic components β MT 1840 HA 100D ST5p. 335
+Location of centralized lubrication portsp. 336
Location of central greasing system lubricatorsp. 336
+Control and adjustmentp. 337
Cumulative flow on release valve A+HAp. 337
+Pressure ports on hydraulic circuit ST5 non-Ap. 337
Location of hydraulic circuit pressure connectors (non-Access versions)p. 337
+Pressure ports on hydraulic circuit ST5 A+HAp. 338
Location of hydraulic circuit pressure connectors (Access versions)p. 338
+Bleeding the compensation/tilting hydraulic circuitp. 338
Bleeding the compensation/tilting circuitp. 339
Testing the safety valves A+HAp. 339
+Checking service brake hydraulic circuit FP HP supply unitp. 344
Check the service brake circuitp. 344
Service brake circuit pressure faultp. 345
+Tightening torques for 9 element control valve 14mp. 345
9-component hydraulic distributor tightening torques (14 m non-Access versions)p. 345
+Tightening torques for 9 element control valve 18mp. 346
9-component hydraulic distributor tightening torques (18 m non-Access versions)p. 346
+Tightening torques for 4 element control valve A+HAp. 347
4-component electro-proportional main hydraulic distributor tightening torques (Access versions)p. 347
+Tightening torques for 3 element control valve A+HAp. 348
Leveling/stabilizer 3-component hydraulic distributor tightening torques (Access versions)p. 348
+Tightening torques for hydraulic pumpp. 348
Hydraulic pump tightening torquesp. 348
+Tightening torques for hydraulic aspiration assemblyp. 349
Hydraulic suction assembly tightening torquesp. 349
+Tightening torque for hydraulic return filterp. 349
Hydraulic return filter tightening torquep. 349
+Tightening torque for hydraulic breather plugp. 349
Breather plug tightening torquep. 349
+Tightening torque for hydraulic tank sealing plugp. 349
Hydraulic tank sealing plug tightening torquep. 349
+Tightening torques for emergency hydraulic circuit A+HAp. 350
Backup hydraulic circuit tightening torques (Access versions)p. 350
+Tightening torques steer/brake hydraulic block 75Dp. 350
Braking/steering hydraulic unit tightening torques (75D versions)p. 350
+Tightening torques steer/brake hydraulic block 100Dp. 350
Braking/steering hydraulic unit tightening torques (100D versions)p. 350
+Tightening torques for return collector MECAp. 350
Return manifold tightening torques (mechanical transmission)p. 350
+Tightening torques for main hydraulic circuit HAp. 351
Main hydraulic circuit tightening torques (HA versions)p. 351
+Tightening torque hydraulic hose parking brake MECAp. 351
Parking brake hydraulic components tightening torques (mechanical transmission)p. 351
+Tightening torques hydraulic hose parking brake HAp. 351
Parking brake hydraulic components tightening torques (hydrostatic transmission)p. 351
+Tightening torque stabilizer cylinder hydraulic valvep. 352
Stabilizer cylinder valve tightening torquep. 352
+Tightening torque lifting cylinder hydraulic valvep. 352
Lifting cylinder valve tightening torquep. 352
+Tightening torque telescope cylinder hydro valve no A+HAp. 352
Telescopic boom cylinder valve tightening torque (all versions apart from A)p. 352
+Tightening torque telescope cylinder hydraulic valve Ap. 352
Telescopic boom cylinder valve tightening torque (A versions only)p. 352
+Removalp. 353
Securing the machine before hydraulic removal operationsp. 353
Removing the hydraulic oil tankp. 354
Removing the 9 element control valve non-Ap. 356
Removing the 4 element control valve A+HAp. 358
+Specific toolingp. 359
+Basic manometer kitp. 359
Basic manometer box β overviewp. 359
+Digital manometer kitp. 359
Digital manometer boxp. 359
+Characteristics and specificationsp. 360
+Fuses and relaysp. 360
+Fuses and relays in the cabp. 360
List of fuses in the cabp. 360
List of relays in the cabp. 361
+Motor fuses and relays 75Dp. 361
List of fuses under the engine hoodp. 361
List of relays under the engine hoodp. 361
+Motor fuses and relays 100Dp. 361
List of fuses under the engine hoodp. 361
List of relays under the engine hoodp. 362
+ECU Inputs/Outputsp. 362
+Input/Output Harmony ECUp. 362
Harmony screenp. 362
Connector X13p. 362
Connector X14p. 363
+Input/Output SPU 40-26 ECU Mechp. 363
Keyp. 363
Connector X112p. 364
Keyp. 364
Connector X113p. 365
Keyp. 366
Connector X114p. 366
+Input/Output SPU 40-26 ECU PVGp. 367
Keyp. 367
Connector X112p. 367
Keyp. 368
Connector X113p. 368
Keyp. 369
Connector X114p. 370
+Input/Output ECM engine control unit 75 Dp. 371
Connector X174p. 371
Connector X175p. 372
+Input/Output ECM engine control unit 100 Dp. 374
Connector X174p. 374
Connector X175p. 375
+Input/Output SPU 40-26 ECU PWMp. 377
Keyp. 377
Connector X148p. 378
Keyp. 378
Connector X149p. 379
Keyp. 379
Connector X150p. 380
+Input/Output SPU 25-15 Std2p. 381
Keyp. 381
Connector X148p. 381
Keyp. 381
Connector X149p. 382
+Air conditioning auto ECU IN/OUTp. 382
+Technical sheets for electrical componentsp. 383
Table of Electricals Technicals DataSheetsp. 383
Ignition switchp. 385
Rotating beacon light-554935p. 385
Wiper combination switchp. 386
air filter clogging indicatorp. 387
Lighting combination switchp. 387
Reverse warningp. 388
Front hornp. 388
DSBp. 389
switch_746448p. 390
12V socketp. 390
Electrovalve transmissionp. 391
transmission pressure switchp. 391
transmission temperature sensorp. 392
fuel water sensorp. 392
transmission speed sensorp. 393
Fuel gage 315265-320410p. 393
+JSMp. 394
12-pin connectorp. 394
2-pin connectorp. 395
4-pin connectorp. 395
Pressure switch 52502269p. 395
Spool position sensorp. 396
Safety electrovalvep. 397
+Angle sensor_288253p. 397
Angle of potentiometer (1) depending on voltage (2)p. 398
Centering of the adjustment rangep. 398
contact positionp. 399
emergency stopp. 399
+BMEPp. 400
Electrovalve PVEHp. 401
Electrovalve PVEAp. 401
Throttle pedal angle sensor (52500209)p. 402
release valvep. 402
water level sensorp. 403
Strain gage 52506420p. 403
Flow regulation valve 288003p. 404
+Diagrams and schematicsp. 405
+CAN synoptic MECHp. 405
CAN and LIN operating diagramp. 405
+CAN Synoptic HAp. 406
CAN and LIN operating diagramp. 406
+Electrical Diagram Codificationp. 407
Example of an electrical diagramp. 407
+Electrical marking of cablesp. 408
Cable marking on an electrical wiring harnessp. 408
Position by Schematic – MT 100Dp. 408
+Electrical Schematics – MT 100Dp. 423
Diag. 1: Starting electrical diagram – MT 100Dp. 423
Diag. 1: Starting electrical diagram – MT 100Dp. 425
Diag. 2: CAN electrical diagram – MT 100Dp. 426
Diag. 2: CAN electrical diagram – MT 100Dp. 428
Diag. 3: Transmission electrical diagram – MT 100Dp. 429
Diag. 3: Transmission electrical diagram – MT 100Dp. 431
Diag. 4: Hydraulic movements electrical diagram – MT 100Dp. 432
Diag. 4: Hydraulic movements electrical diagram – MT 100Dp. 434
Diag. 5: Sensors electrical diagram – MT 100Dp. 435
Diag. 5: Sensors electrical diagram – MT 100Dp. 437
Diag. 6: Air conditioning/wiping electrical diagram – MT 100Dp. 438
Diag. 6: Air conditioning/wiping electrical diagram – MT 100Dp. 440
Diag. 7: Options electrical diagram – MT 100Dp. 441
Diag. 7: Options electrical diagram – MT 100Dp. 442
Diag. 8: Lights and signals electrical diagram – MT 100Dp. 443
Diag. 8: Lights and signals electrical diagram – MT 100Dp. 445
Position by Schematic – MT A 100Dp. 447
+Electrical Schematics – MT A 100Dp. 461
Diag. 1: Starting electrical diagram – MT A 100Dp. 461
Diag. 1: Starting electrical diagram – MT A 100Dp. 463
Diag. 2: CAN electrical diagram – MT A 100Dp. 464
Diag. 2: CAN electrical diagram – MT A 100Dp. 466
Diag. 3: Transmission electrical diagram – MT A 100Dp. 467
Diag. 3: Transmission electrical diagram – MT A 100Dp. 469
Diag. 4: Hydraulic movements electrical diagram – MT A 100Dp. 470
Diag. 4: Hydraulic movements electrical diagram – MT A 100Dp. 472
Diag. 5: Sensors electrical diagram – MT A 100Dp. 473
Diag. 5: Sensors electrical diagram – MT A 100Dp. 475
Diag. 6: Air conditioning/wiping electrical diagram – MT A 100Dp. 476
Diag. 6: Air conditioning/wiping electrical diagram – MT A 100Dp. 478
Diag. 7: Options electrical diagram – MT A 100Dp. 479
Diag. 7: Options electrical diagram – MT A 100Dp. 480
Diag. 8: Lights and signals electrical diagram – MT A 100Dp. 481
Diag. 8: Lights and signals electrical diagram – MT A 100Dp. 483
Position by Schematic – MT HA 100Dp. 485
+Electrical Schematics – MT HA 100Dp. 499
Diag. 1: Starting electrical diagram – MT HA 100Dp. 499
Diag. 1: Starting electrical diagram – MT HA 100Dp. 501
Diag. 2: CAN electrical diagram – MT HA 100Dp. 502
Diag. 2: CAN electrical diagram – MT HA 100Dp. 504
Diag. 3: Transmission electrical diagram – MT HA 100Dp. 505
Diag. 3: Transmission electrical diagram – MT HA 100Dp. 507
Diag. 4: Hydraulic movements electrical diagram – MT HA 100Dp. 508
Diag. 4: Hydraulic movements electrical diagram – MT HA 100Dp. 510
Diag. 5: Sensors electrical diagram – MT HA 100Dp. 511
Diag. 5: Sensors electrical diagram – MT HA 100Dp. 513
Diag. 6: Air conditioning/wiping electrical diagram – MT HA 100Dp. 514
Diag. 6: Air conditioning/wiping electrical diagram – MT HA 100Dp. 516
Diag. 7: Options electrical diagram – MT HA 100Dp. 517
Diag. 7: Options electrical diagram – MT HA 100Dp. 518
Diag. 8: Lights and signals electrical diagram – MT HA 100Dp. 519
Diag. 8: Lights and signals electrical diagram – MT HA 100Dp. 521
+Locationp. 523
+Electrical locations MT 75Dp. 525
3D location of engine electrical components β MT 75Dp. 525
3D location of engine electrical components β MT 75Dp. 526
2D location of engine electrical components β MT 75Dp. 527
2D location of engine electrical components β MT 75Dp. 528
3D location of chassis electrical components β MT 75Dp. 529
3D location of chassis electrical components β MT 75Dp. 531
2D location of chassis electrical components β MT 75Dp. 532
2D location of chassis electrical components β MT 75Dp. 534
3D location of cab electrical components β MT 75Dp. 535
3D location of cab electrical components β MT 75Dp. 537
2D location of cab electrical components β MT 75Dp. 538
2D location of cab electrical components β MT 75Dp. 540
+Electrical locations MT 100Dp. 541
3D location of engine electrical components β MT 100Dp. 541
3D location of engine electrical components β MT 100Dp. 542
2D location of engine electrical components β MT 100Dp. 543
2D location of engine electrical components β MT 100Dp. 545
3D location of chassis electrical components β MT 100Dp. 546
3D location of chassis electrical components β MT 100Dp. 548
2D location of chassis electrical components β MT 100Dp. 549
2D location of chassis electrical components β MT 100Dp. 552
3D location of cab electrical components β MT 100Dp. 553
3D location of cab electrical components β MT 100Dp. 555
2D location of cab electrical components β MT 100Dp. 556
2D location of cab electrical components β MT 100Dp. 558
+Electrical locations MT A 100Dp. 559
3D location of engine electrical components β MT A 100Dp. 559
3D location of engine electrical components β MT A 100Dp. 560
2D location of engine electrical components (main harness) β MT A 100Dp. 561
2D location of engine electrical components (main harness) β MT A 100Dp. 563
2D location of engine electrical components (additional harness) β MT A 100Dp. 564
2D location of engine electrical components (additional harness) β MT A 100Dp. 565
3D location of chassis electrical components β MT A 100Dp. 566
3D location of chassis electrical components β MT A 100Dp. 568
2D location of chassis electrical components β MT A 100Dp. 569
2D location of chassis electrical components β MT A 100Dp. 571
3D location of cab electrical components β MT A 100Dp. 572
3D location of cab electrical components β MT A 100Dp. 574
2D location of cab electrical components β MT A 100Dp. 575
2D location of cab electrical components β MT A 100Dp. 577
+Electrical locations MT HA 100Dp. 579
3D location of engine electrical components β MT HA 100Dp. 579
3D location of engine electrical components β MT HA 100Dp. 580
2D location of engine electrical components (main harness) β MT HA 100Dp. 581
2D location of engine electrical components (main harness) β MT HA 100Dp. 583
2D location of engine electrical components (additional harness) β MT HA 100Dp. 584
2D location of engine electrical components (additional harness) β MT HA 100Dp. 585
3D location of chassis electrical components β MT HA 100Dp. 586
3D location of chassis electrical components β MT HA 100Dp. 588
2D location of chassis electrical components β MT HA 100Dp. 589
2D location of chassis electrical components β MT HA 100Dp. 592
3D location of cab electrical components β MT HA 100Dp. 593
3D location of cab electrical components β MT HA 100Dp. 595
2D location of cab electrical components β MT HA 100Dp. 596
2D location of cab electrical components β MT HA 100Dp. 598
+Control and adjustmentp. 599
+Adjusting the boom sensorp. 599
Adjusting the longitudinal stability warning and limitingp. 599
Checking the cut-off of aggravating hydraulic movementsp. 600
+Calibrate the angle sensor boomp. 600
Lifting the boomp. 600
Adjustment values to be obtainedp. 600
Boom loweringp. 600
+Removalp. 600
+Remove the fuses and relays cab coverp. 600
+Remove the fuses and relays engine cover 100 Dp. 601
Engine fuse and relay box coverp. 601
+Remove the engine control unit 75/100Dp. 601
Disconnect the ECU connectorsp. 601
Remove the fastening screwsp. 602
+Remove the cab control unitp. 602
Rear housingp. 602
Connectors X112, X113 and X114p. 602
+Remove combined instrument panelp. 602
Fastening screws and connectorsp. 602
+Remove the strain gage localizationp. 602
Location of the strain gagep. 603
Removing the JSM from the BMEPp. 603
+Refitp. 603
+Install the strain gage localizationp. 603
Contact surface cleaningp. 604
Contact zone sandingp. 604
Result of sandingp. 604
Jack under the rear axlep. 604
Stands under rear axlep. 605
Stands positioned under the rear axlep. 605
Gage identificationp. 605
Glue on the gagep. 605
Tightening the screwsp. 606
Knocking the screwsp. 606
Marking the screwsp. 606
Installing the protective coverp. 606
Verification of marksp. 606
+Install JSM on the BMEPp. 606
Tightening the locknutp. 607
Example 1p. 607
Example 2p. 607
+Troubleshootingp. 607
DTC Main ECU (SPU 40-26-PWM) P350-New Ag)p. 607
DTC Auxiliary calculator (SPU 25-15 STD2)p. 616
DTC Motor Deutz ST5p. 622
Air conditioning error codes (DTC)p. 643
+Specific toolingp. 644
+Solenoid valve adapterp. 644
Electrovalve adapterp. 644
+Breakout boxesp. 644
+Characteristics and specificationsp. 645
Air conditioning description of operationp. 645
Safety measures for handling the R134ap. 645
+Diagrams and schematicsp. 646
+Air conditioning operating principlep. 646
Air conditioning schematic diagramp. 646
+Locationp. 648
+Location air conditioningp. 648
HVAC interior componentsp. 648
Key to interior componentsp. 648
HVAC exterior componentsp. 649
Key to HVAC exterior componentsp. 649
+Location automatic air conditioningp. 650
Automatic air conditioning unitp. 650
Key to automatic air conditioning unitp. 650
+Location condenser componentsp. 651
+Control and adjustmentp. 651
General check point air conditioningp. 651
Air conditioning assembly instructionsp. 652
Safety measures for handling the R134ap. 652
+Air conditioning check the evap temp sensorp. 652
Automatic air conditioning connectorp. 652
Manual air conditioning connectorp. 653
Evaporator temperature measurementp. 653
Sensor position on the evaporatorp. 653
Tester on automatic air conditioning unit temperature sensorp. 654
Tester on manual air conditioning unit temperature sensorp. 654
Air conditioning controlp. 654
+Tightening torque old cabp. 655
Air conditioning components tightening torques on cabp. 655
+Tightening torques for the cabin shocks mountsp. 656
Cab suspension silent block tightening torquesp. 656
+Removalp. 656
+Remove the cab lower trimp. 656
Lower dashboard trim panelp. 657
+Remove the front cab coverp. 657
+Remove the rear cab coverp. 657
+Remove the HVAC blockp. 657
Heating and air conditioning hosesp. 657
Heating and air conditioning unitp. 658
+Remove the cabp. 658
Side flapp. 658
Condenser casingp. 658
Air conditioning hose casingp. 659
Condenser unitp. 659
Cab and ECU connectorsp. 659
Rear harness clipp. 659
Front cab metal casingp. 660
Front cab groundp. 660
Hoses on the orbitrolp. 660
Fuel gagep. 660
Heating and air conditioning hosesp. 661
Door cylinder and fuse box casingp. 661
Fuse box power supplyp. 661
Side consolep. 661
Side console casingp. 662
Joystick bellowsp. 662
Cab console with armrestp. 662
Gear lever ringp. 663
Steering selectorp. 663
Cab rear fastening screwsp. 663
Cab front fastening screwsp. 663
Boom side cab front fastening screwsp. 664
Remove the condenserp. 664
+Remove the electric windows system Cabp. 664
Motor and door window assemblyp. 664
Door trim panel removalp. 665
Window up support fastenerp. 665
Window up motor connectorp. 665
Window up motor removalp. 665
+Refitp. 666
+Install the electric windows system Cabp. 666
Window up motor insertionp. 666
Window up motor connectorp. 666
Window up support fastenerp. 666
Checking trim clip conditionp. 666
Trim panel and handle attachmentp. 667
+Troubleshootingp. 667
Air conditioning error codesp. 667
Air conditioning temperature faultsp. 667
Air conditioning unusual noisep. 668
Air conditioning unpleasant smellp. 668
+Control and adjustmentp. 669
+Tightening torque for the counter weightp. 669
Counterweight tightening torquep. 669
+Removalp. 669
+Remove the engine coverp. 669
+Removing the engine housing 75Dp. 670
Removing the engine housing rear access panel and supportsp. 670
Removing the engine housing front access panel and supportsp. 670
Unscrewing the lower radiator tie rodp. 670
Pallet truck under engine housingp. 670
Rear fastening screwsp. 671
Front fastening screwsp. 671
+Removing the engine housing 100Dp. 671
Removing the engine housing rear access panel and supportsp. 671
Removing the engine housing front access panel and supportsp. 671
Unscrewing the lower radiator tie rodp. 671
Pallet truck under engine housingp. 672
Front and rear fastening screwsp. 672
intentionally left blankp. 673
+Diagnostics casep. 674
Diagnostics casep. 674
Example of connection to the machinep. 675
Accessoriesp. 675
+Diagnostics case USB link 2p. 675
+Diagnostics componentp. 676
Component diagnostics boxp. 676
Example of connection to the componentp. 676
Delivery is instant. The Manitou MT 1440 MT 1840 Telehandler Service Manual 2021 – 75D 100D ST5 PDF Repair Guide is supplied as a PDF file that downloads immediately after payment, with no shipping and no waiting. It opens on any computer, tablet or smartphone, and any section or diagram can be printed for use in the workshop. Because it is a digital file, the full 678 pages β including the large fold-out hydraulic schematics and the electrical diagrams β are available without the weight or cost of a paper binder.

Reviews
There are no reviews yet.